Overview
In our project, we simulated a cloth using masses and springs. Our simulation not only includes the cloth but also its collision with different objects such as spheres and planes.
Part I: Masses and Springs
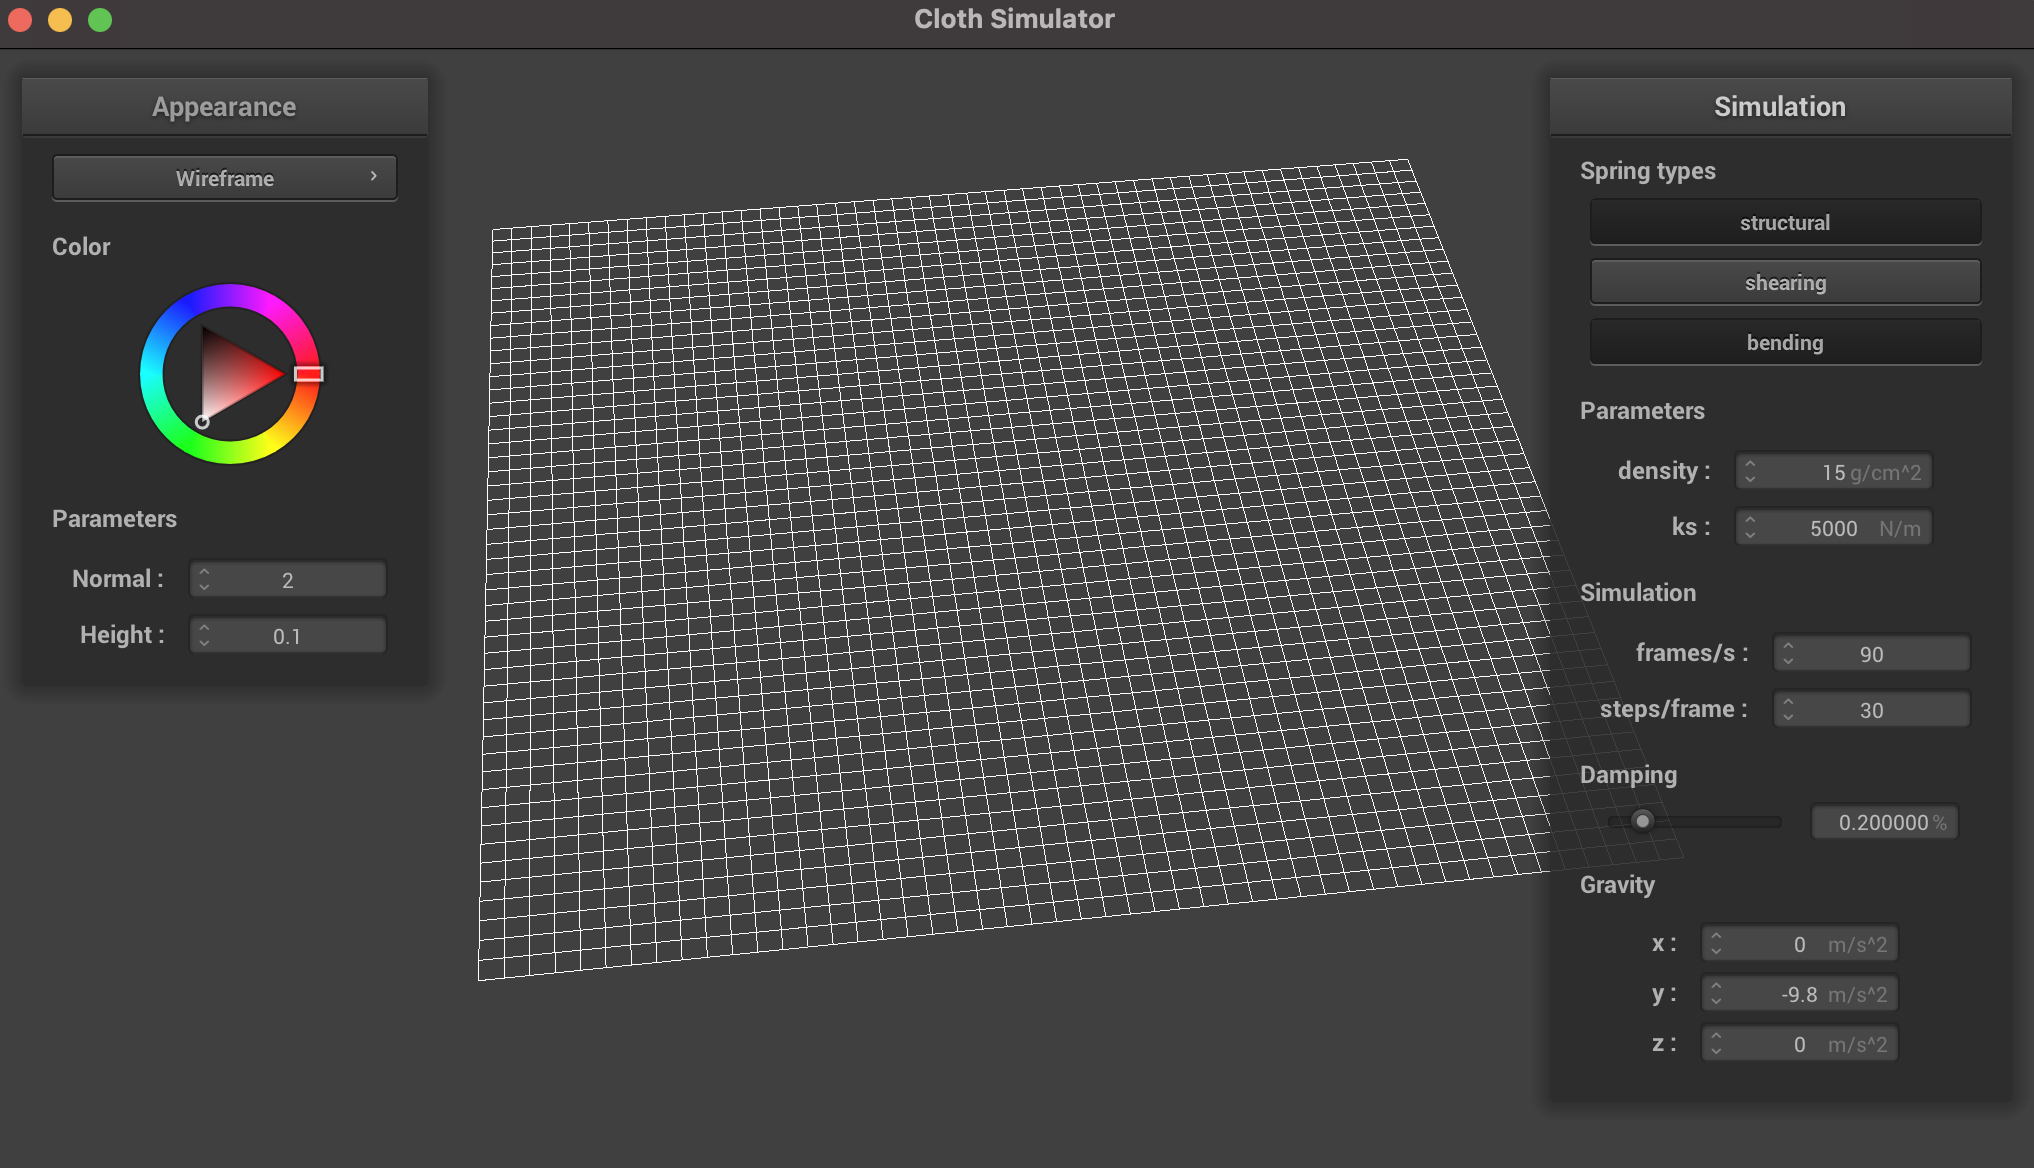
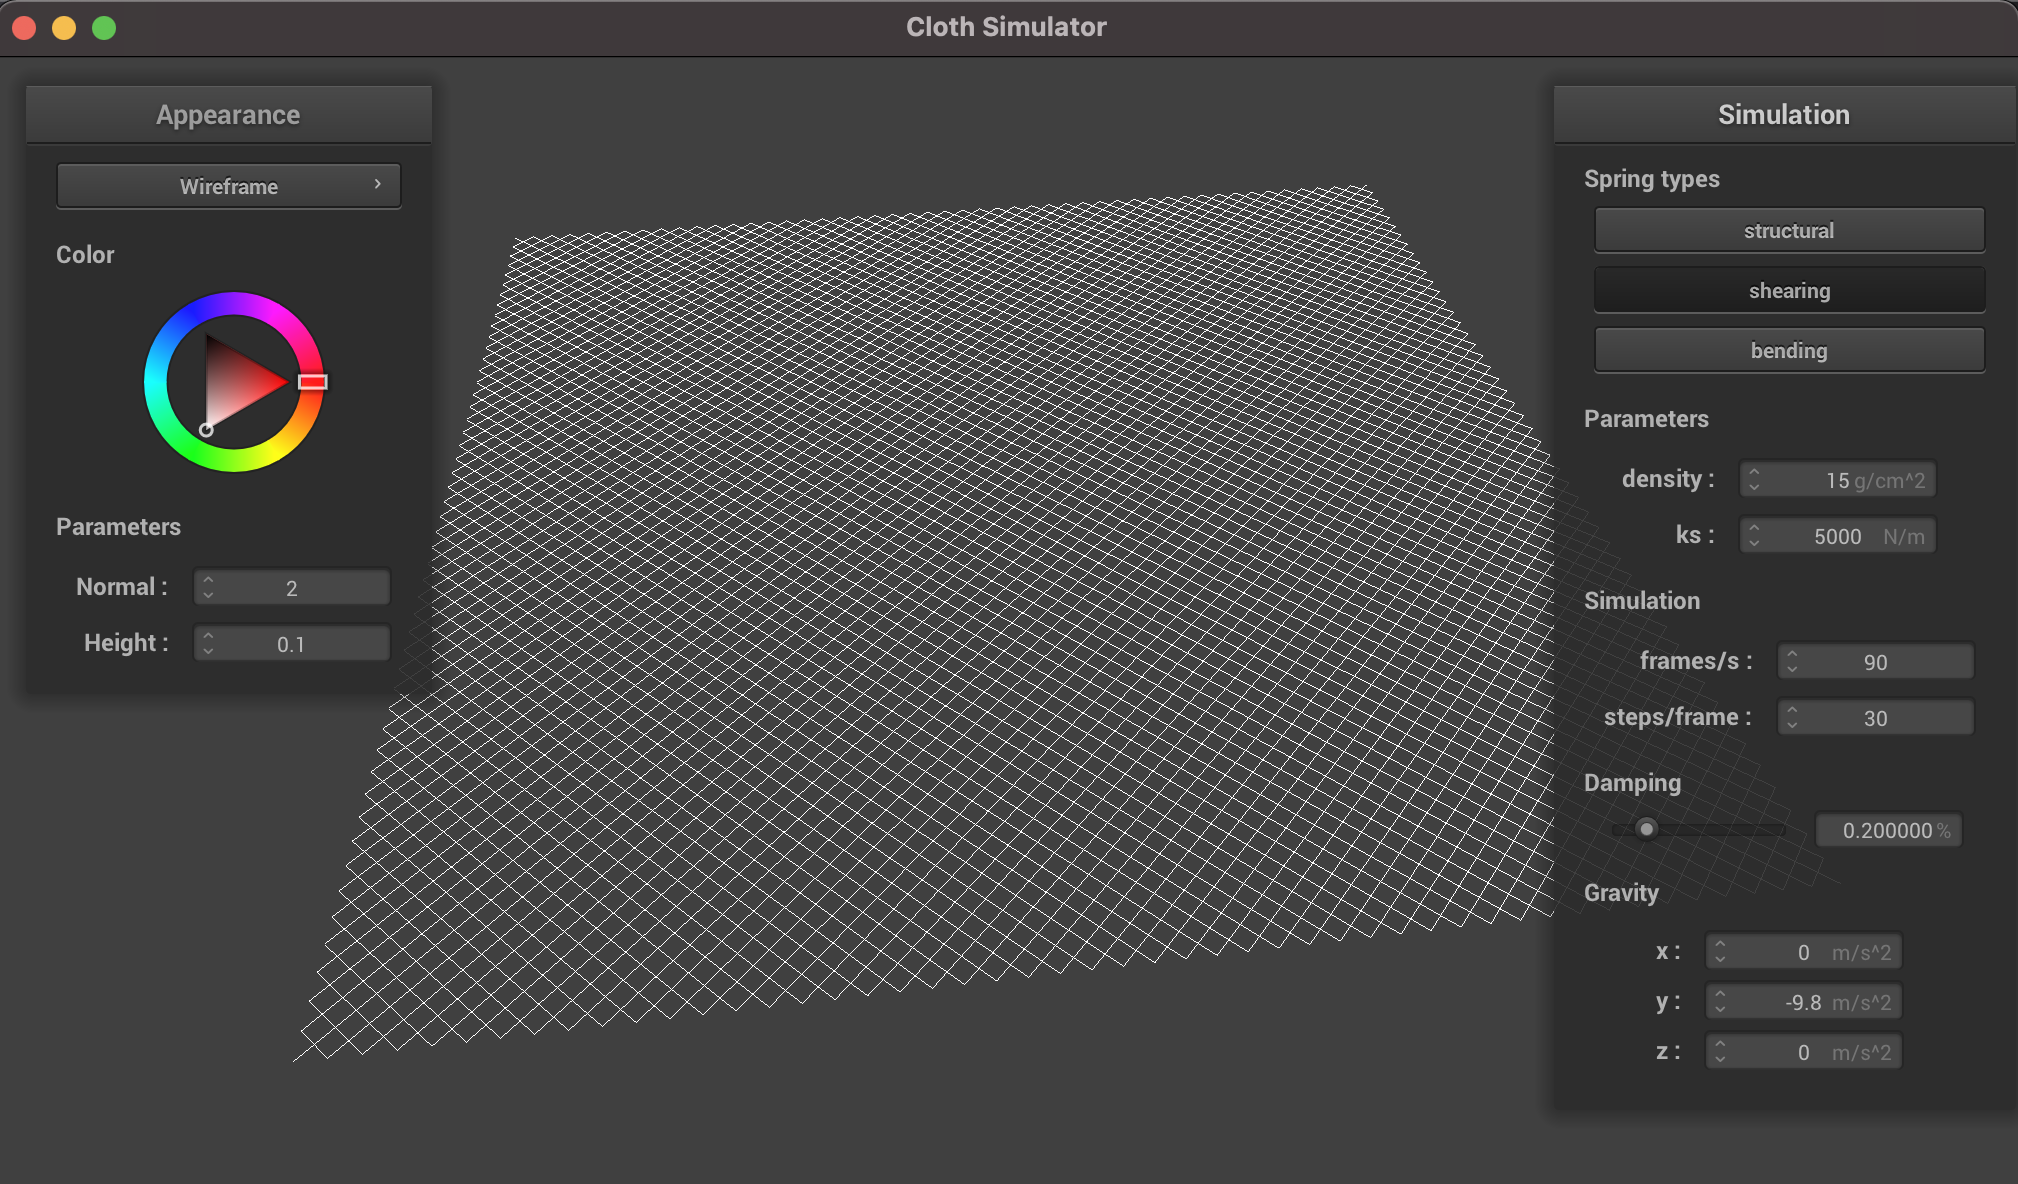
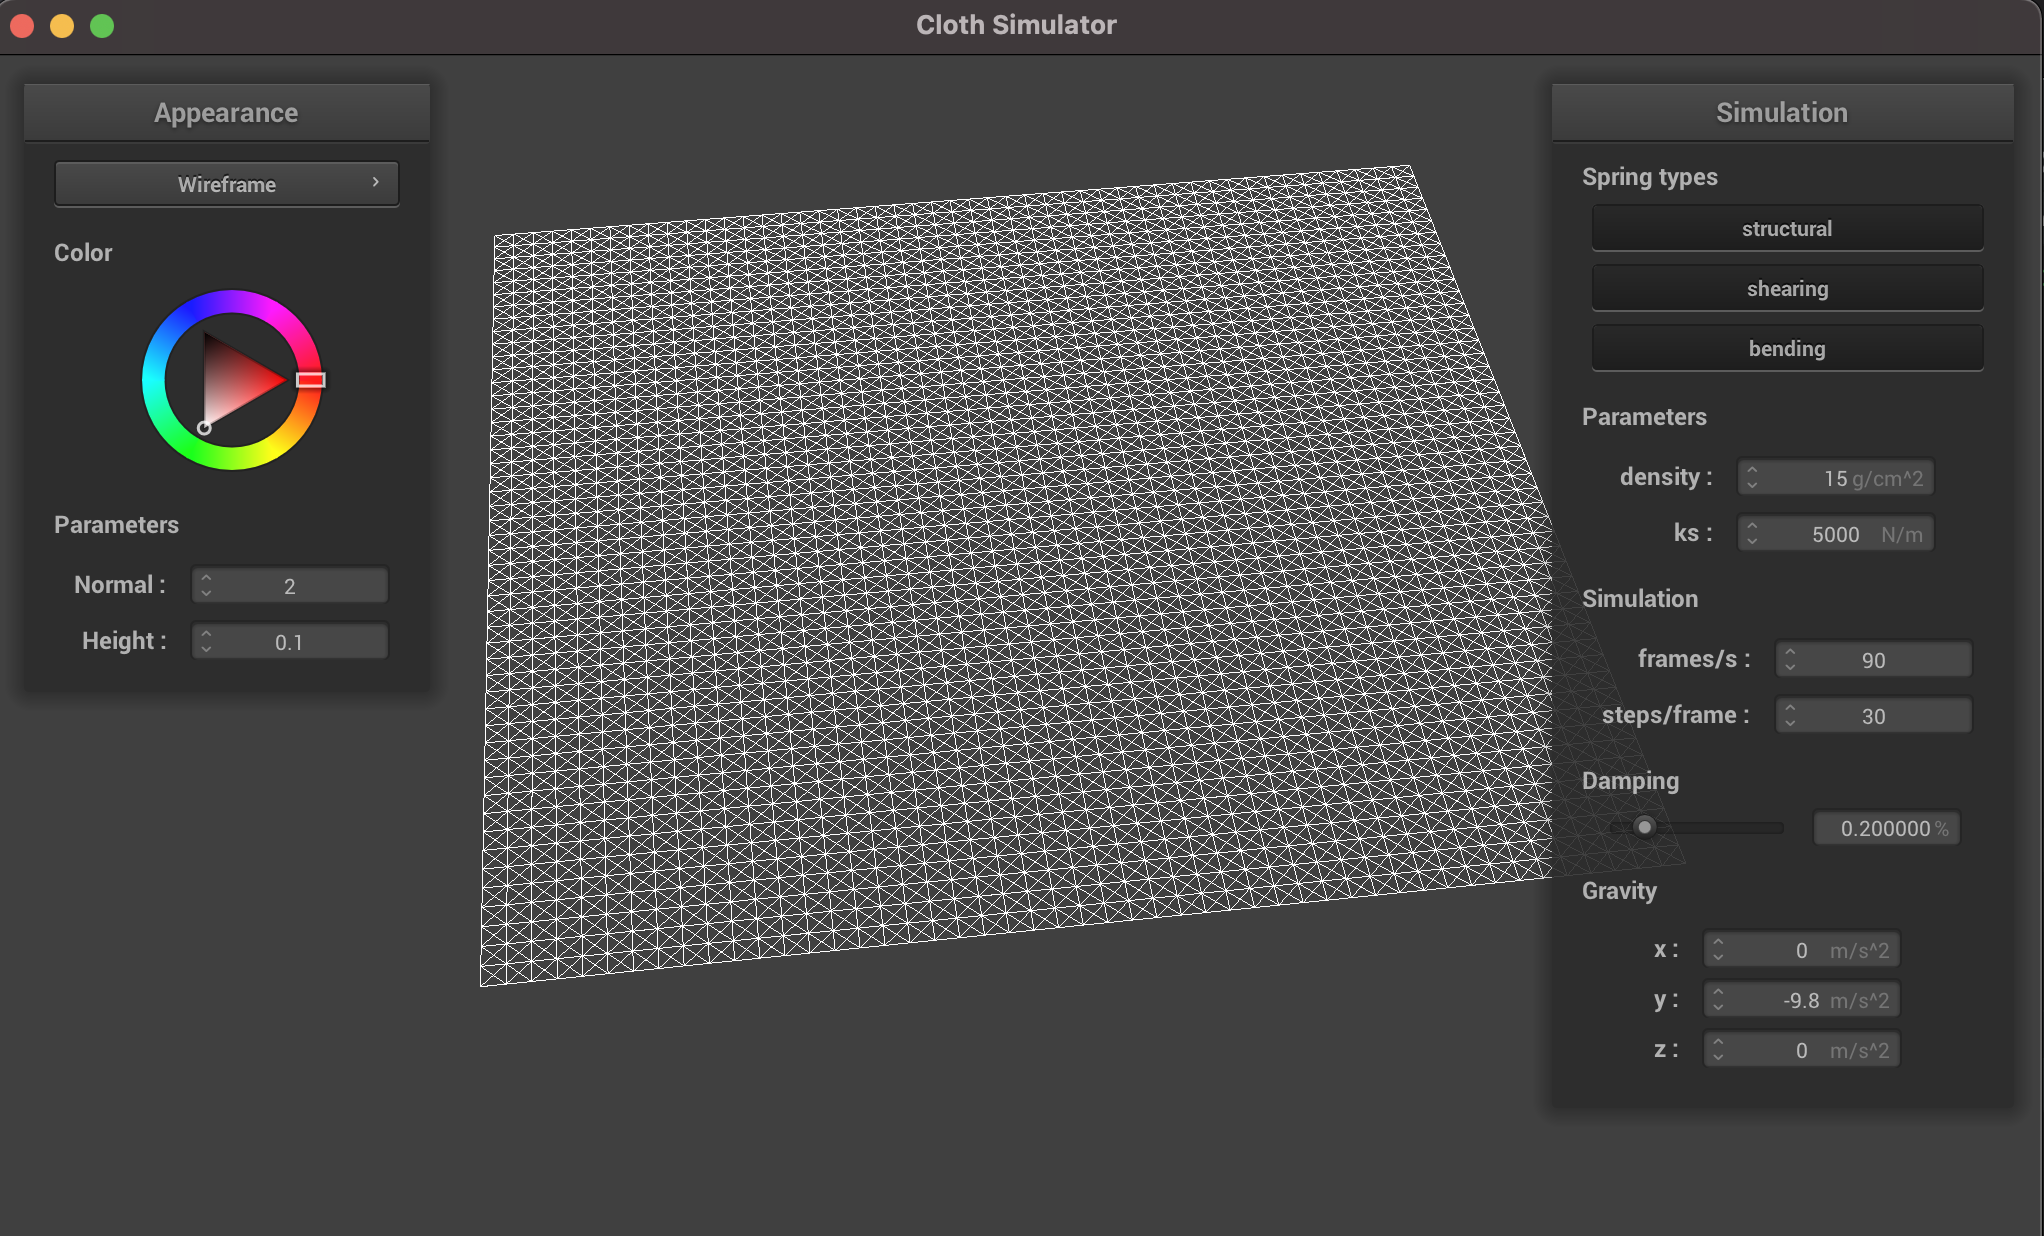
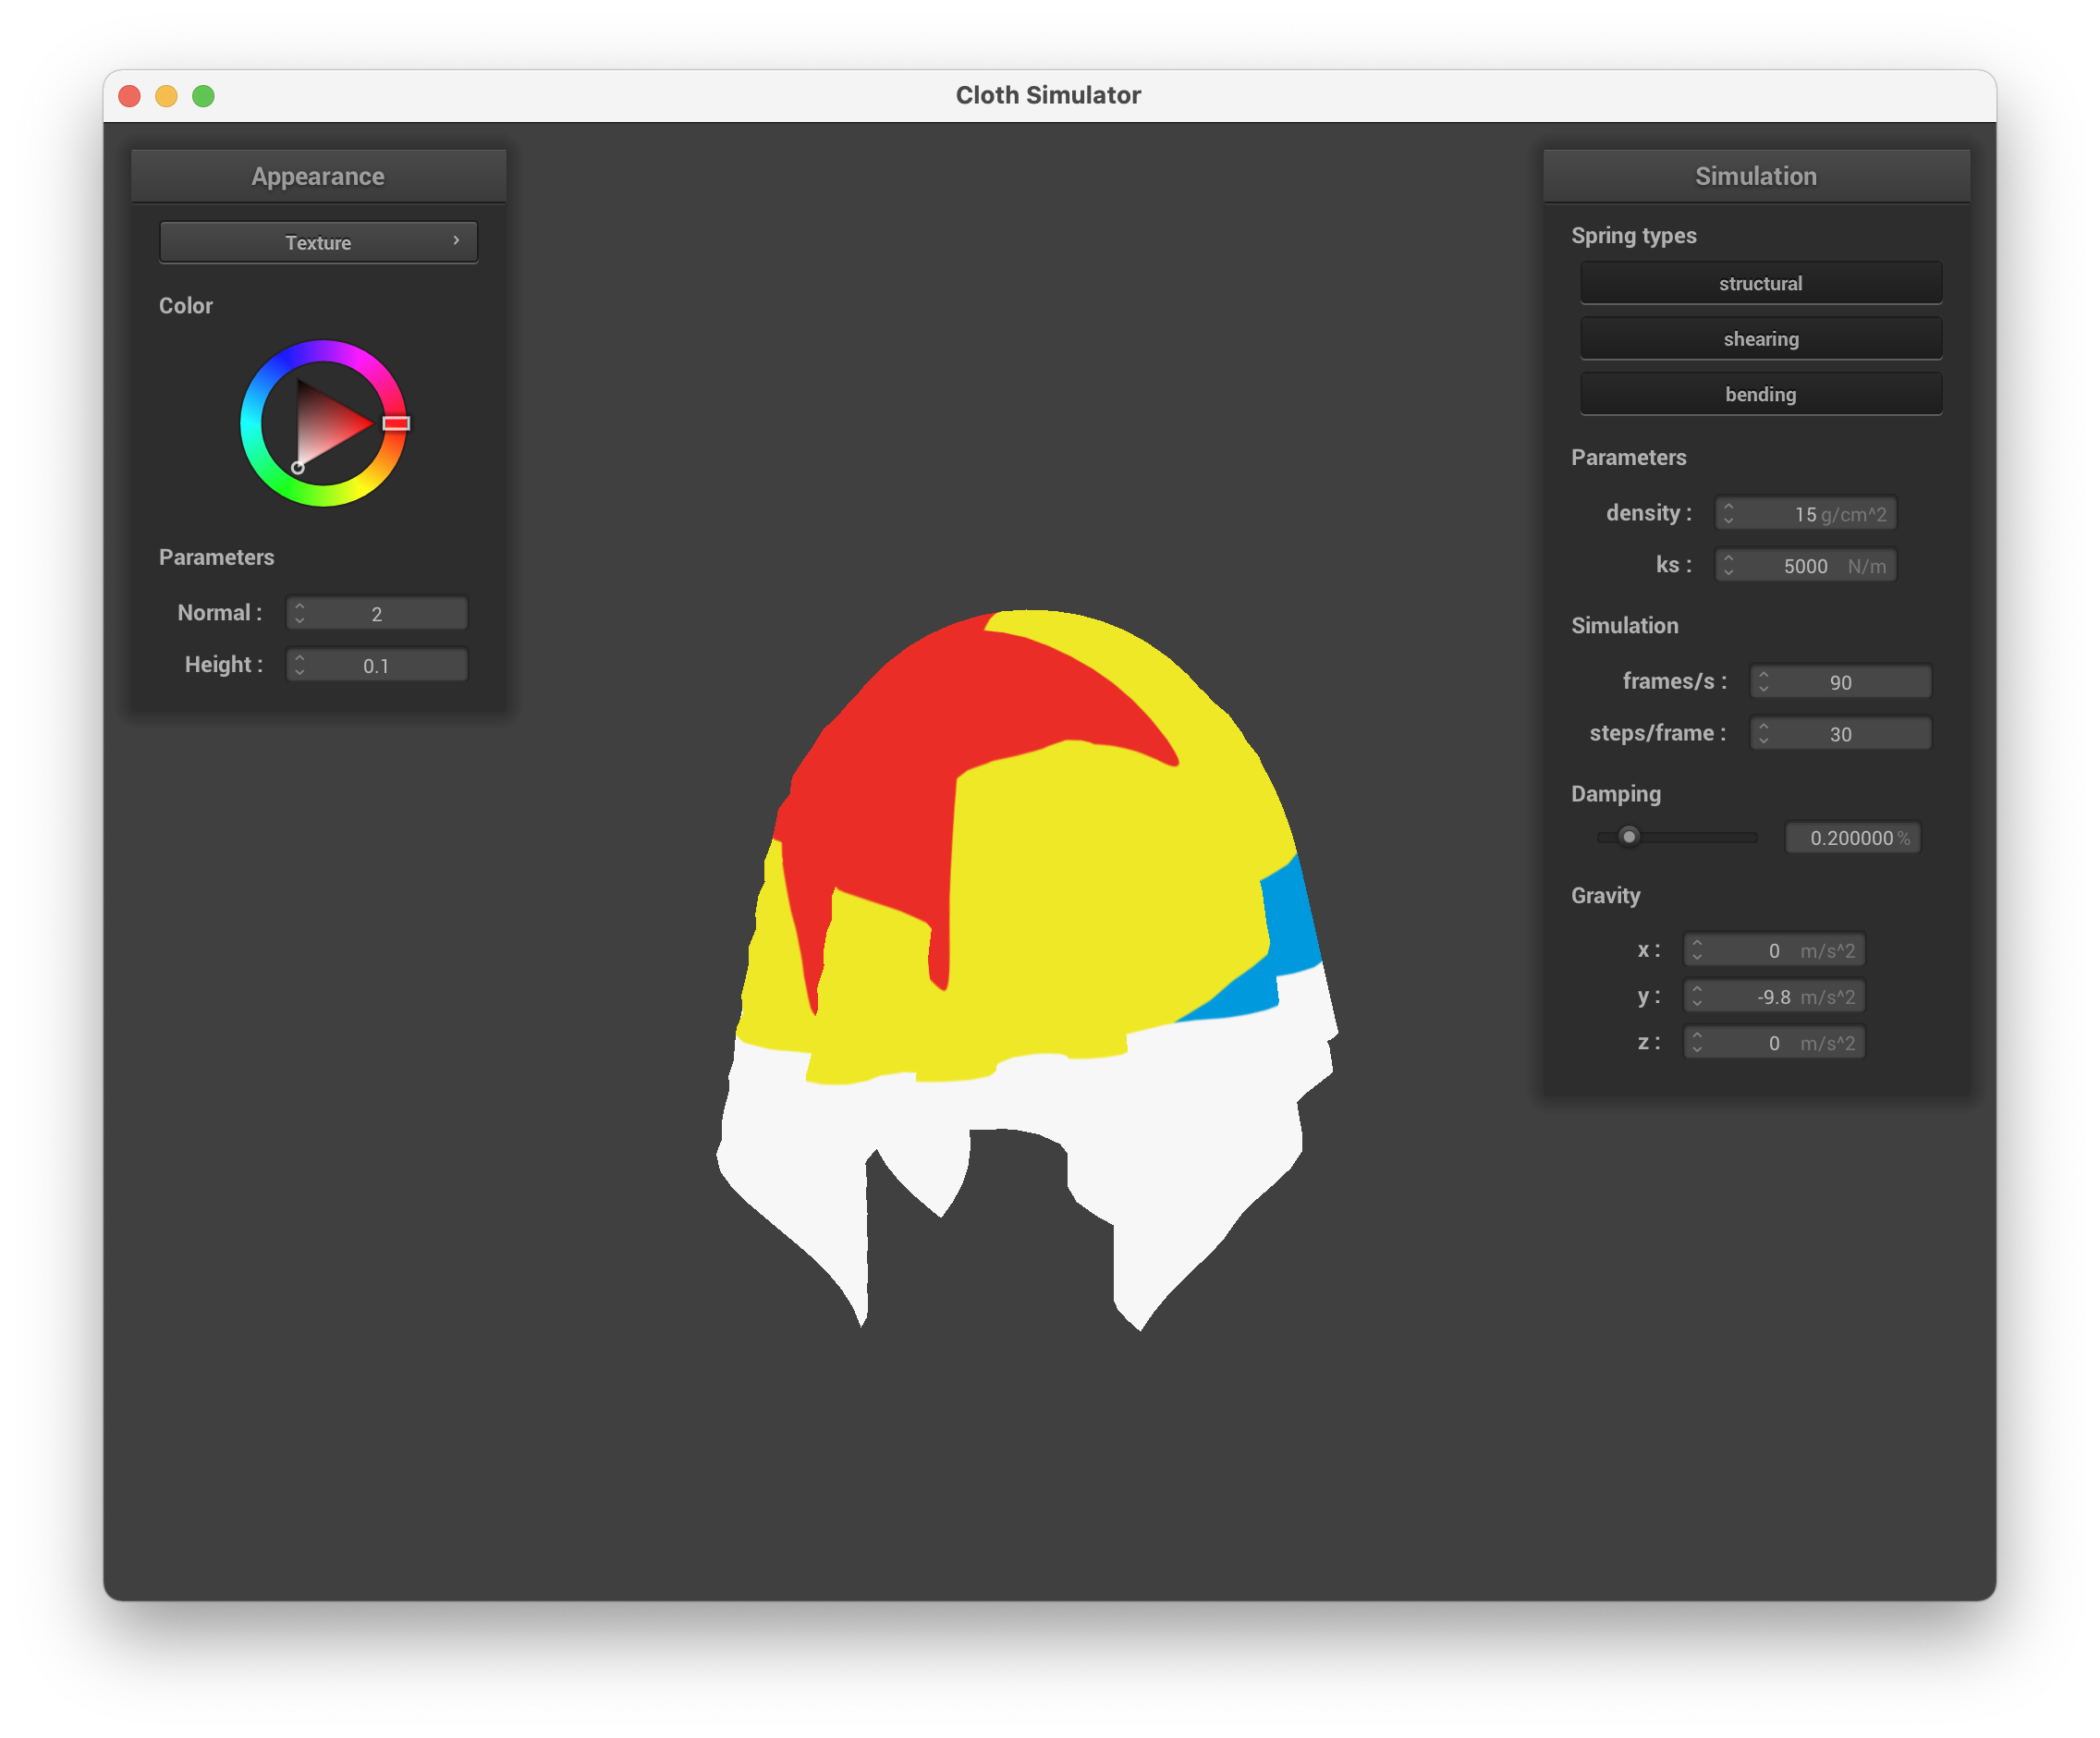
In Part 1, we implemented Cloth::buildGrid, which is meant to create the basis for our cloth. For this part, we populated the point_masses vector by looping through the cloth grid in row-major order and storing the corresponding PointMass in the vector after converting its index from 2D to 1D. We created the corresponding PointMass by setting its position pinned value to true if its position on the grid is in the pinned vector and its position according to whether the cloth is horizontal or vertical, its grid position relative to the number of points, and the width and height of the grid. Afterwards, we looped through the grid again and created the necessary springs for each PointMass using each spring's relative position to the PointMass. This includes structures, bending and shearing springs.
As for debugging, during part 2, we realized that the colors for our cloth were different then the ones in the spec. We then realized that my implementation for part 1 was in column-major order instead of row-major order. After that fix, the colors were correct. Also, in the beginning I didn’t completely understand emblace_back so I ran into compilation errors because of incorrect syntax and usage.
|
|
|
Part II: Simulation via Numerical Integration
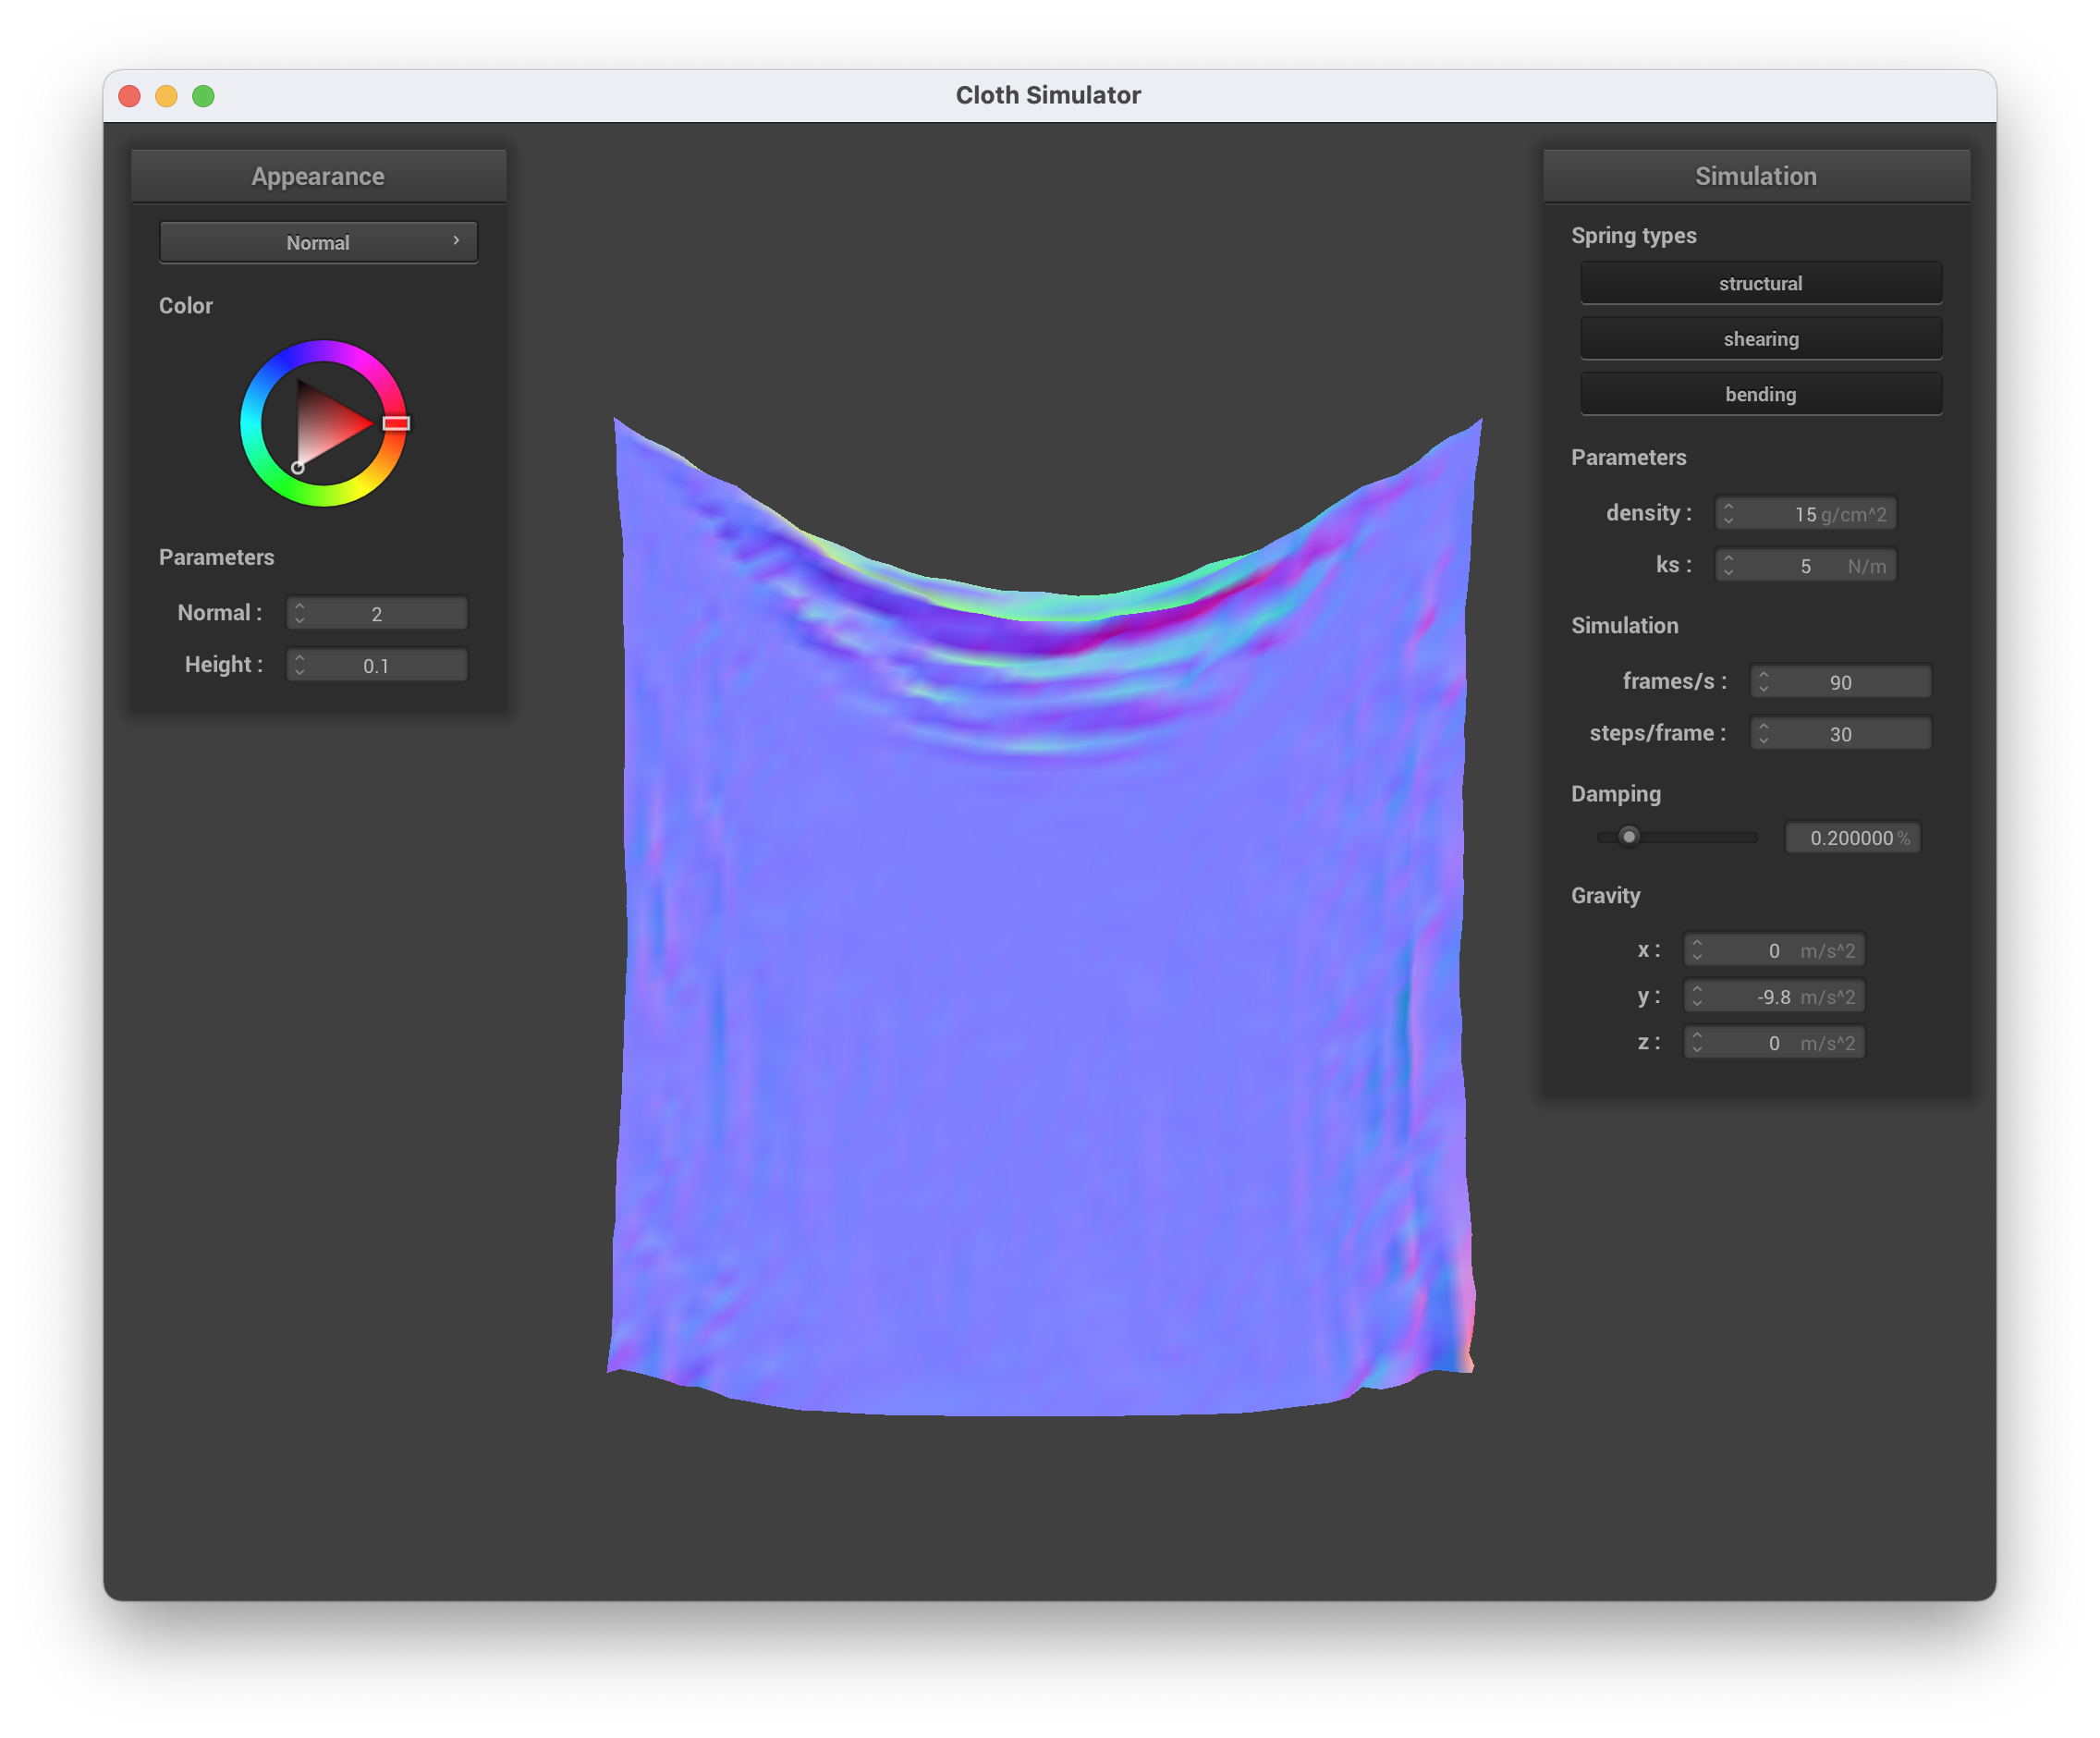
For part 2, we implemented Cloth:simulate which is the physics of the cloth simulation. We computed the total force from all of the external accelerations and set them to all of the point masses' forces. We then iterated through the springs and calculated the correction forces from the two point masses's magnitude subtracted the spring's rest length and multiplied it with the spring constant and added the correction force to a's point mass and subtracted it from b's point mass. After this, we iterated through every point mass and updated the positions of the unpinned point masses using Verlet integration which takes the current position, adds 1 - (d/100) where d is the damping factor, multiplies by the difference between the current and last position, adds the forces divided by the mass, and multiplies by the timestep squared. We then iterated through the springs and corrected the positions of the springs that had the point masses with a distance greater than a 10% change from the rest length and the difference from the point masses positions. If the change was greater than 10%, we updated the positions of the point masses of the unpinned point masses. To update the position, we multiplied the difference in position as a unit vector to the rest length and multiplied the change over 10%. If both point masses were unpinned, we divided this by 2 and added this to point mass b and subtracted this to point mass a. If only point mass b was unpinned, we added the whole value to point mass b. If only point mass a was unpinned, we subtracted the whole value to point mass a.
When debugging part 2 we found the error from part 1 of having our colors wrong. We were also having issues with updating the constraint positions. We had implemented a version that had the cloth jump everywhere so we went to office hours. We got help and rewrote how we updated the positions of the spring's point masses.
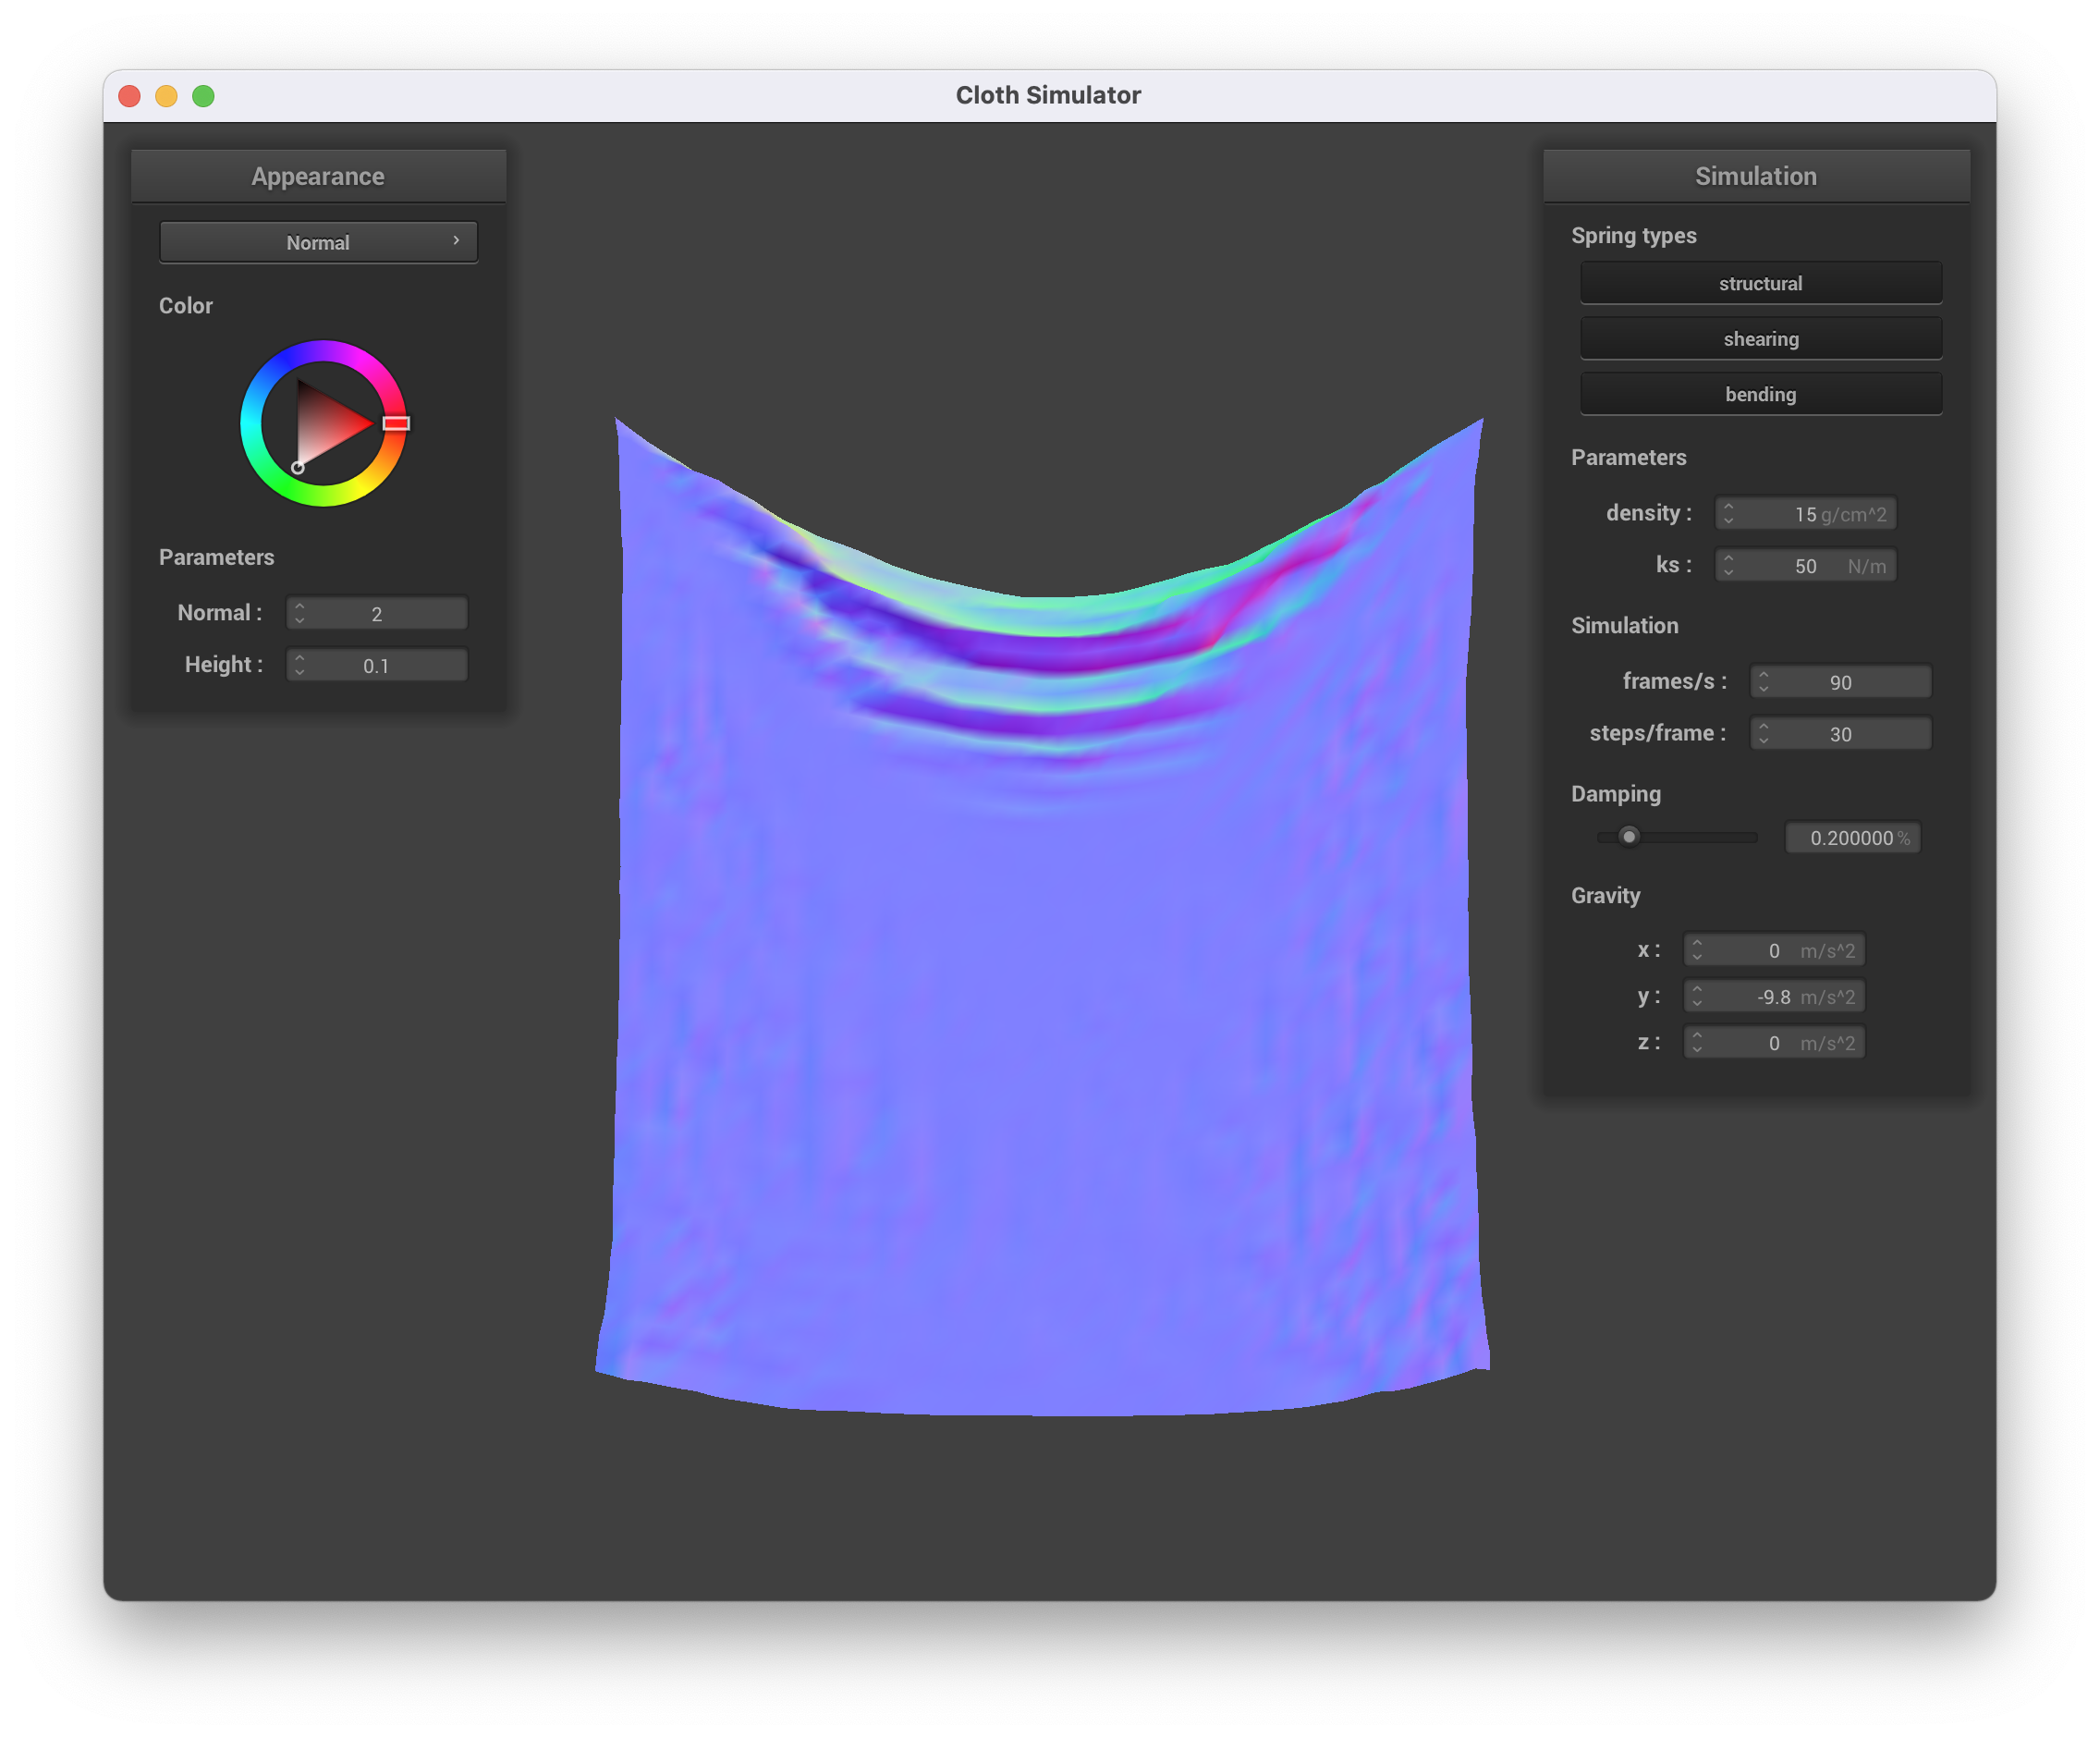
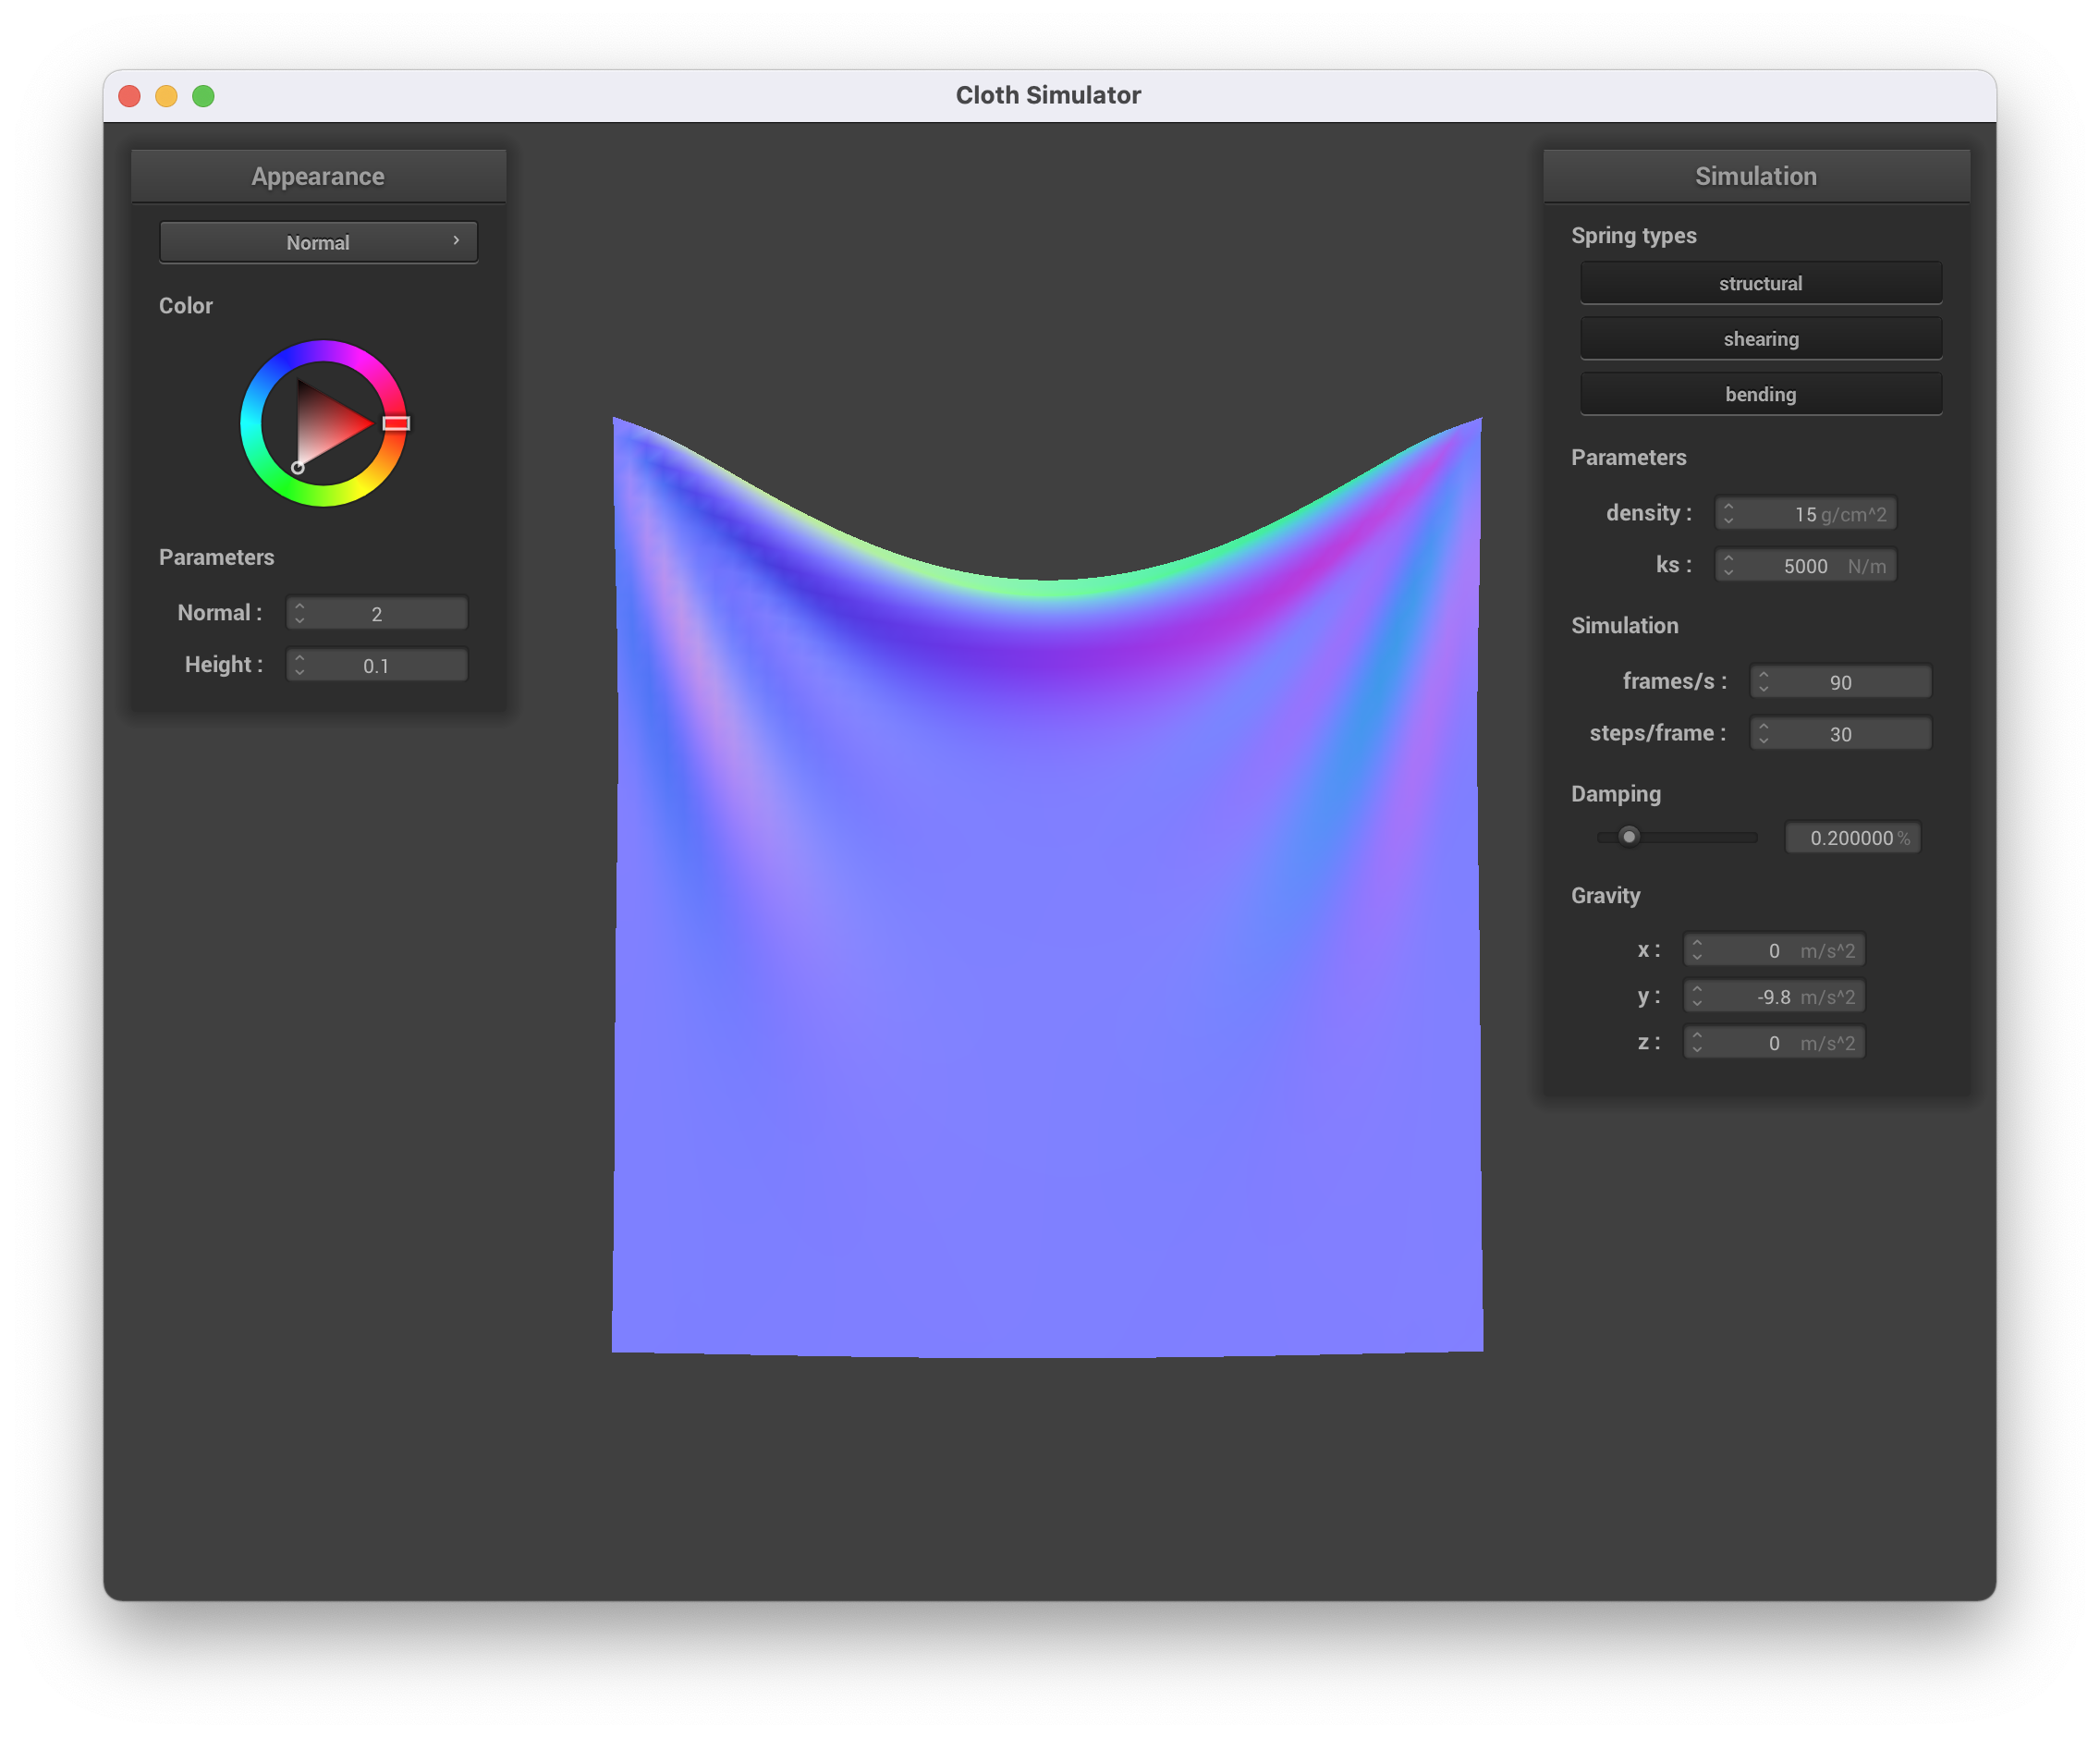
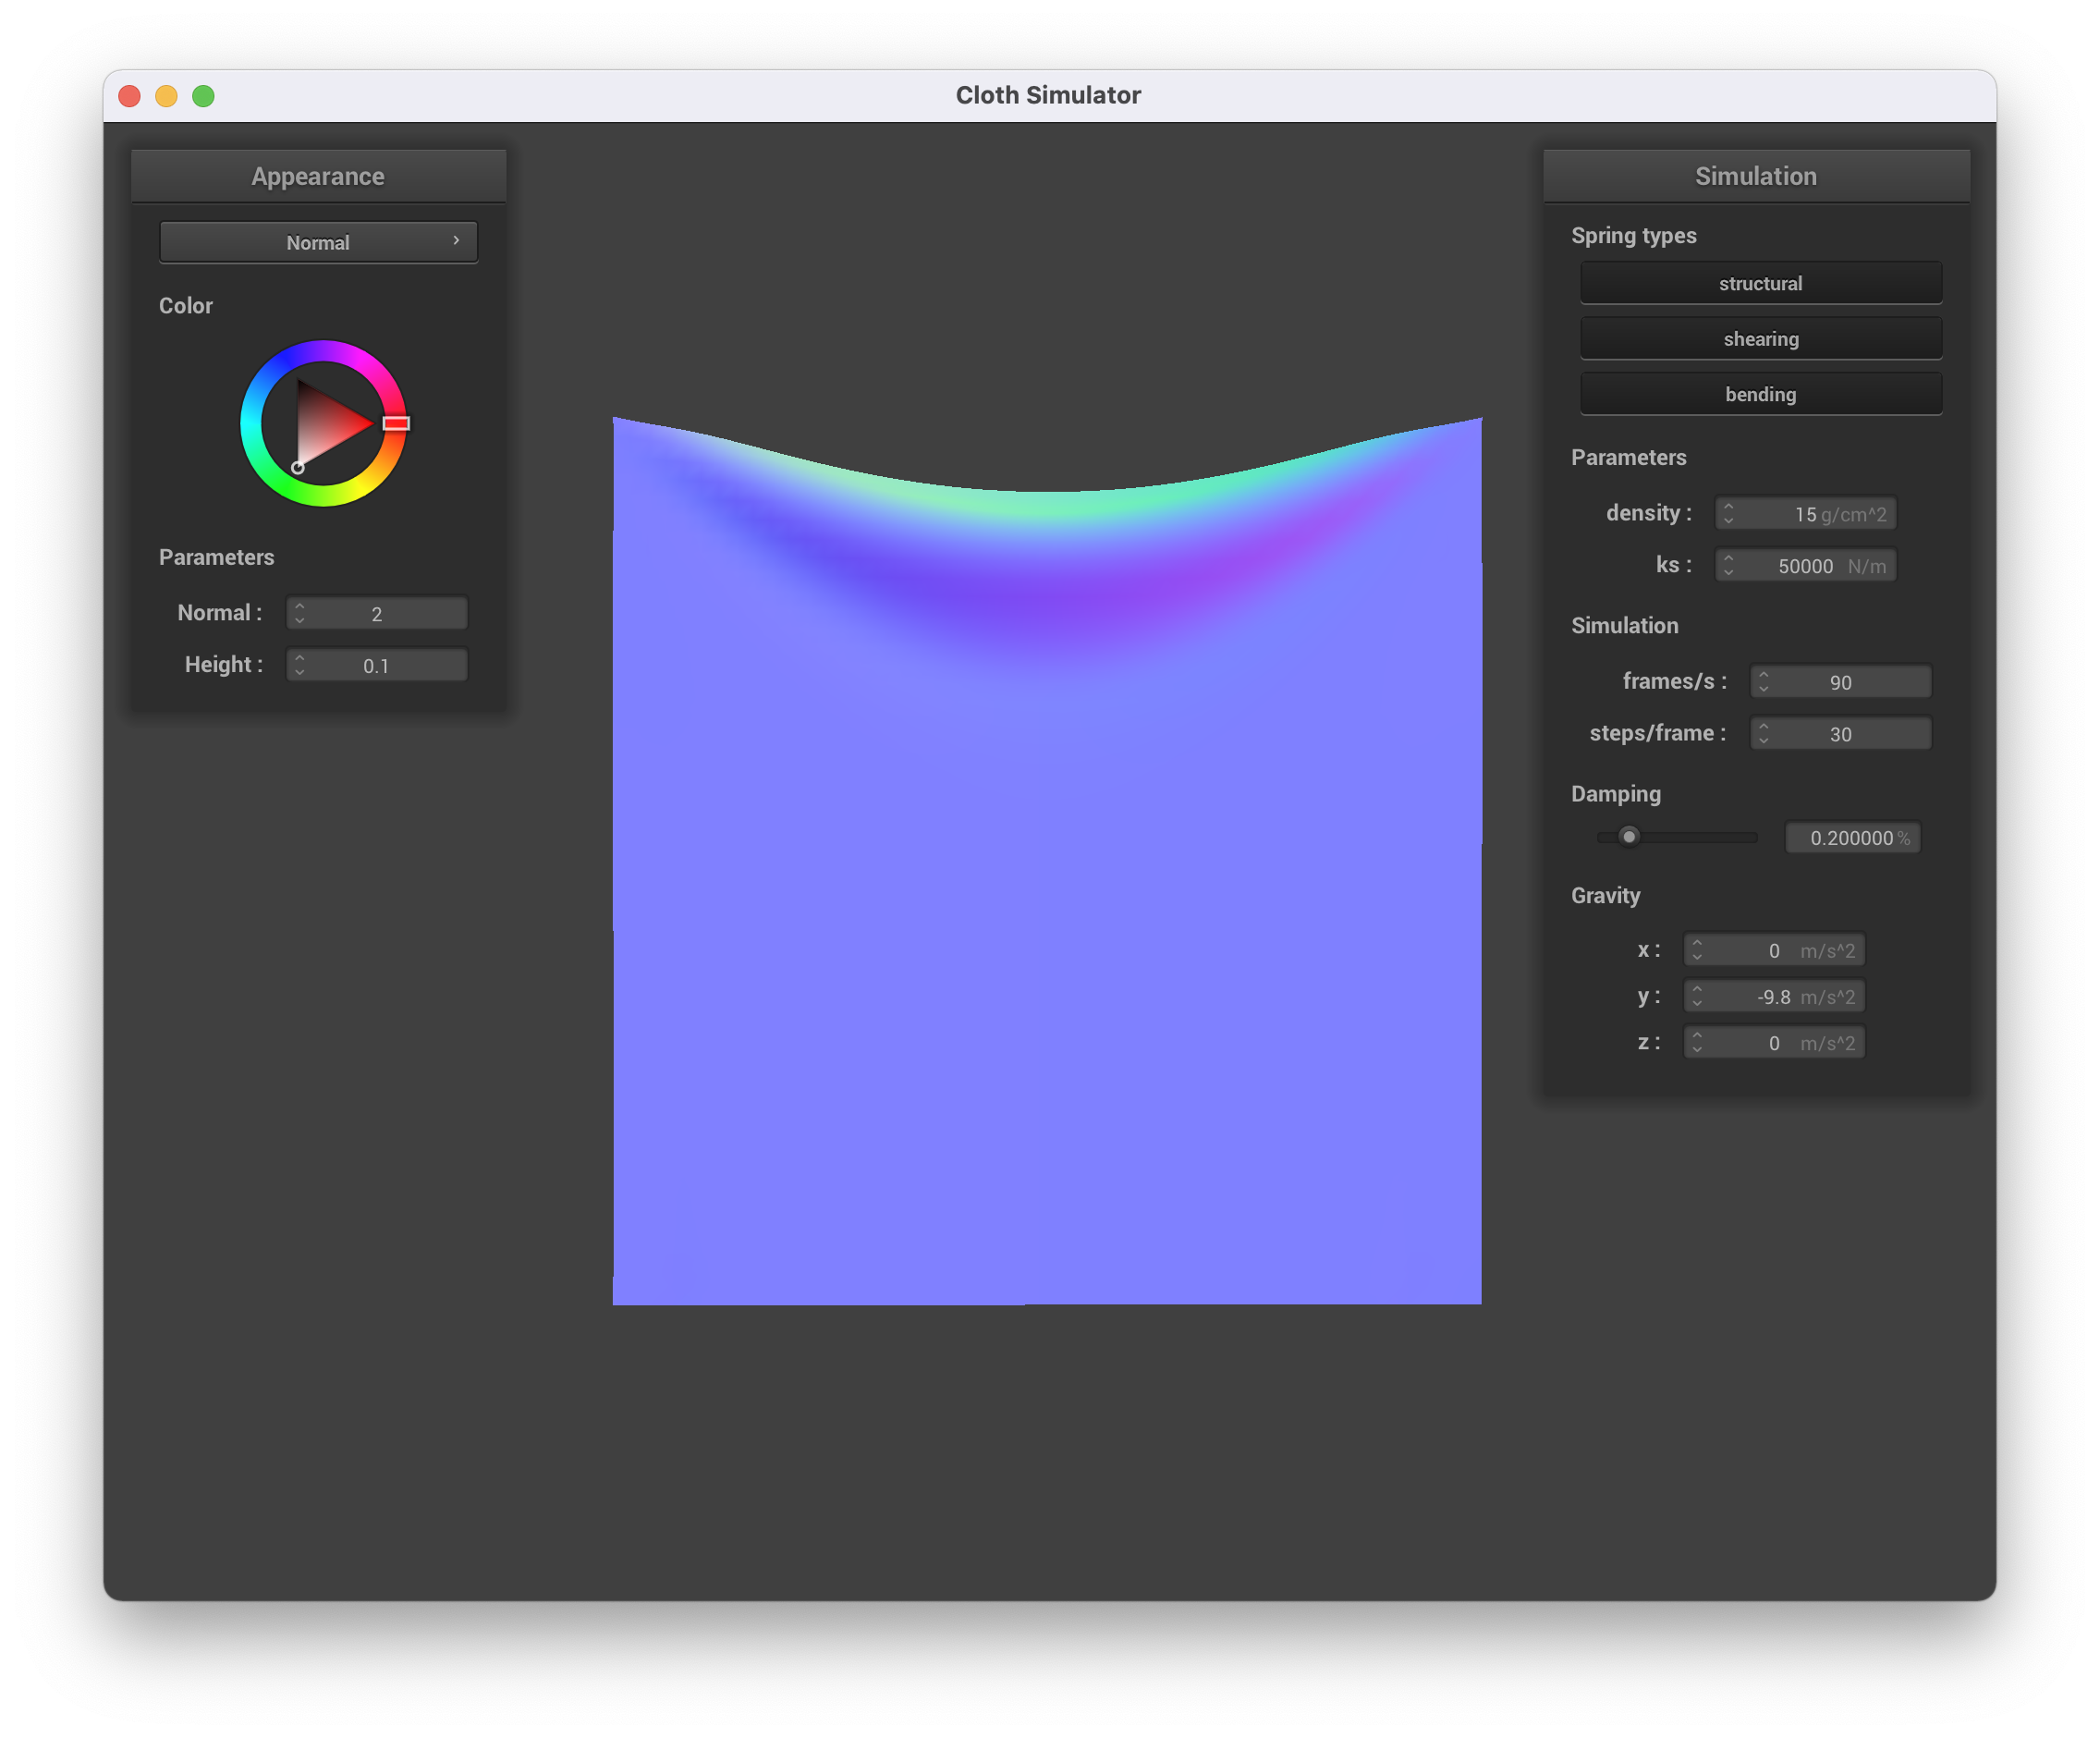
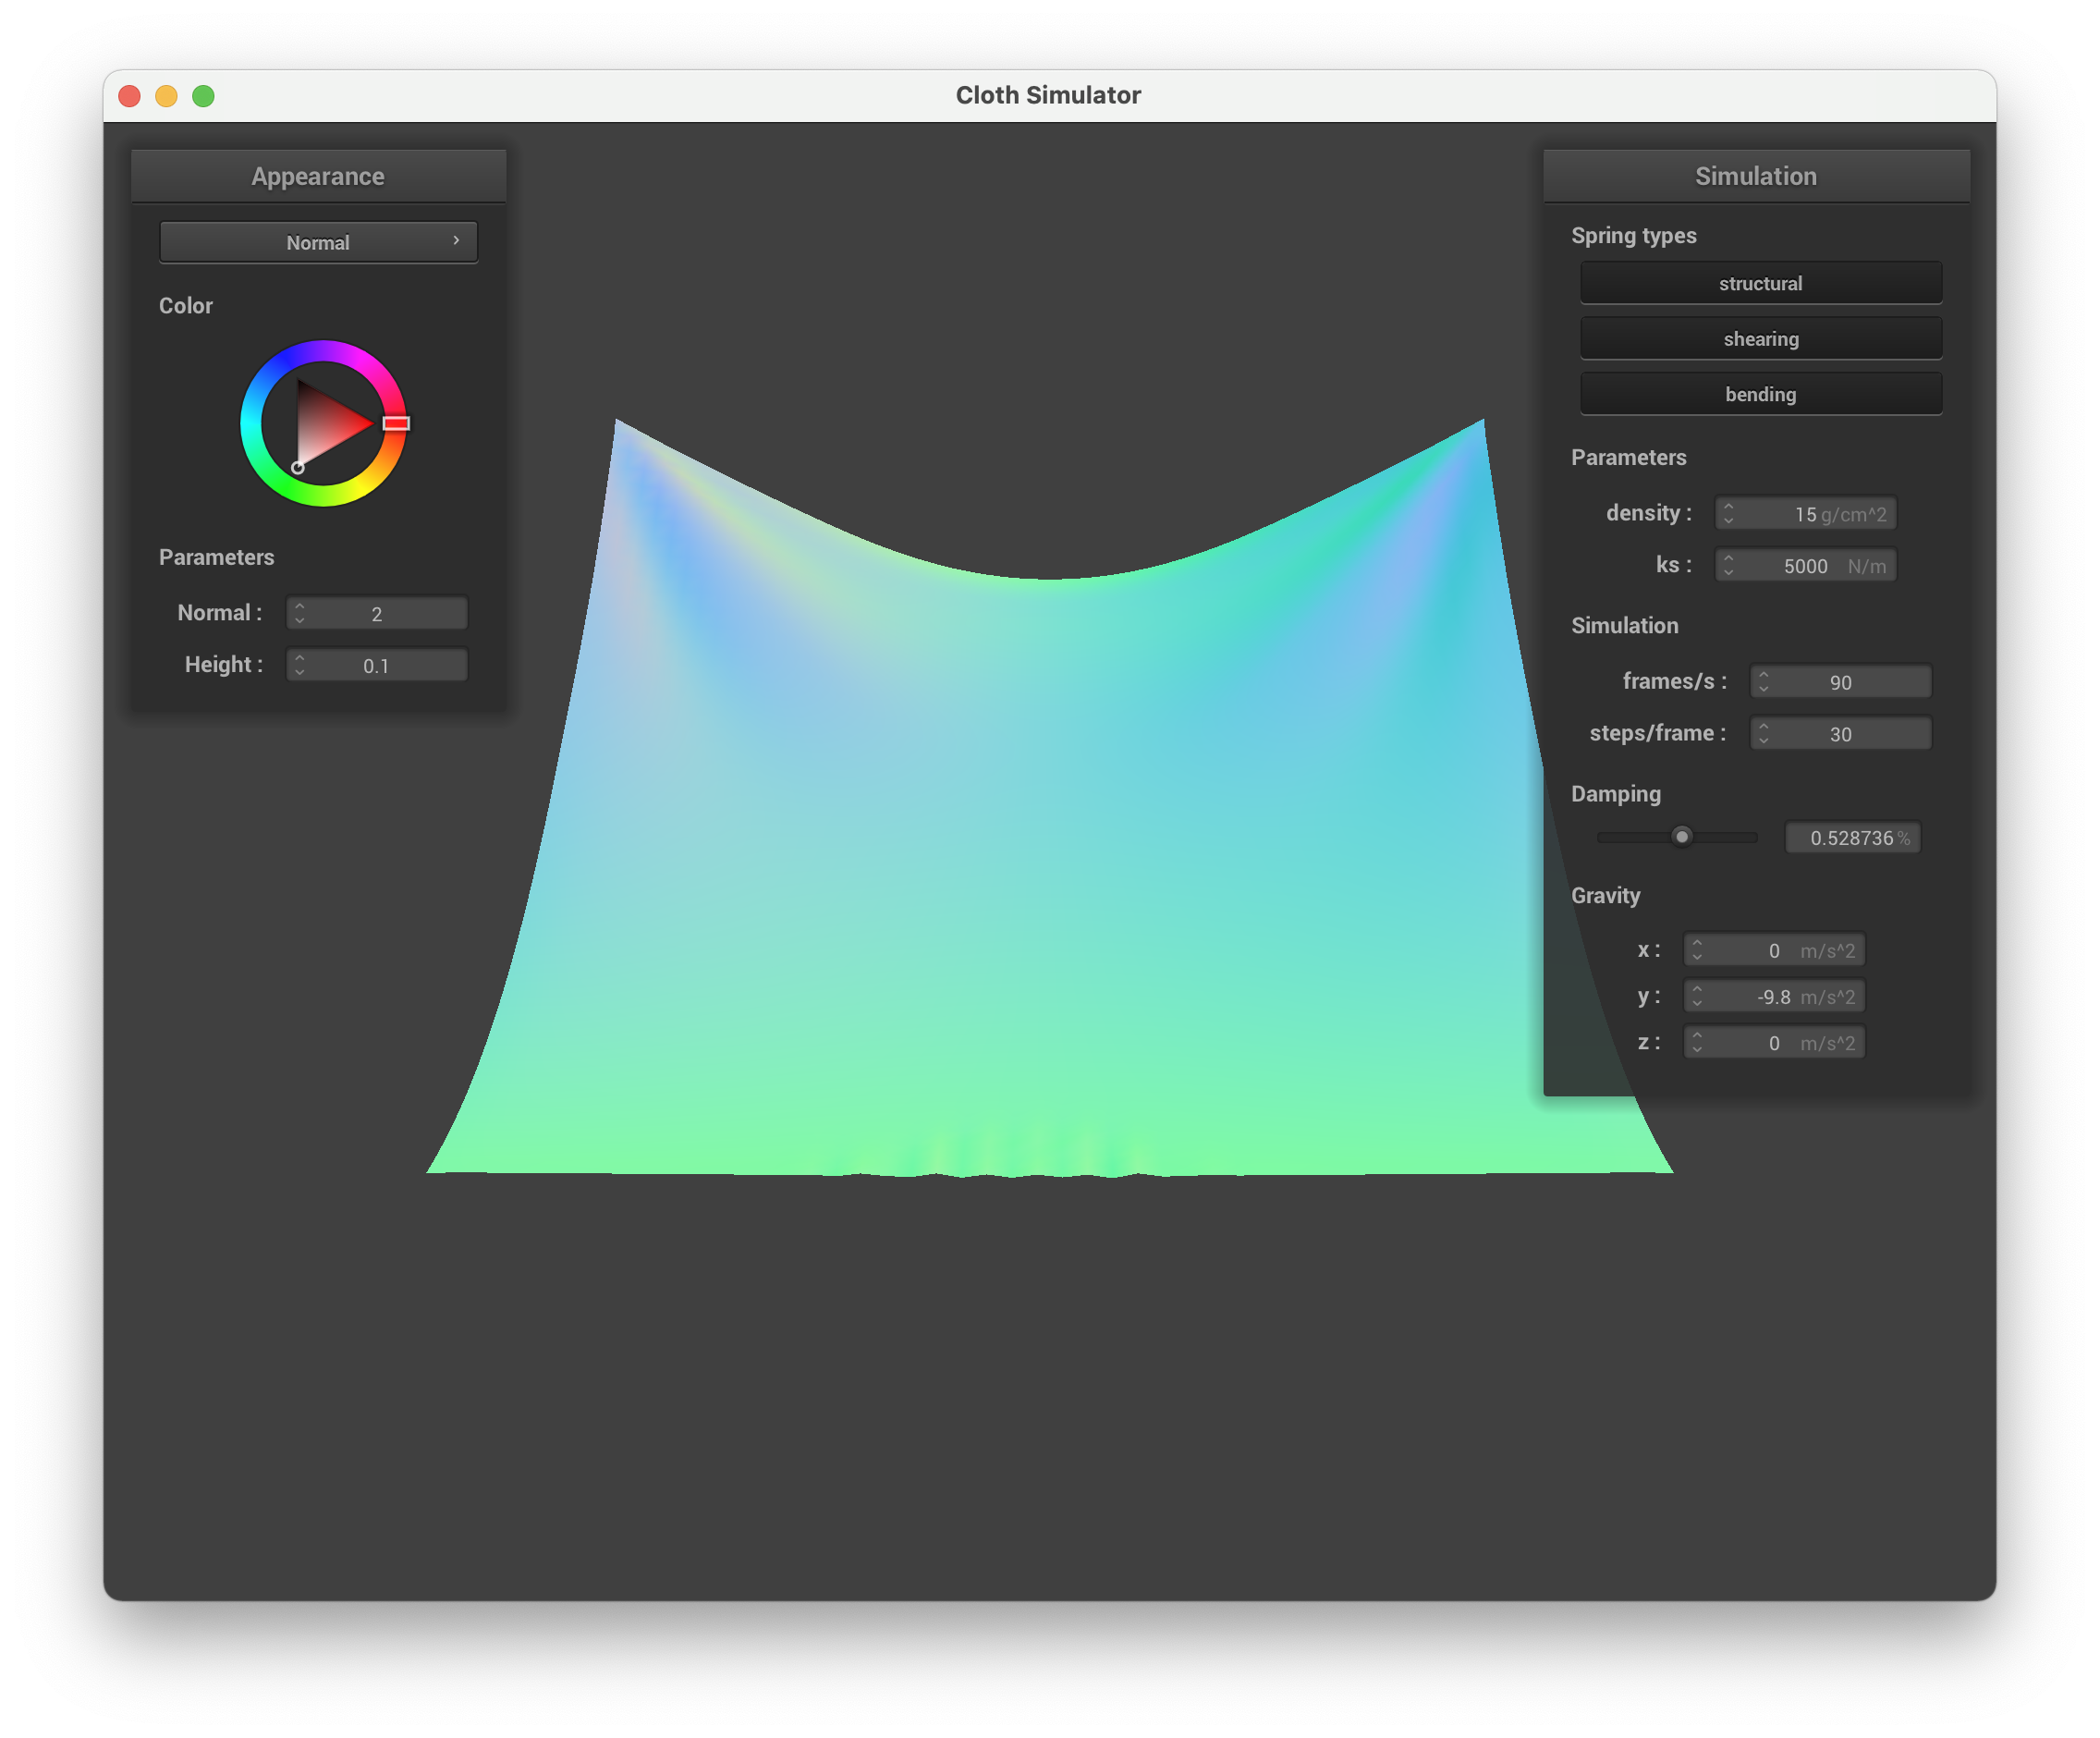
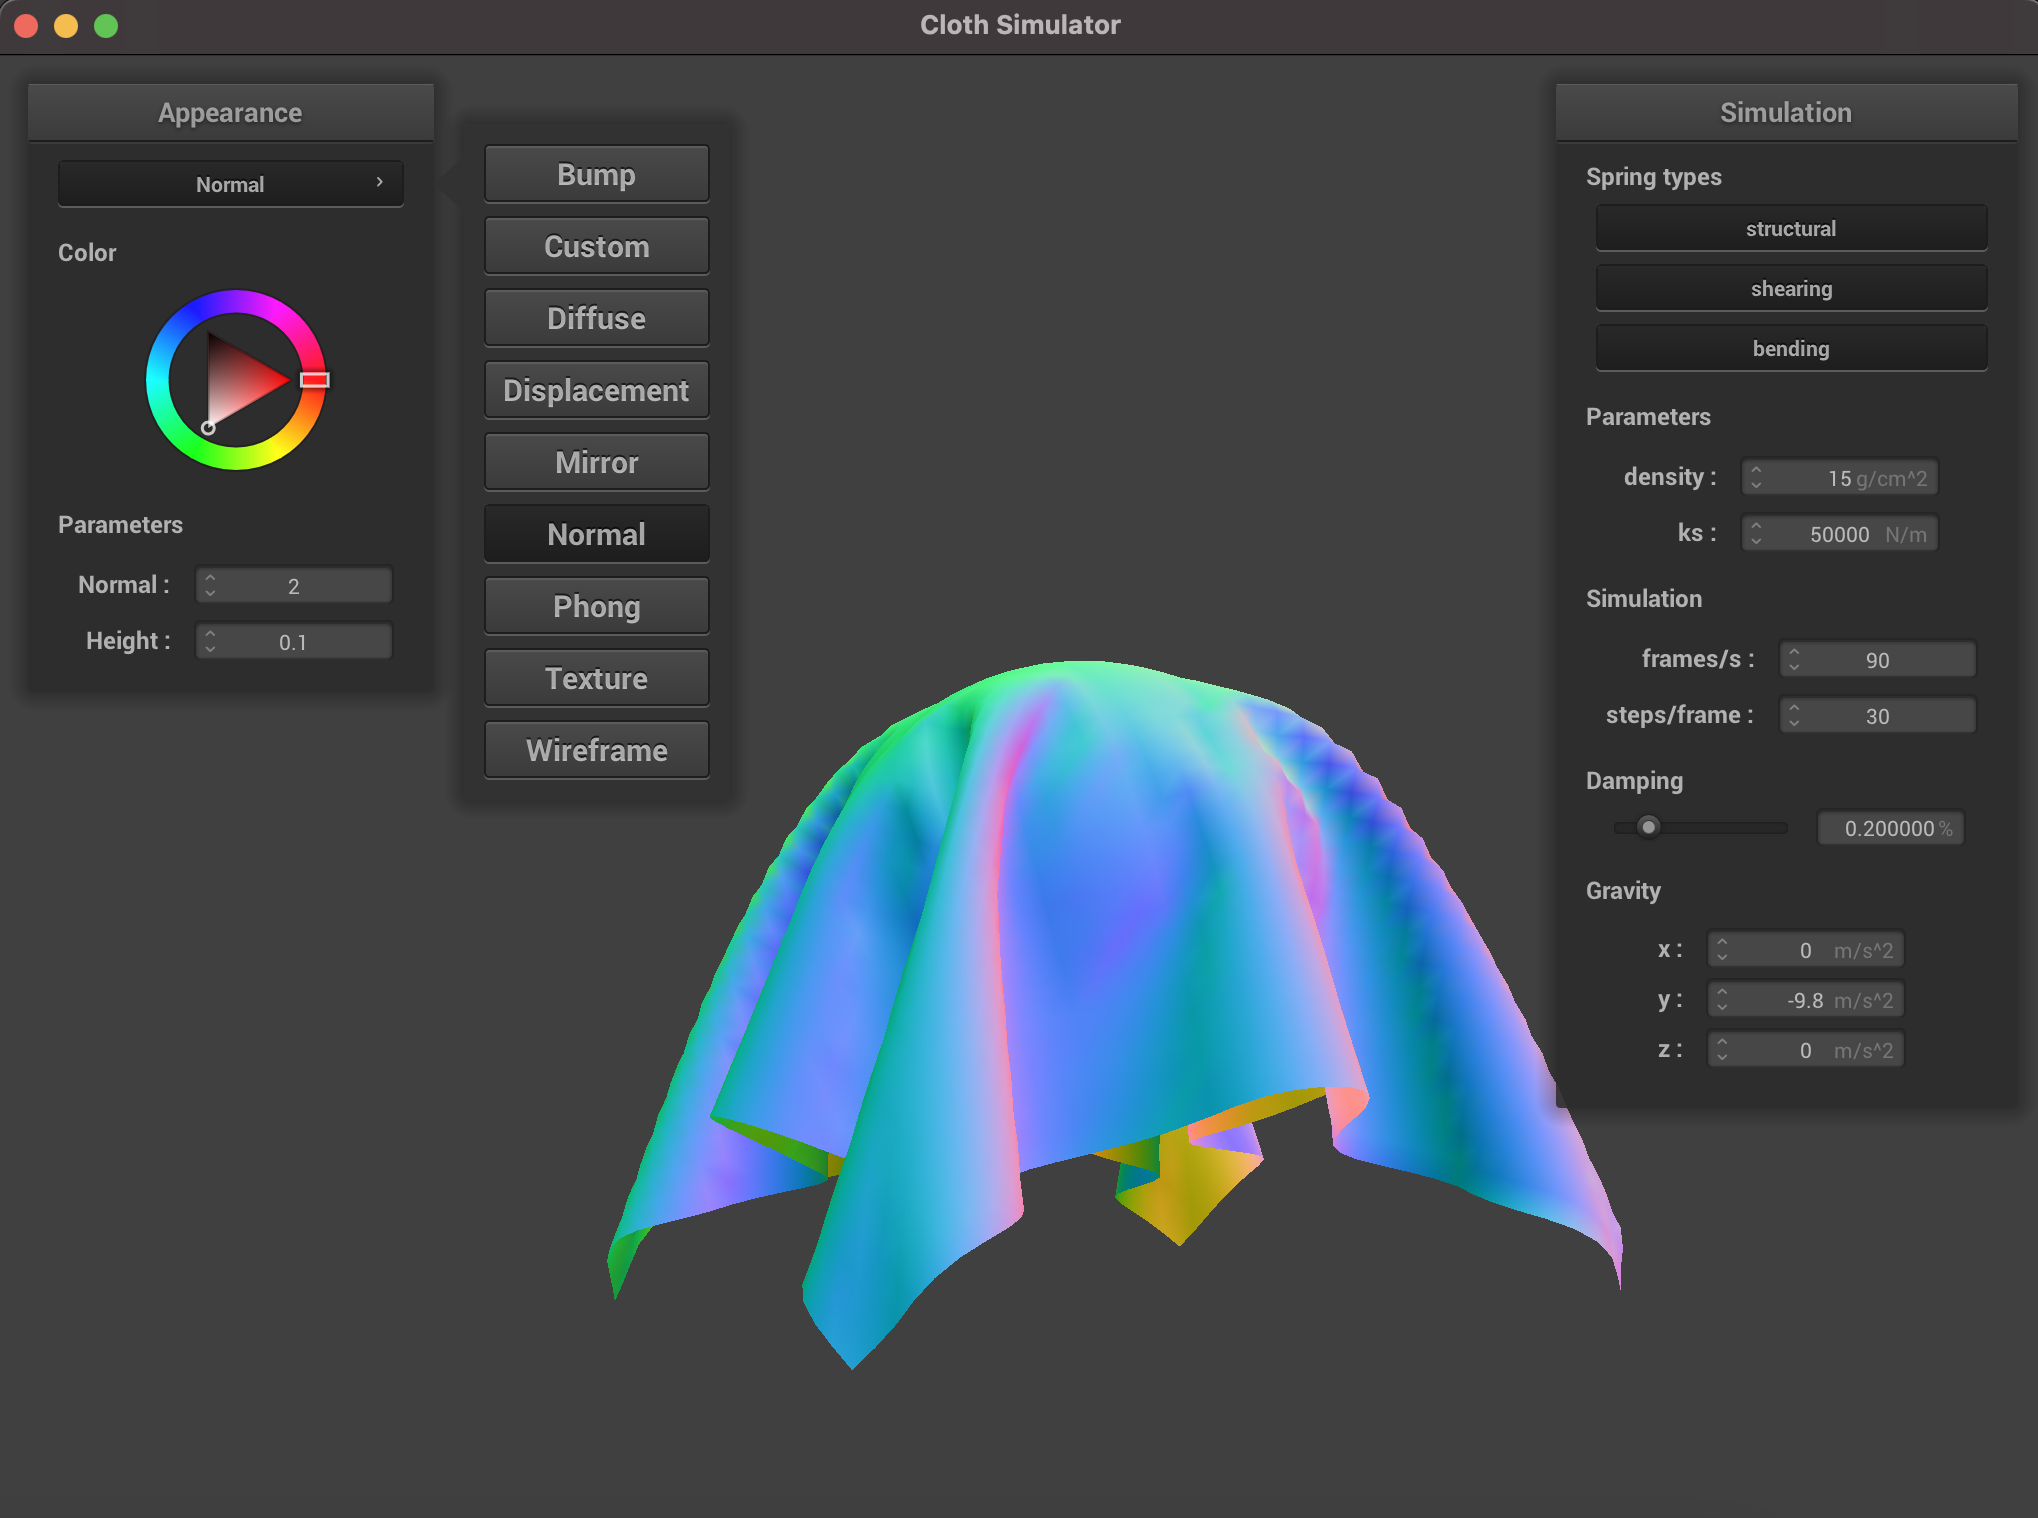
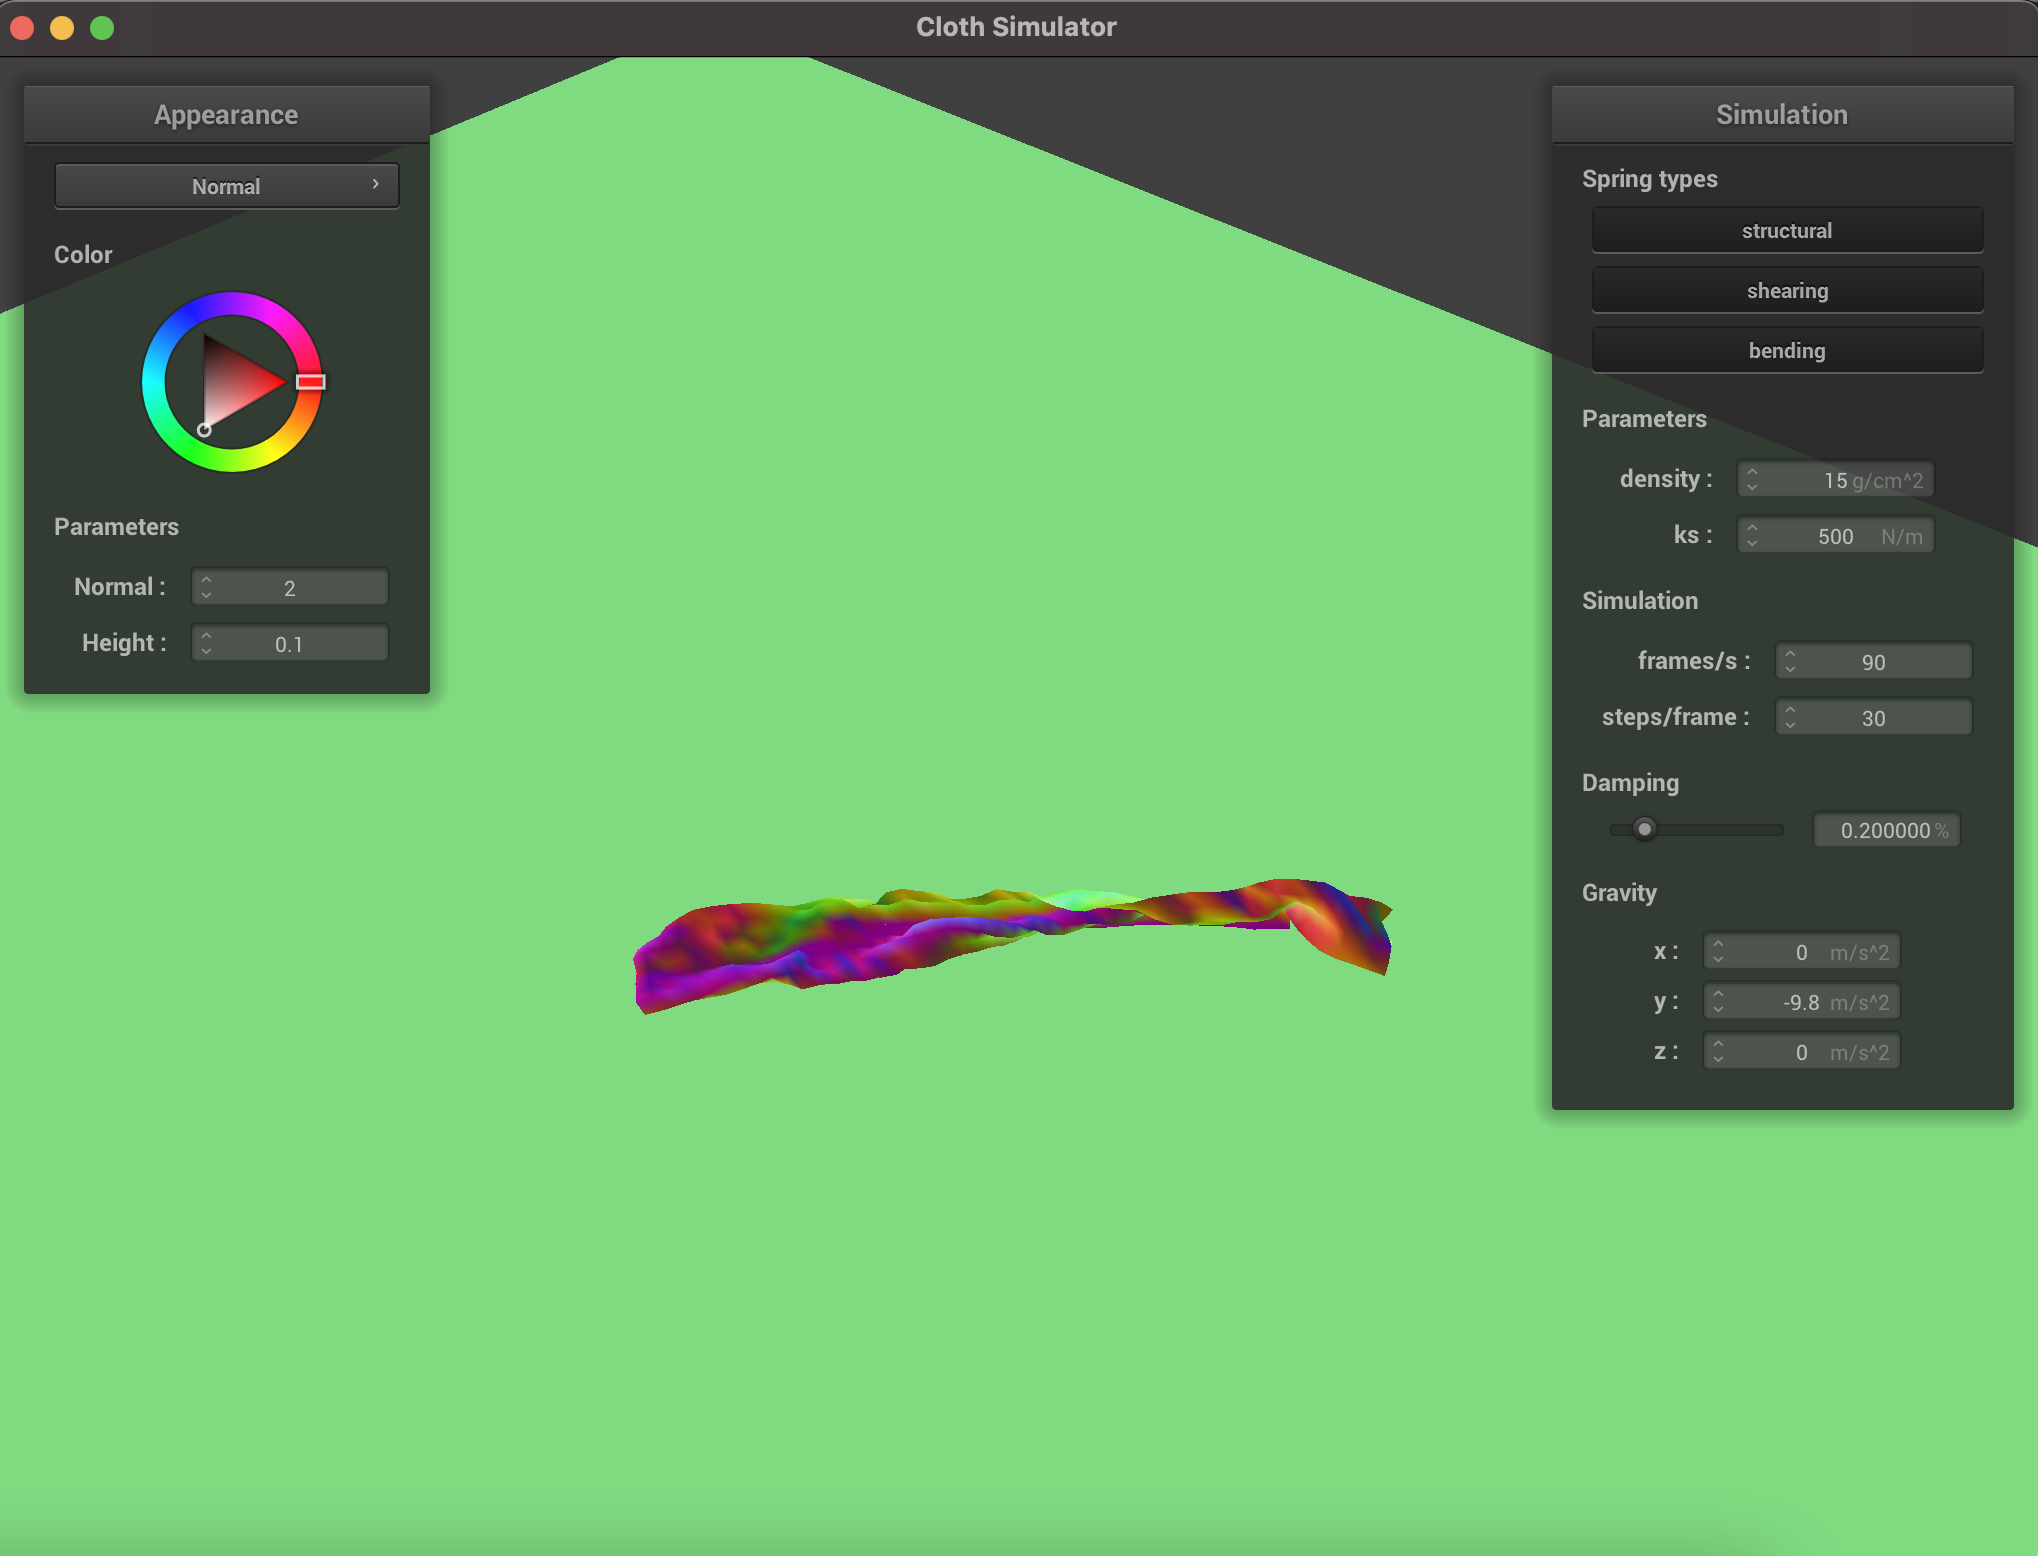
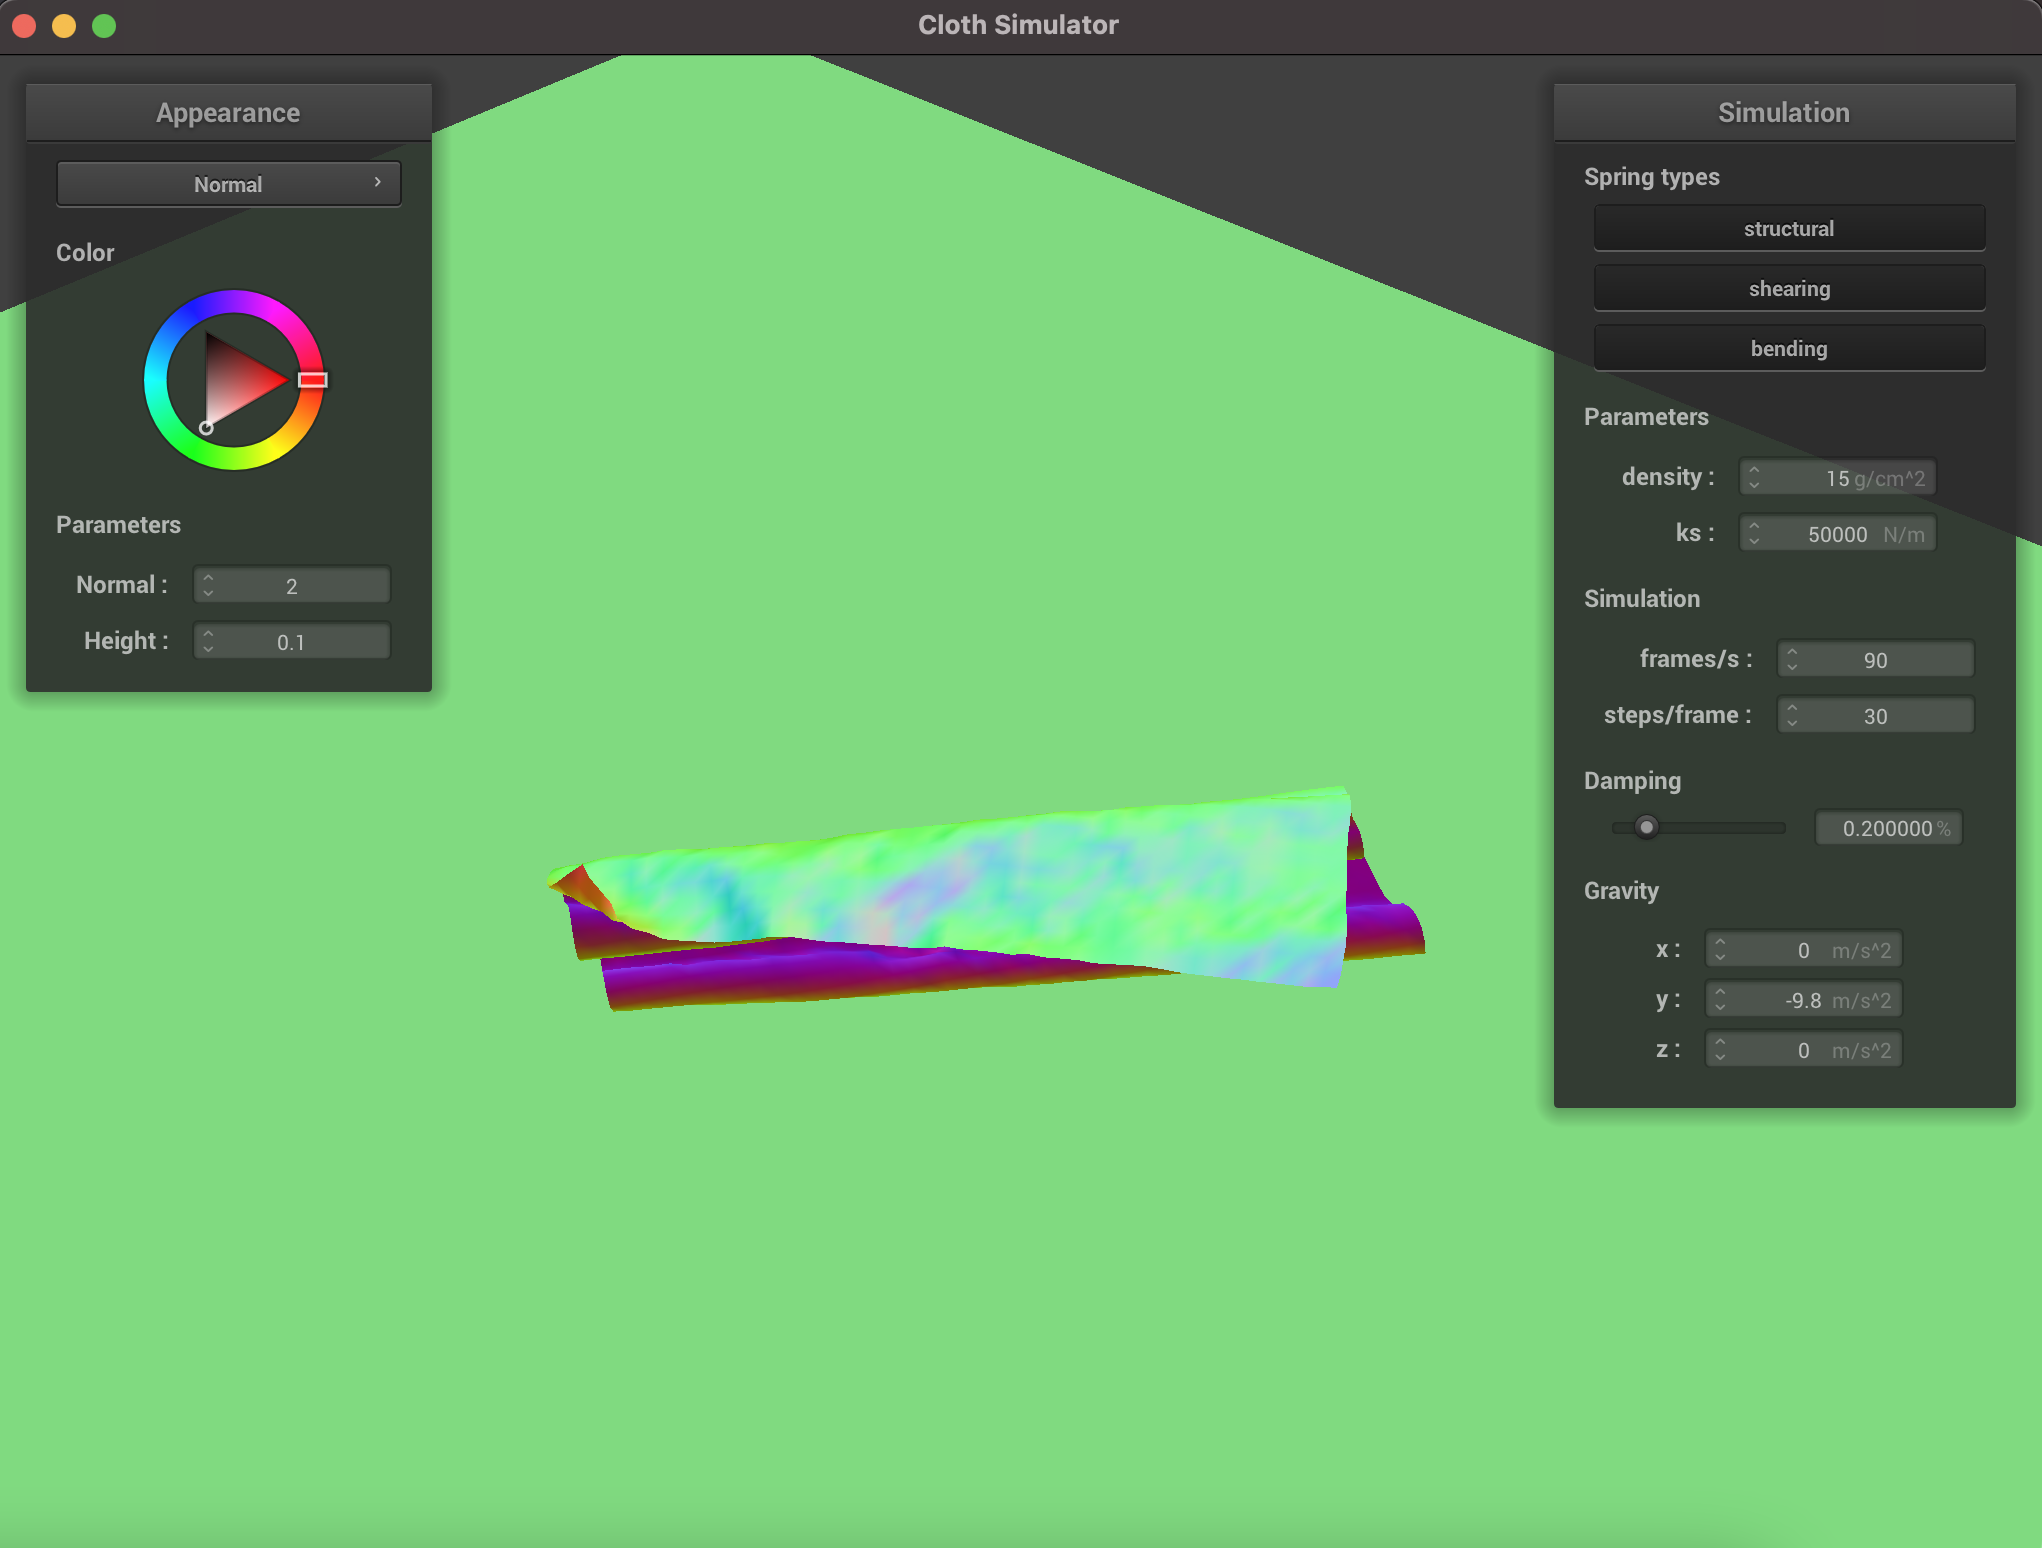
Changing the spring constant ks changes the amount of ripples after the cloth has finished falling. The higher the spring constant, the more stable the cloth becomes. The lower the spring constant, the more ripples and instability in the cloth.
|
|
|
|
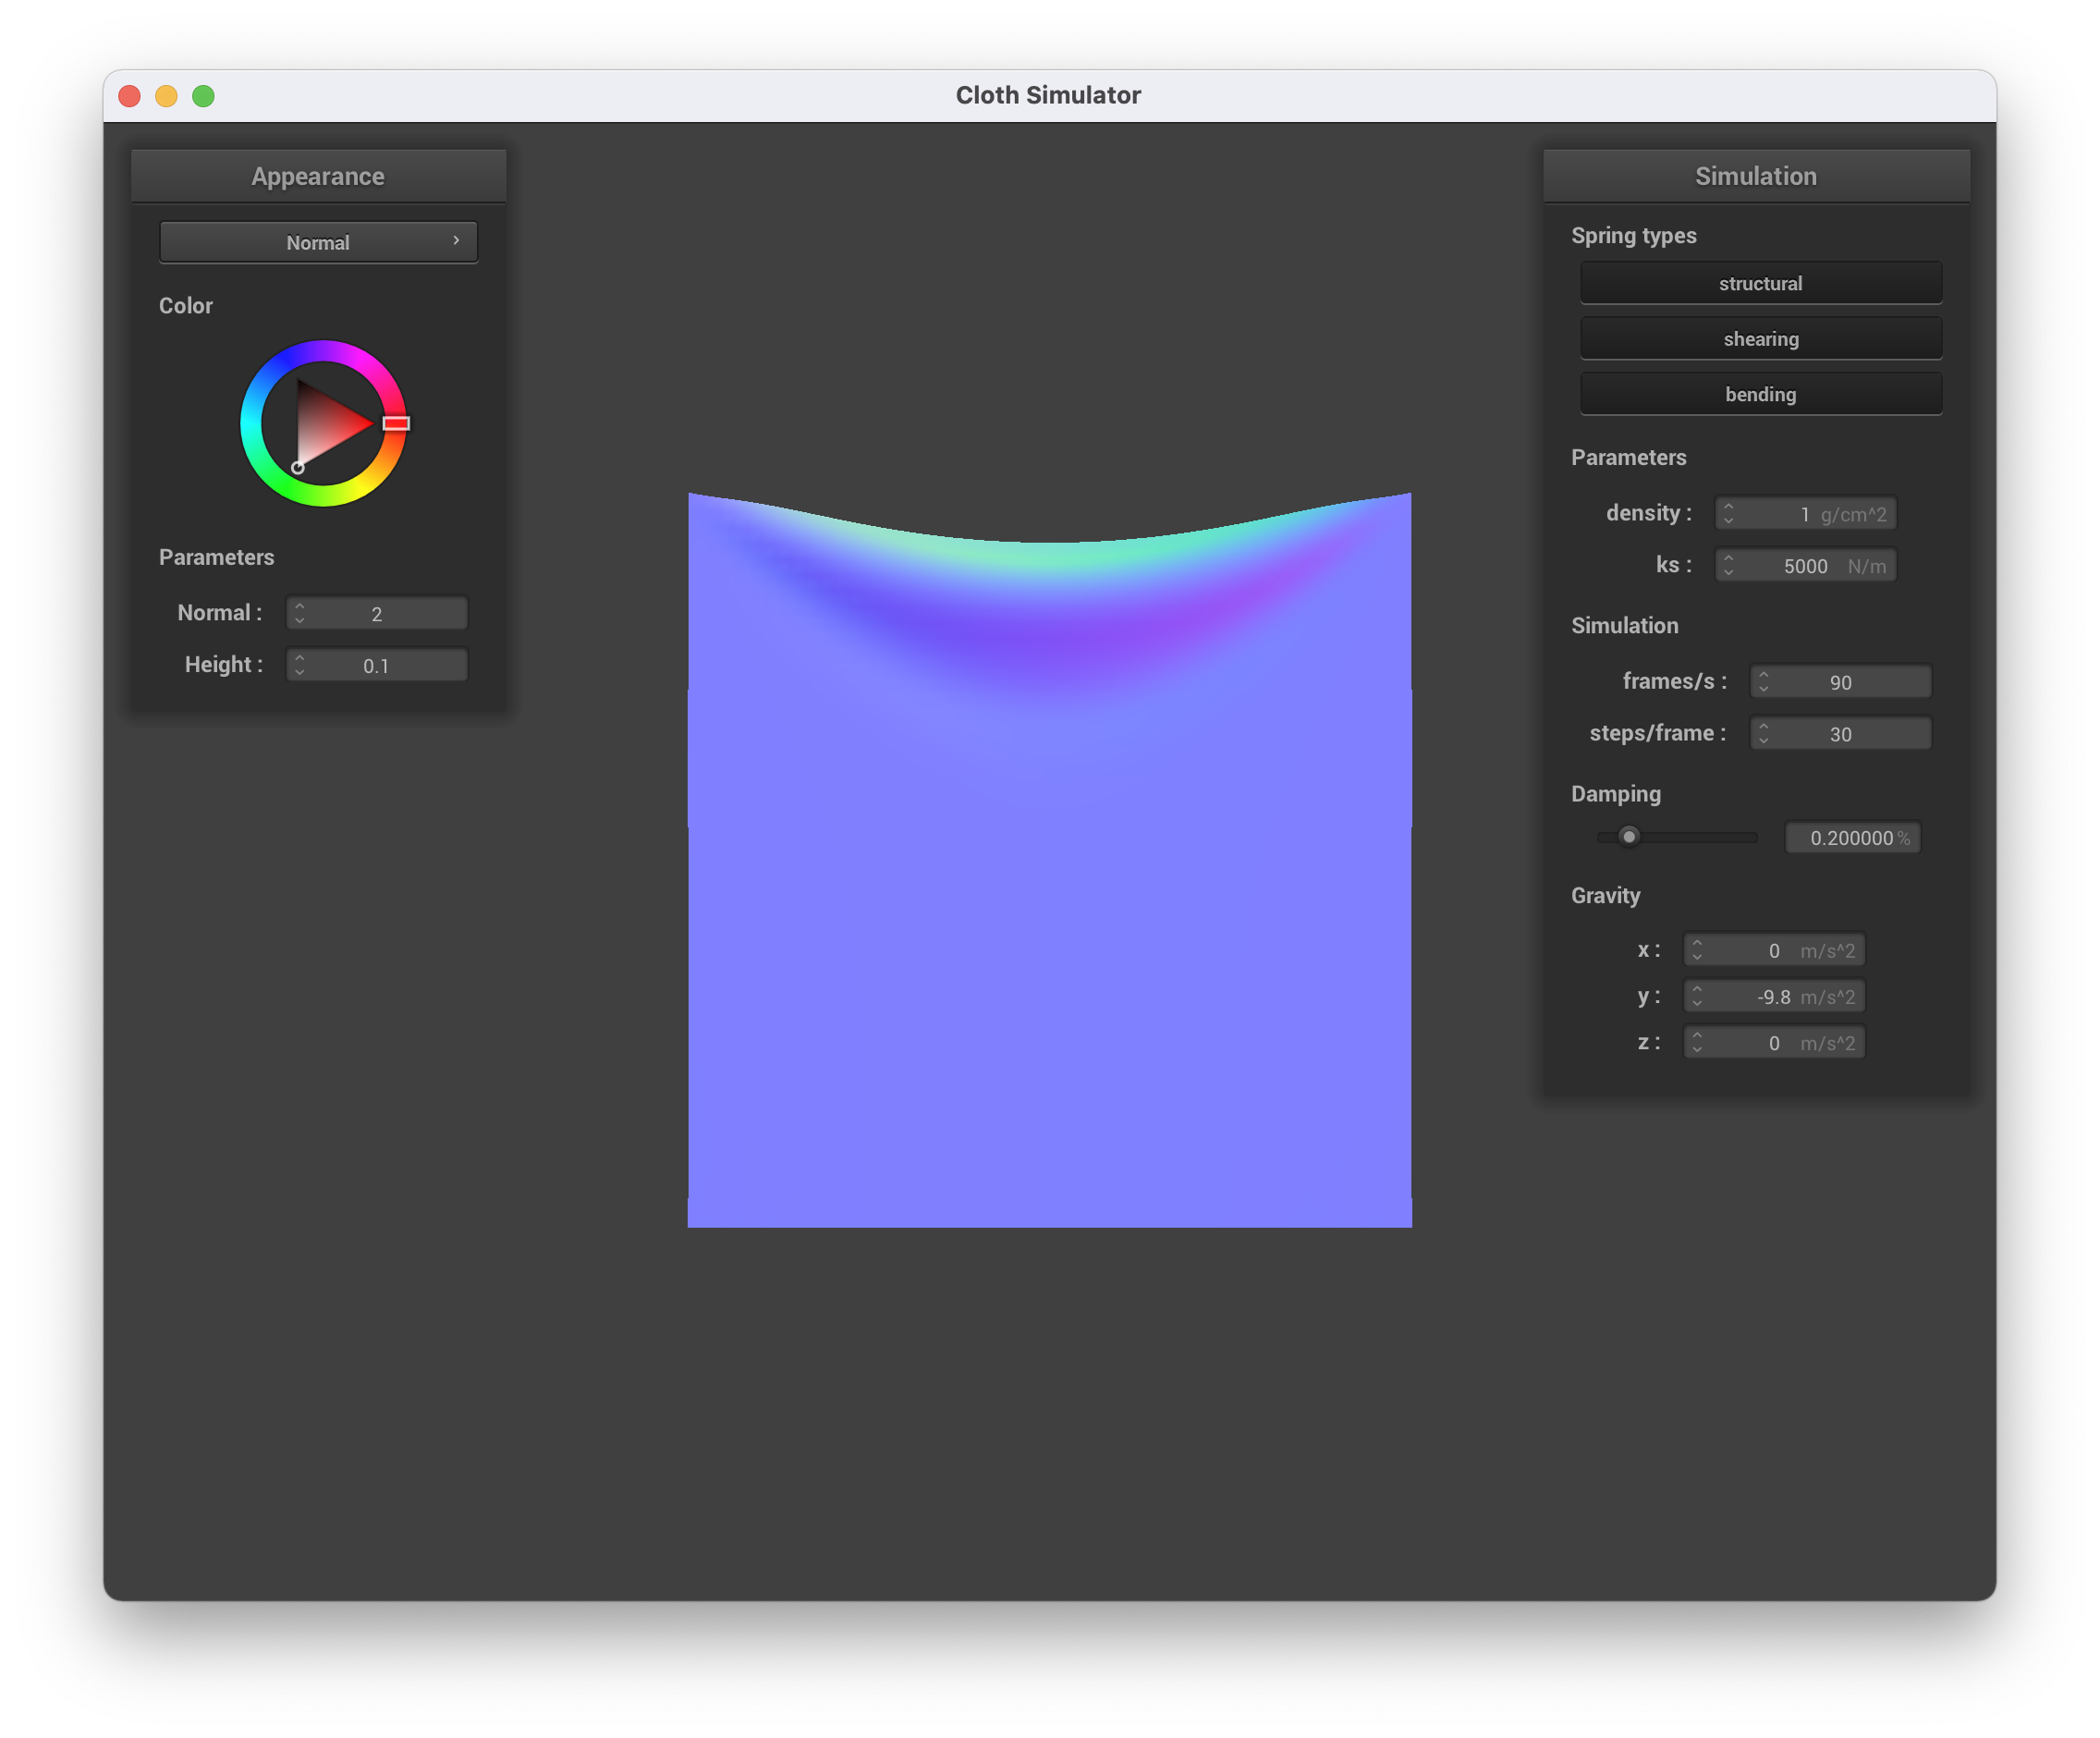
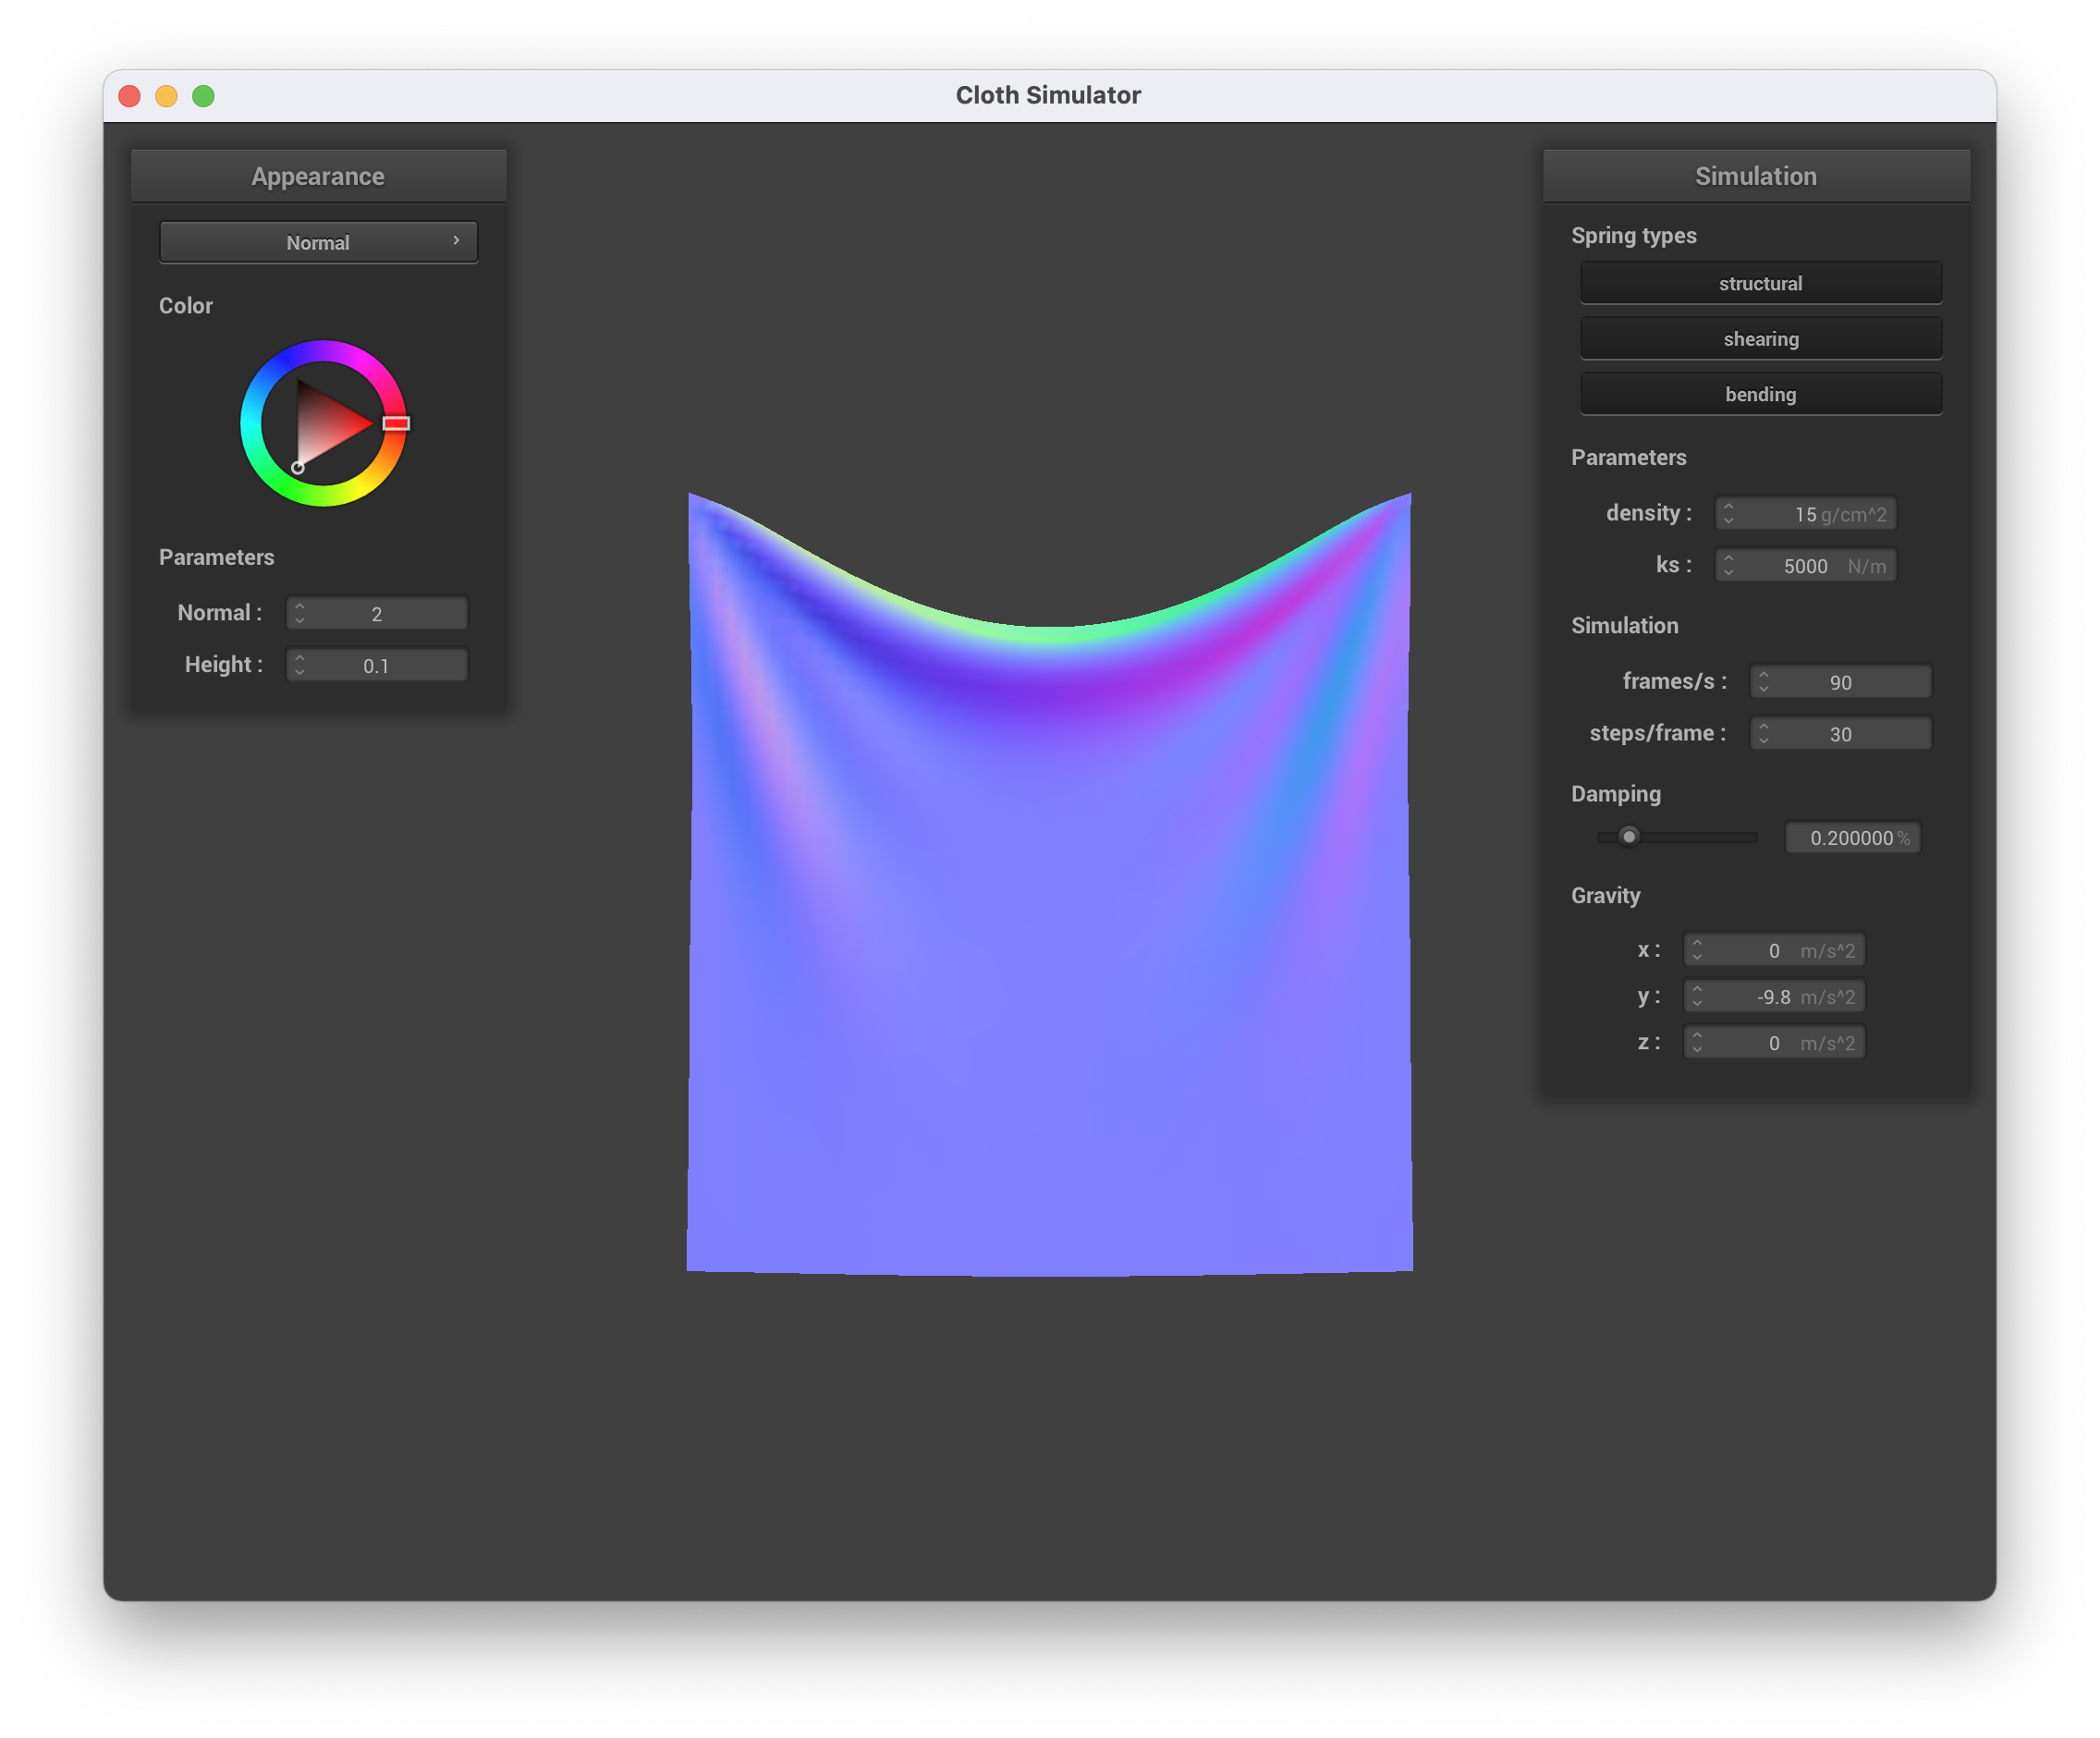
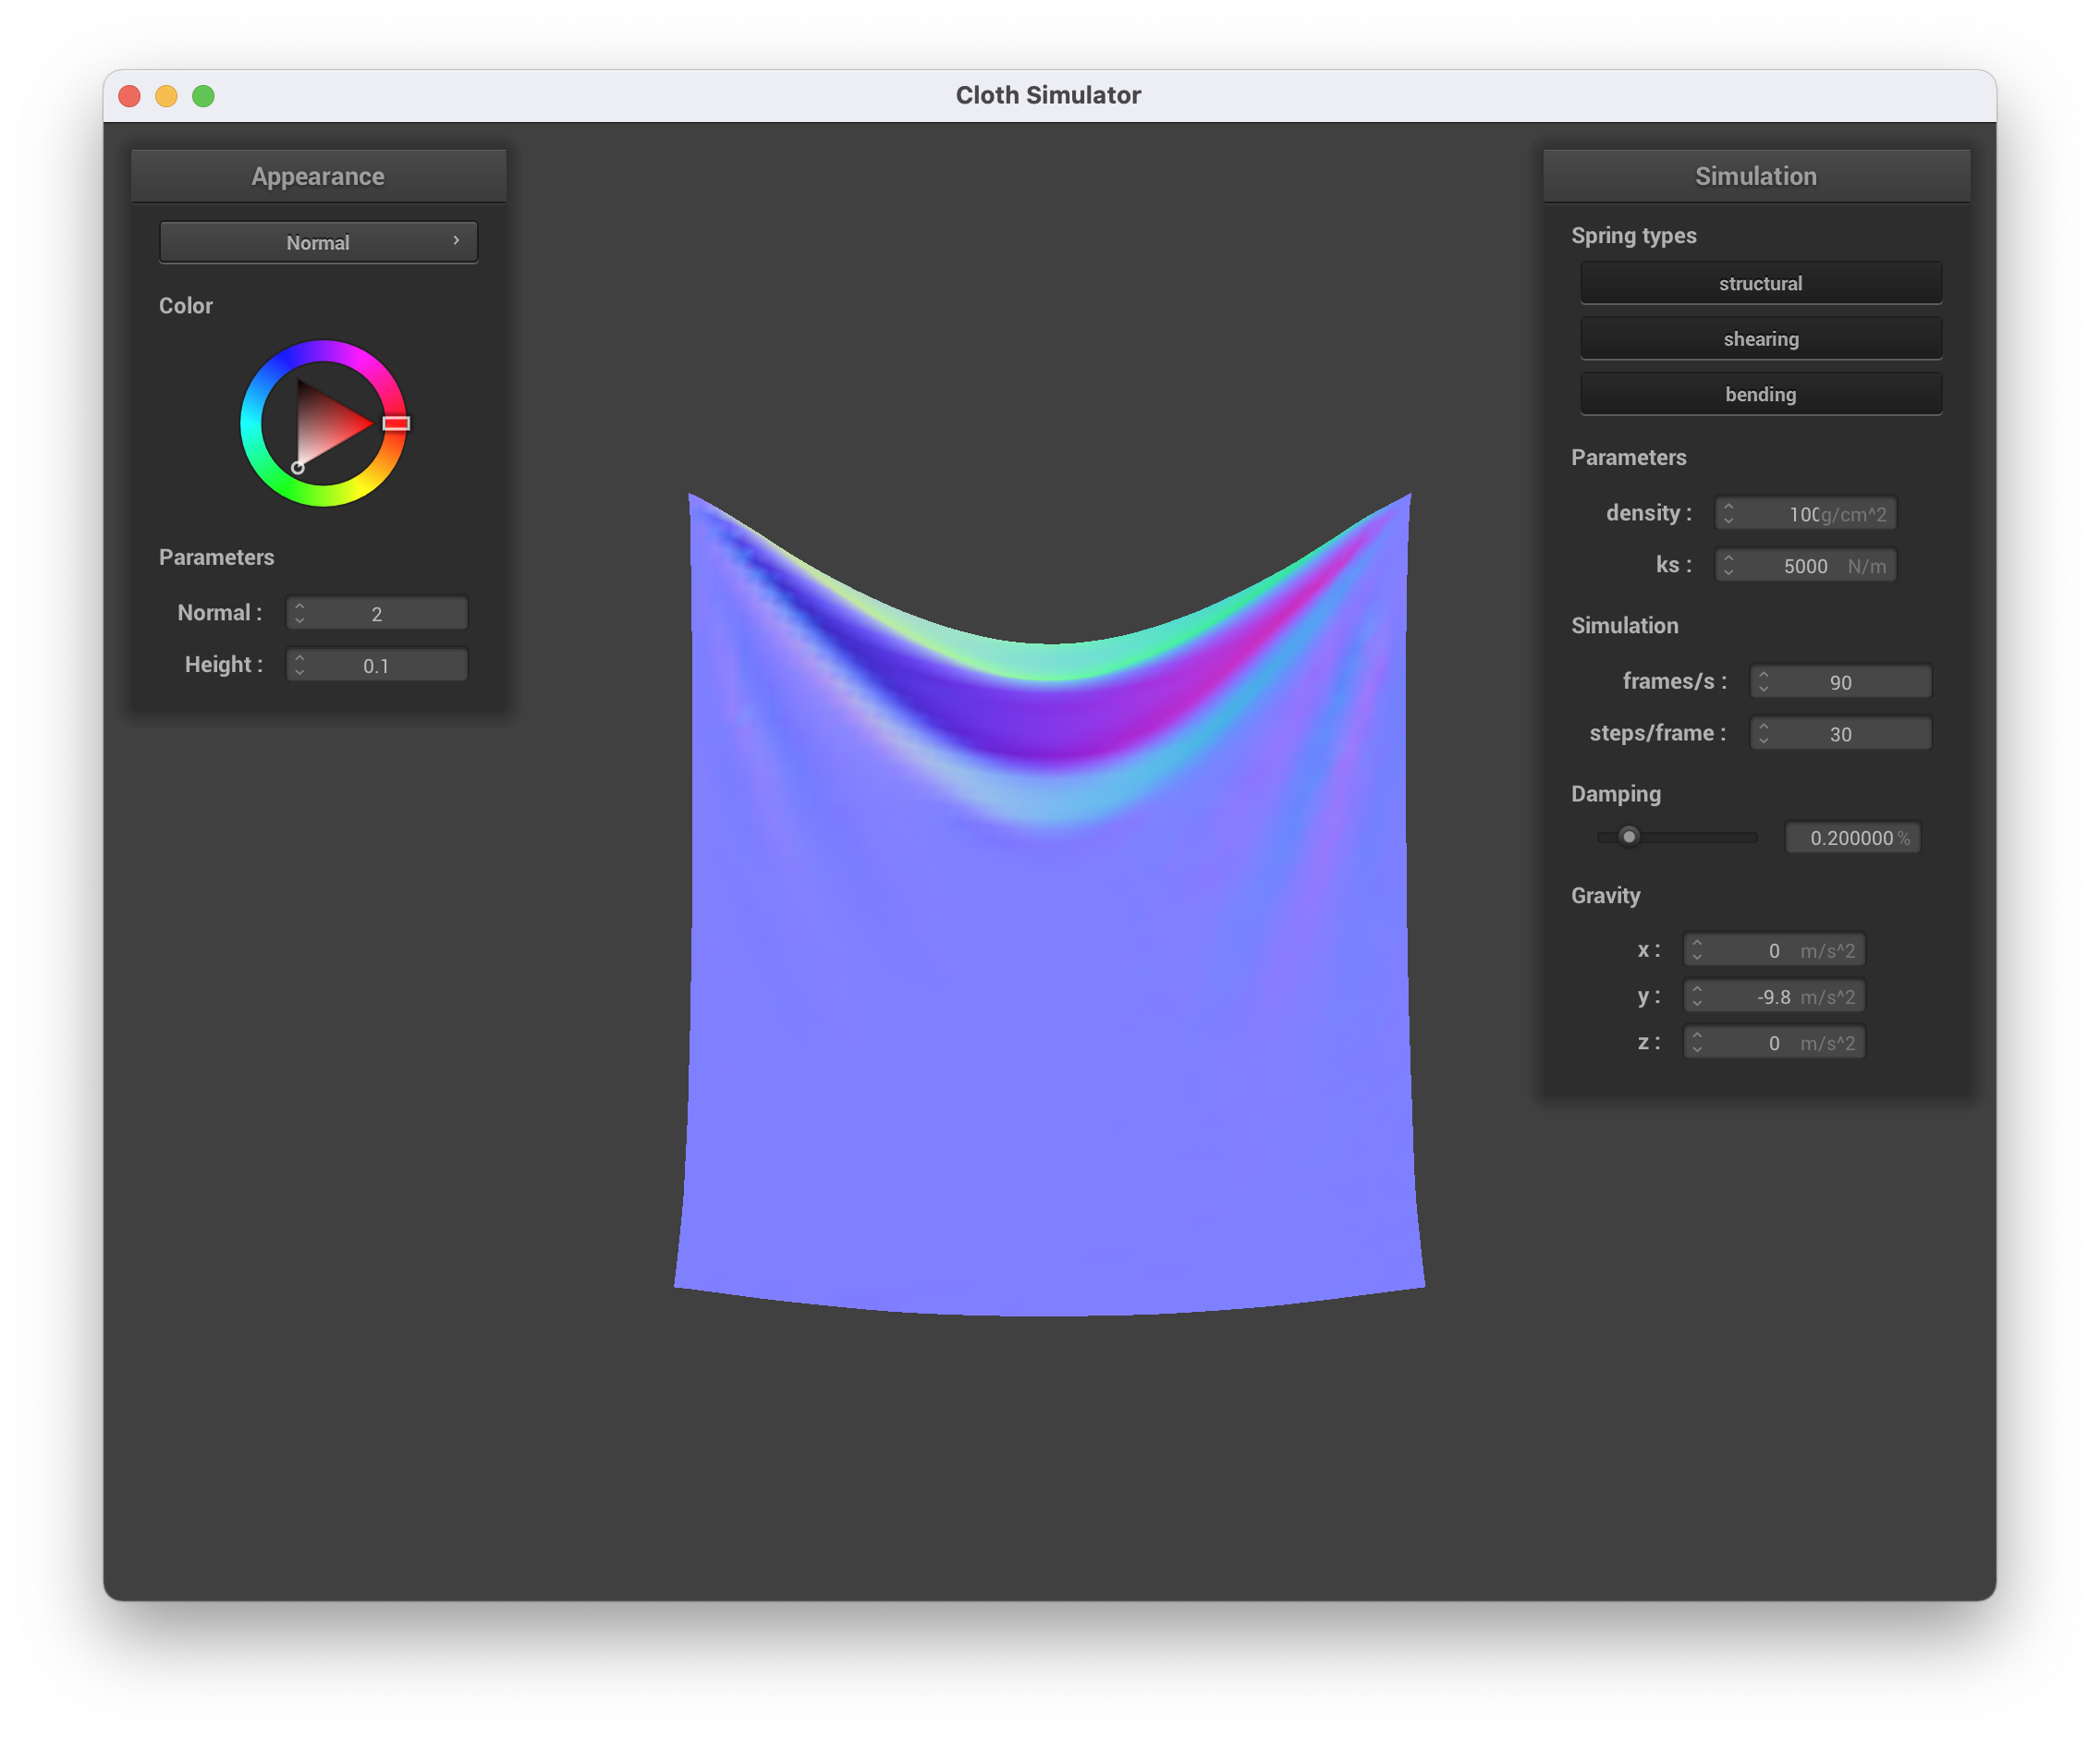
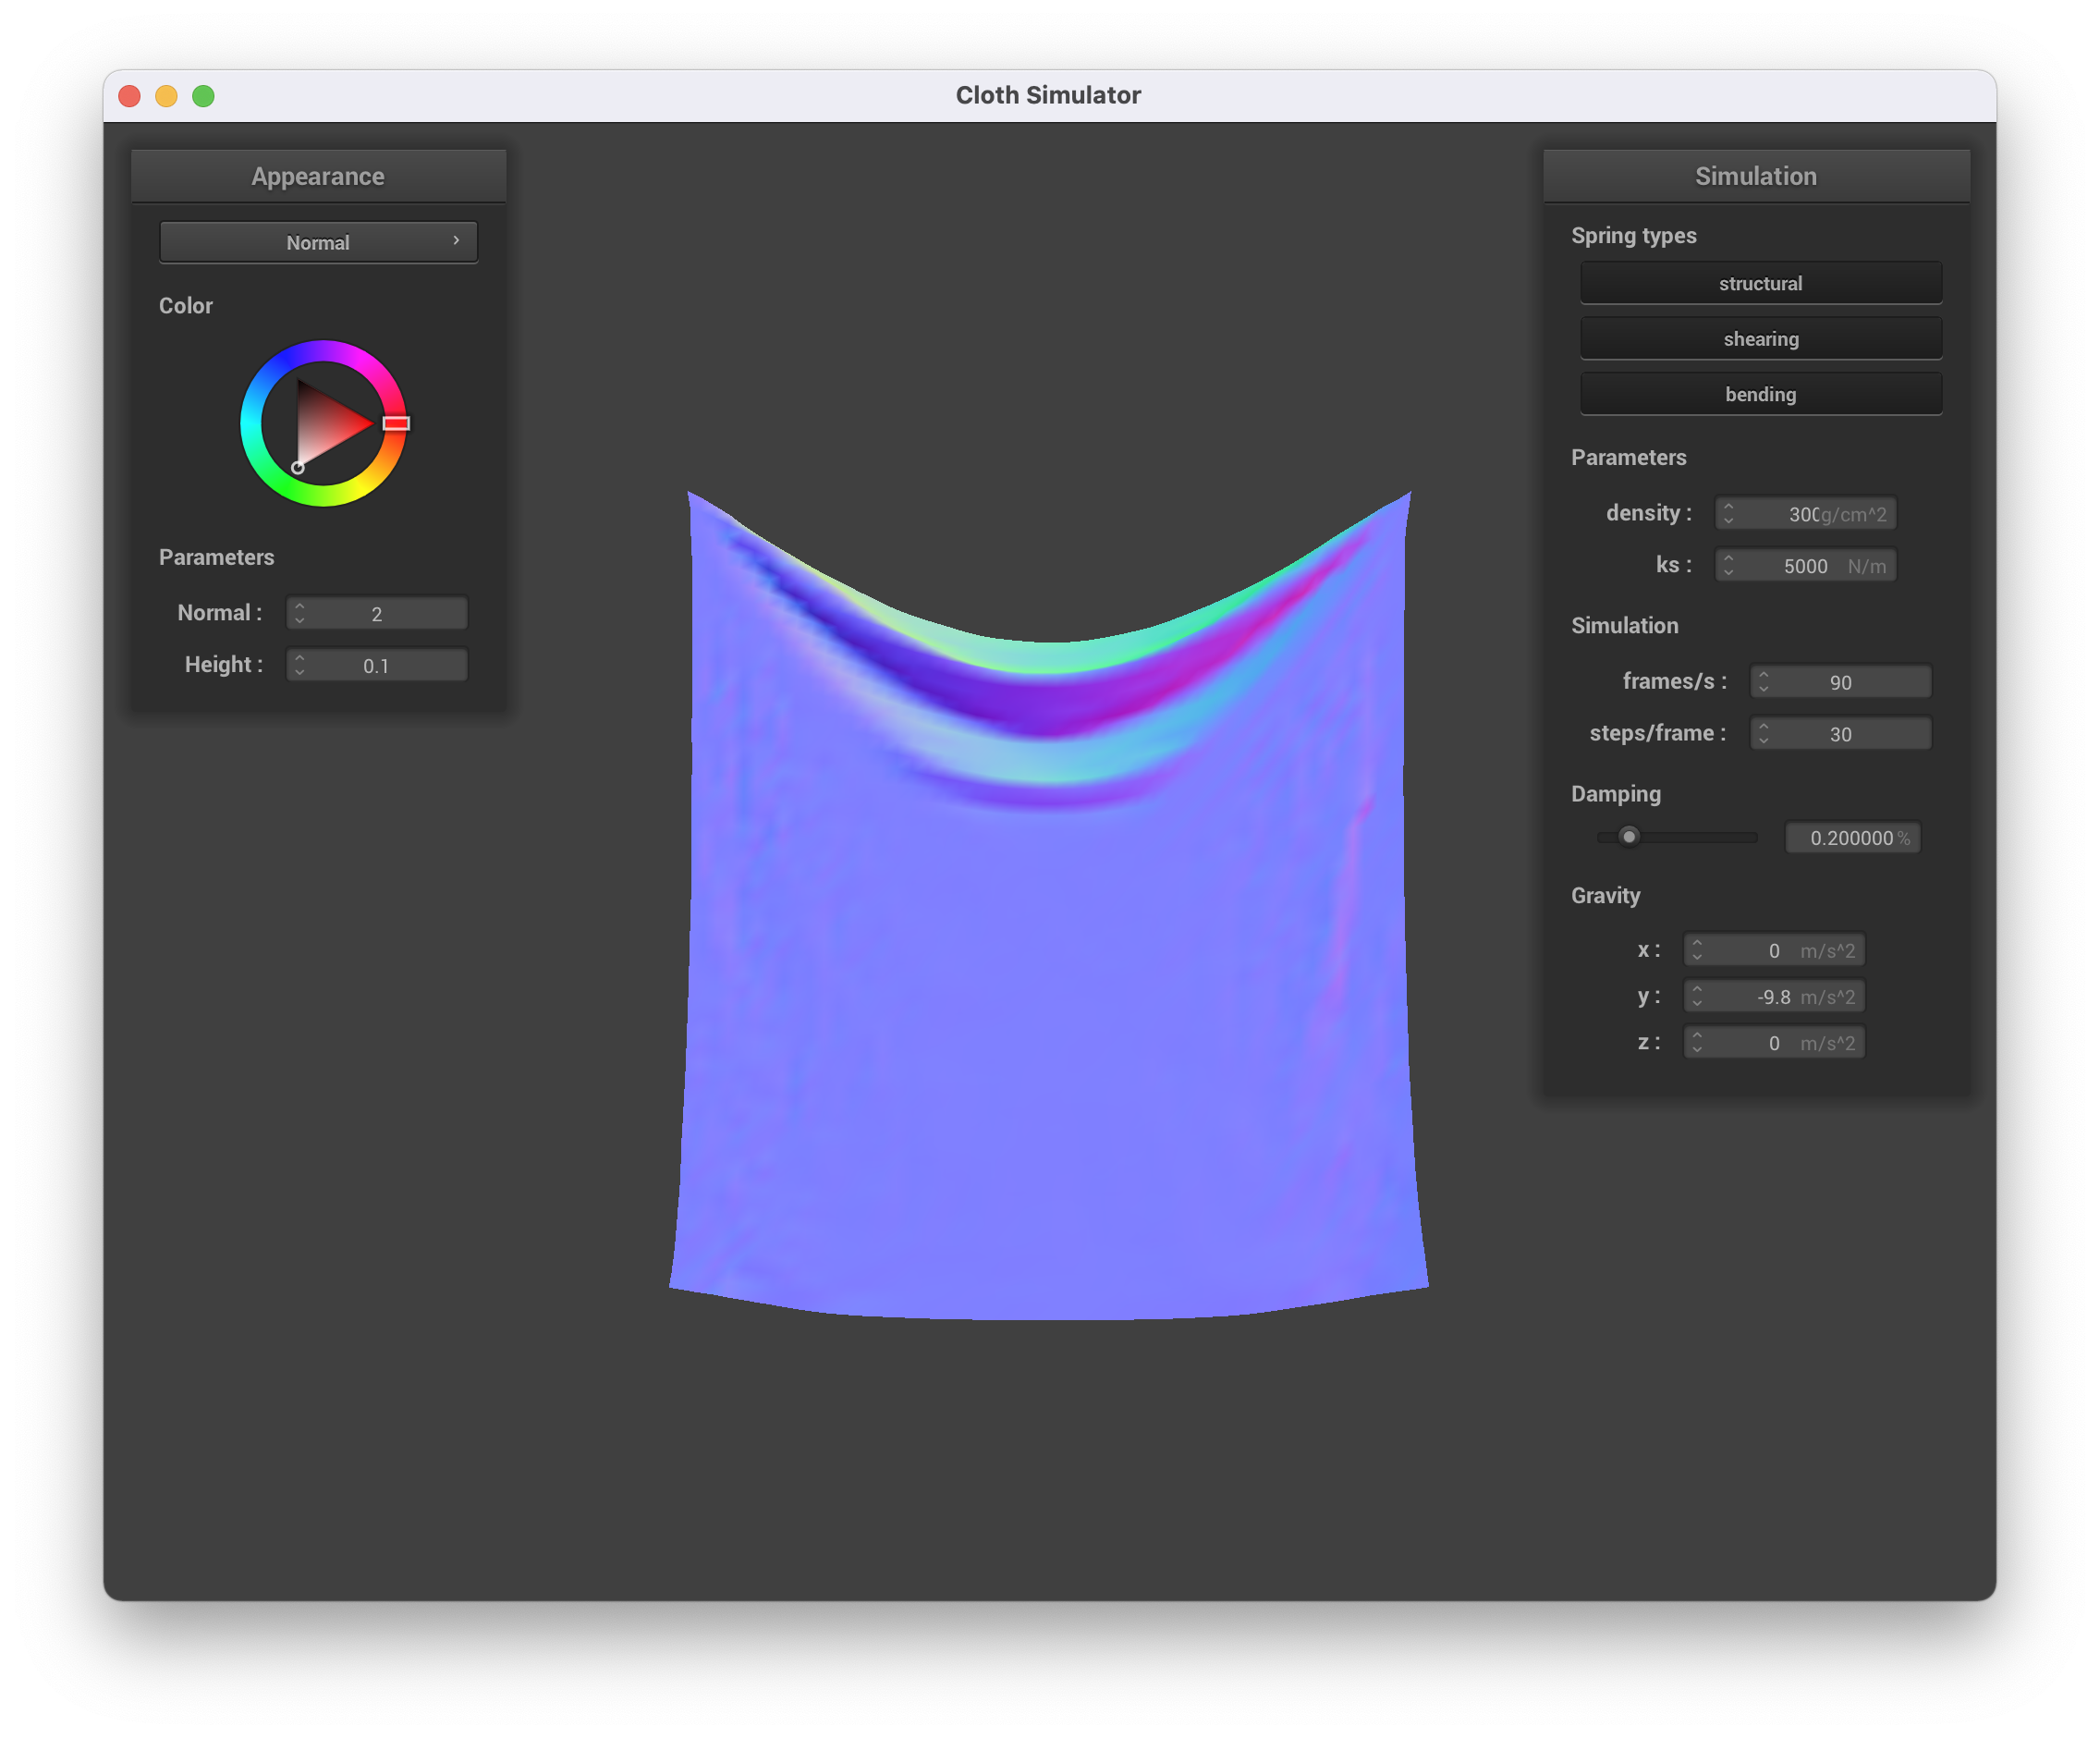
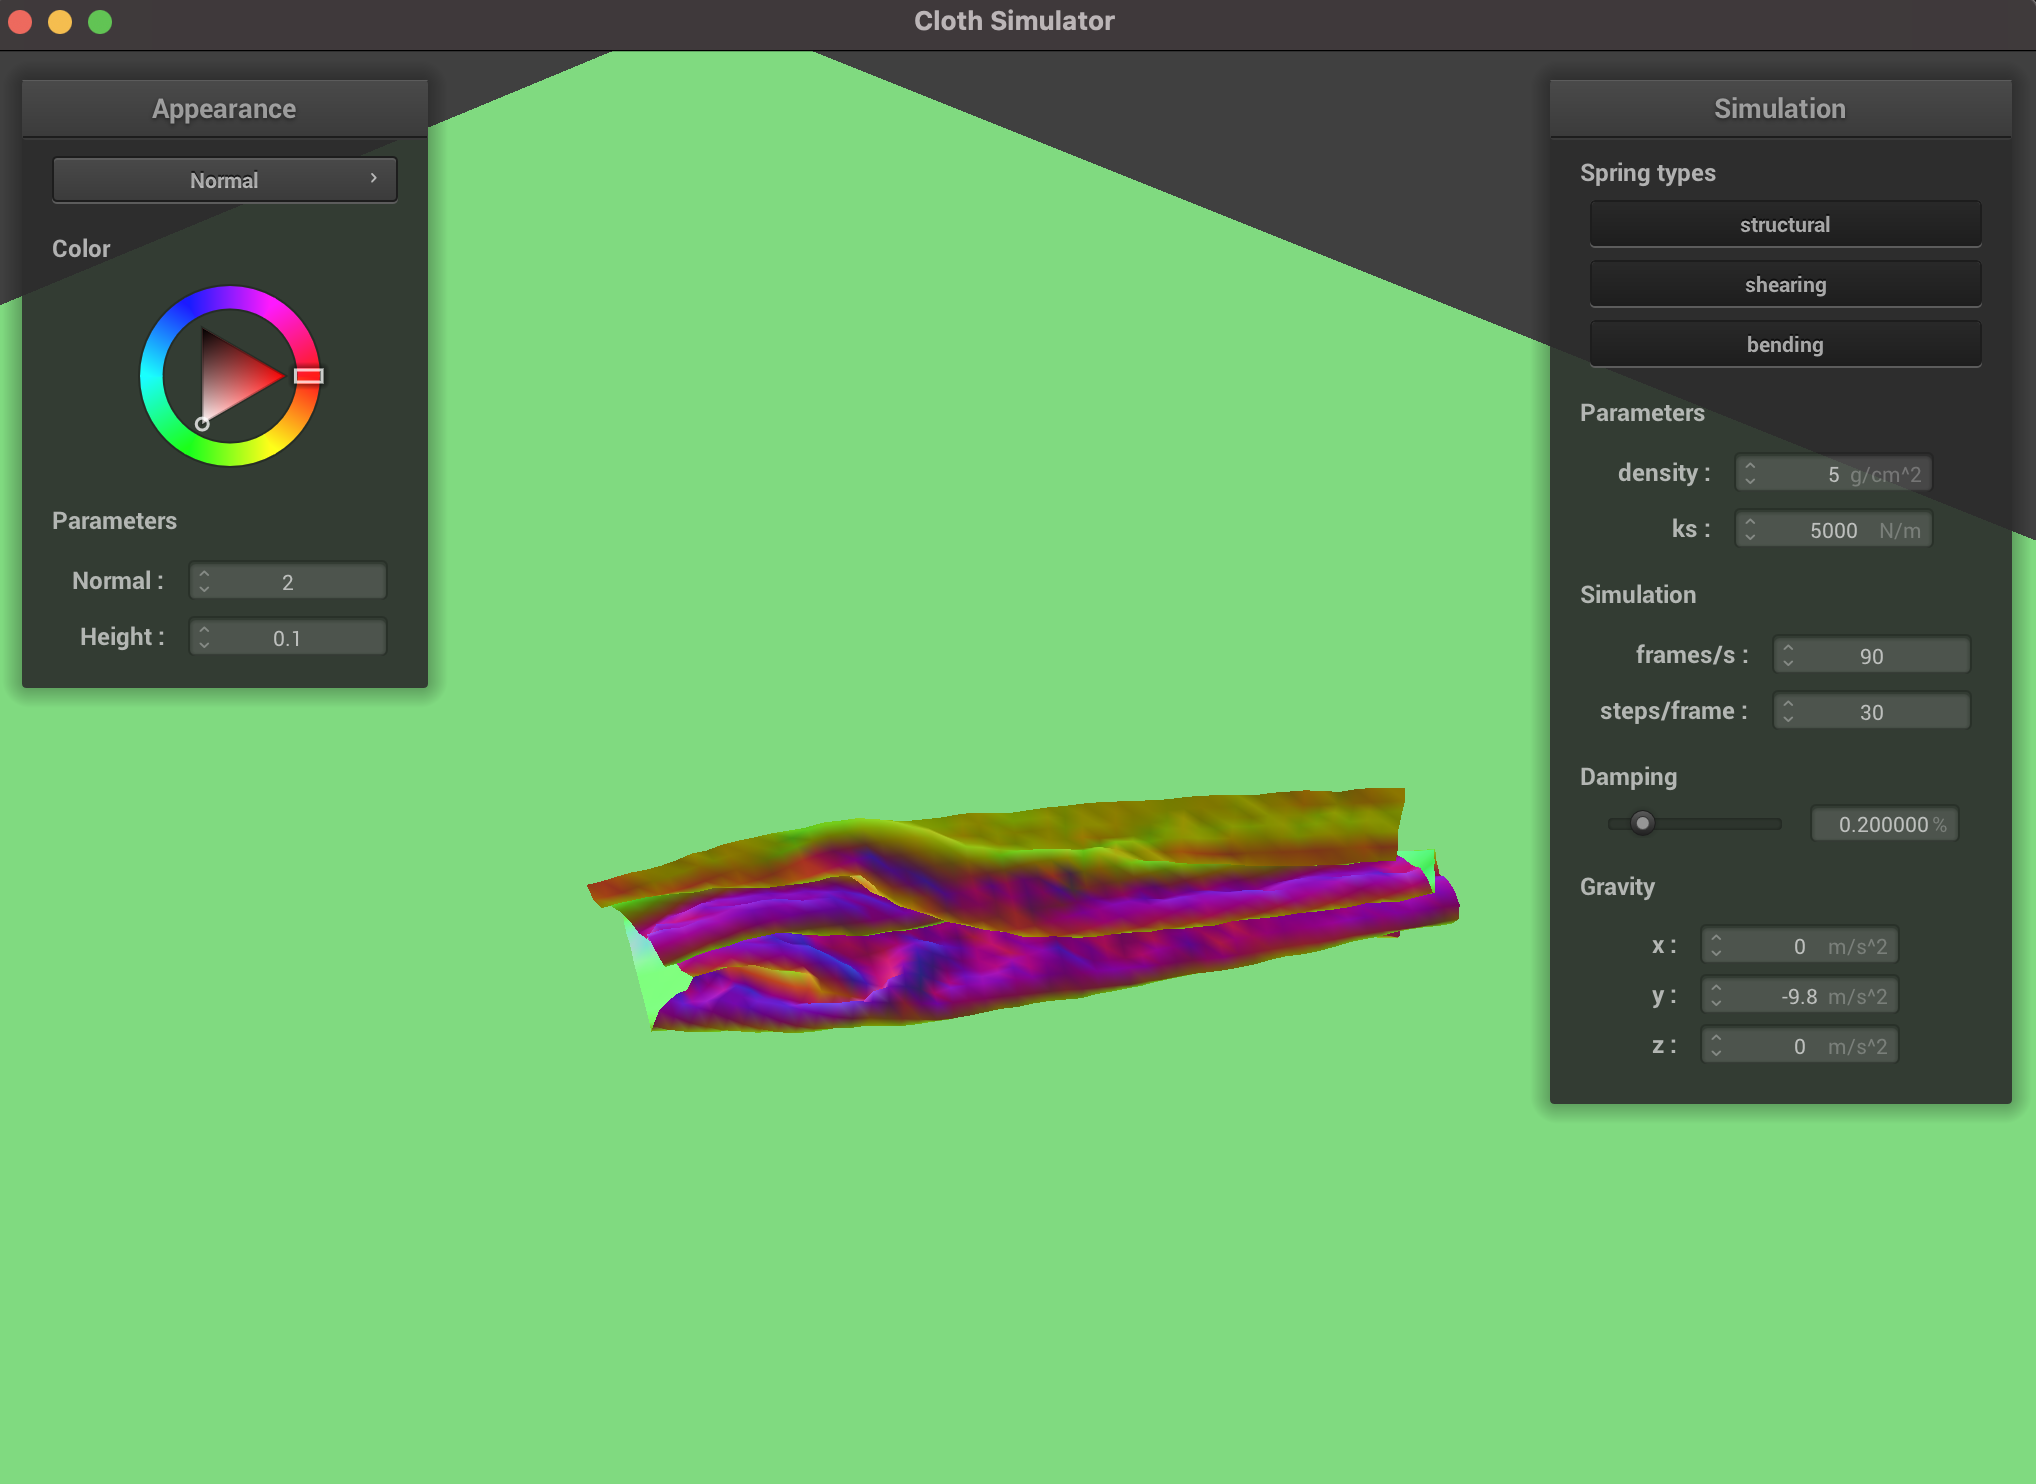
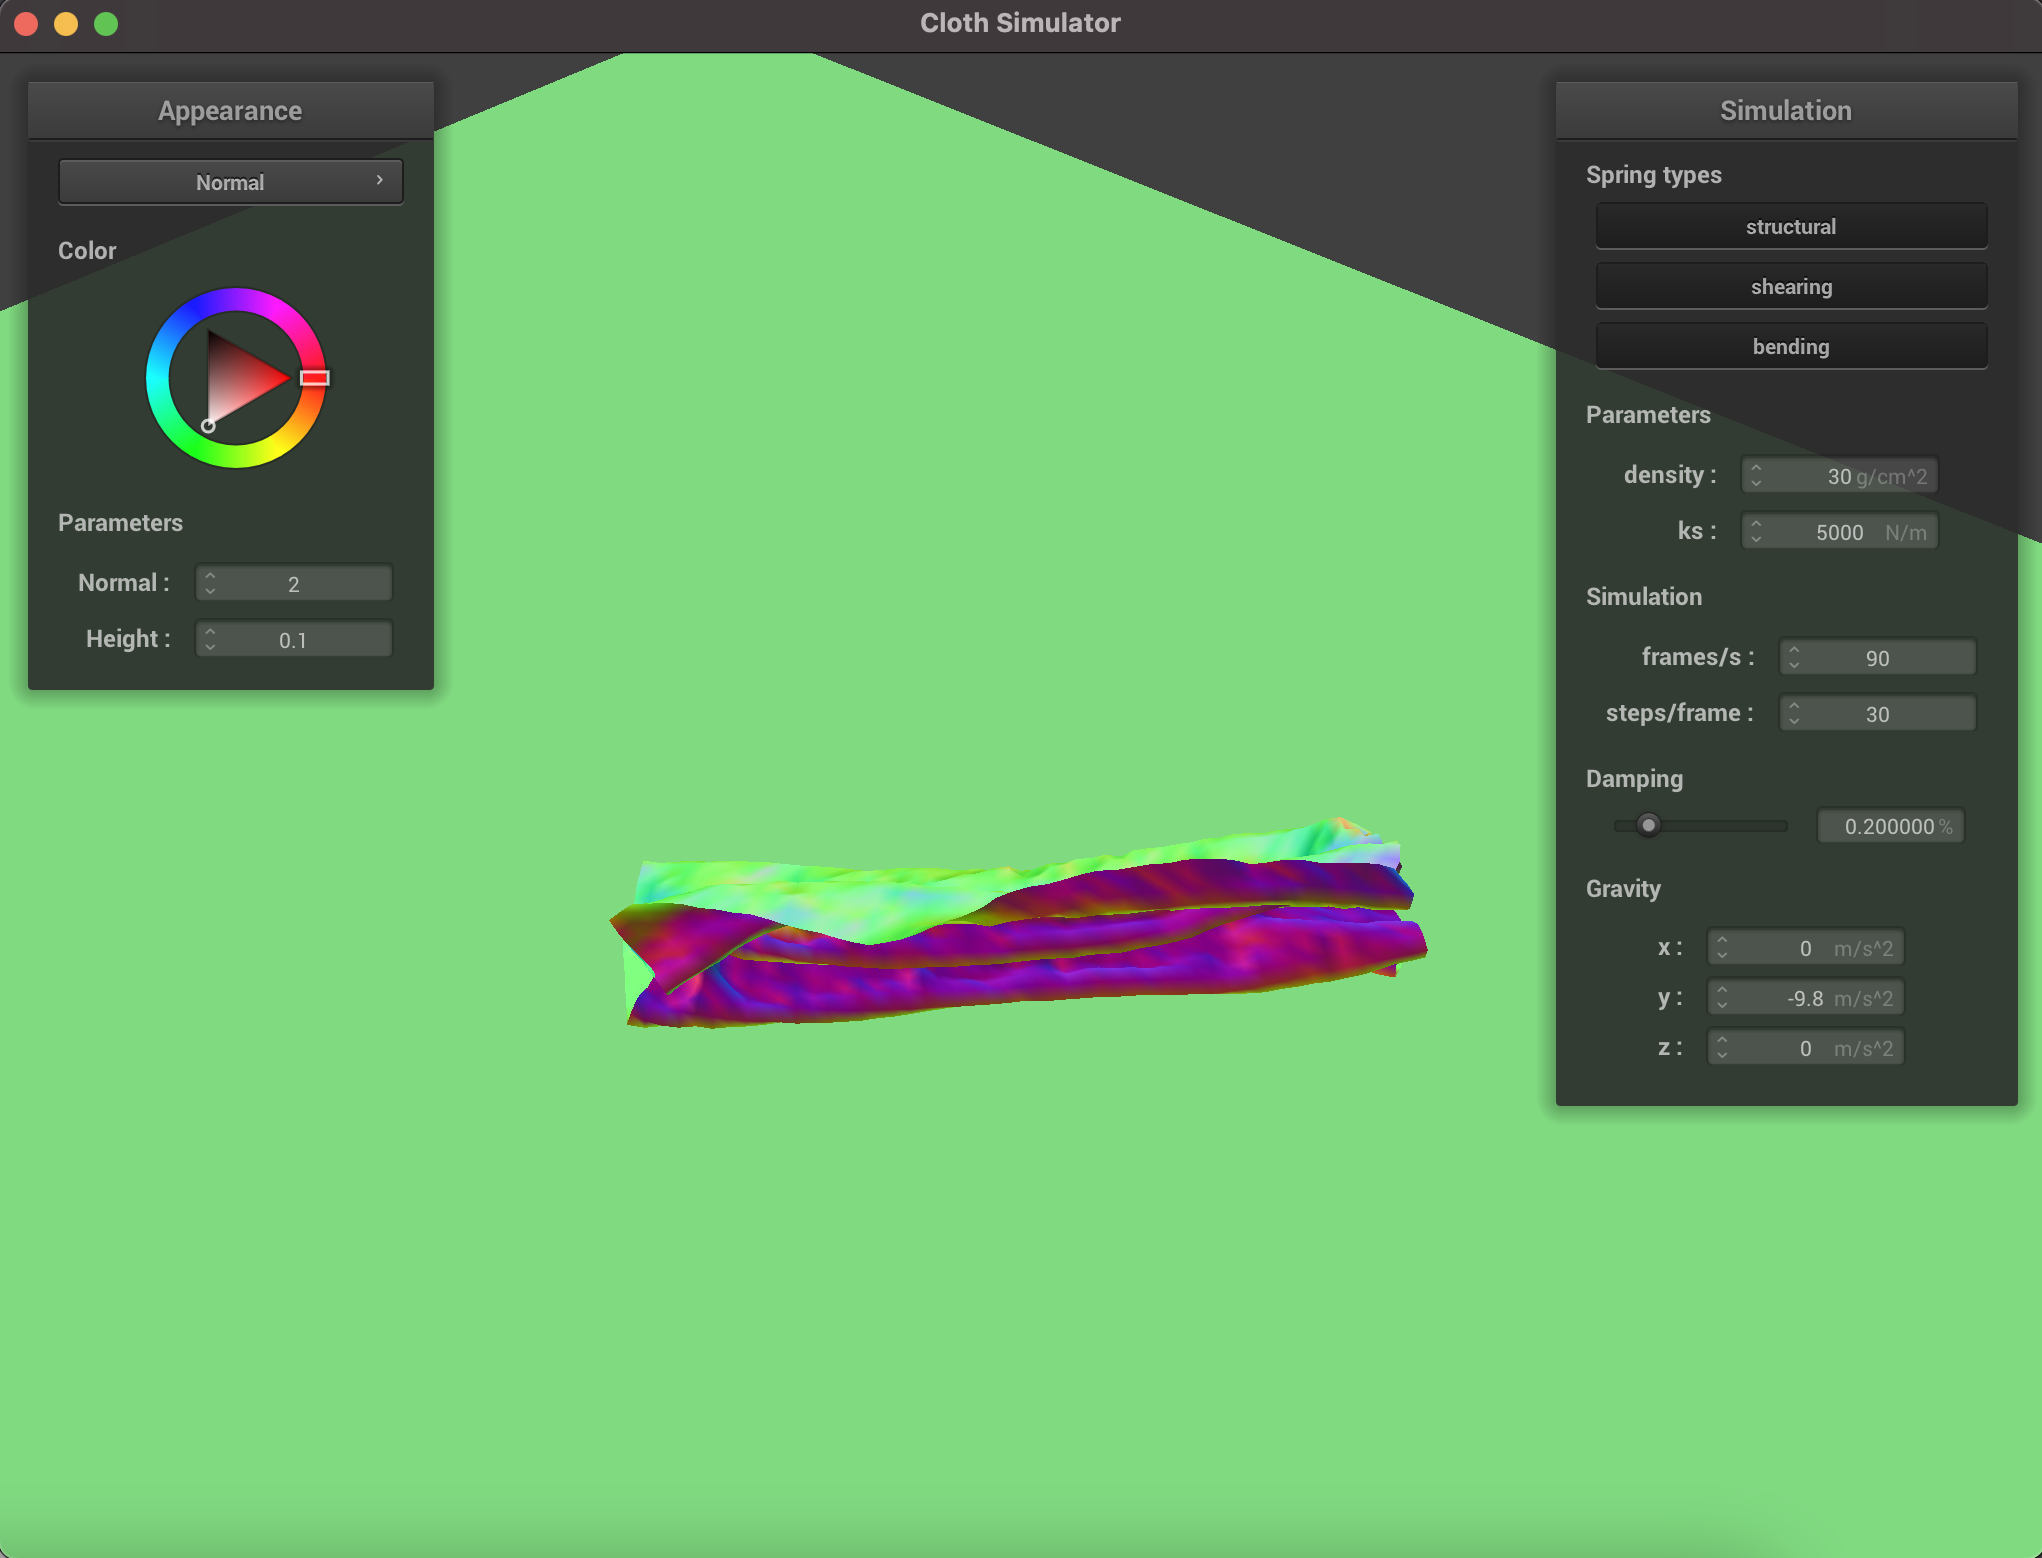
Changing the density value makes the cloth heavier. Increasing the density value will make the cloth hang lower and have more ripples in it. Decreasing the density value will make the cloth just hang and be stable.
|
|
|
|
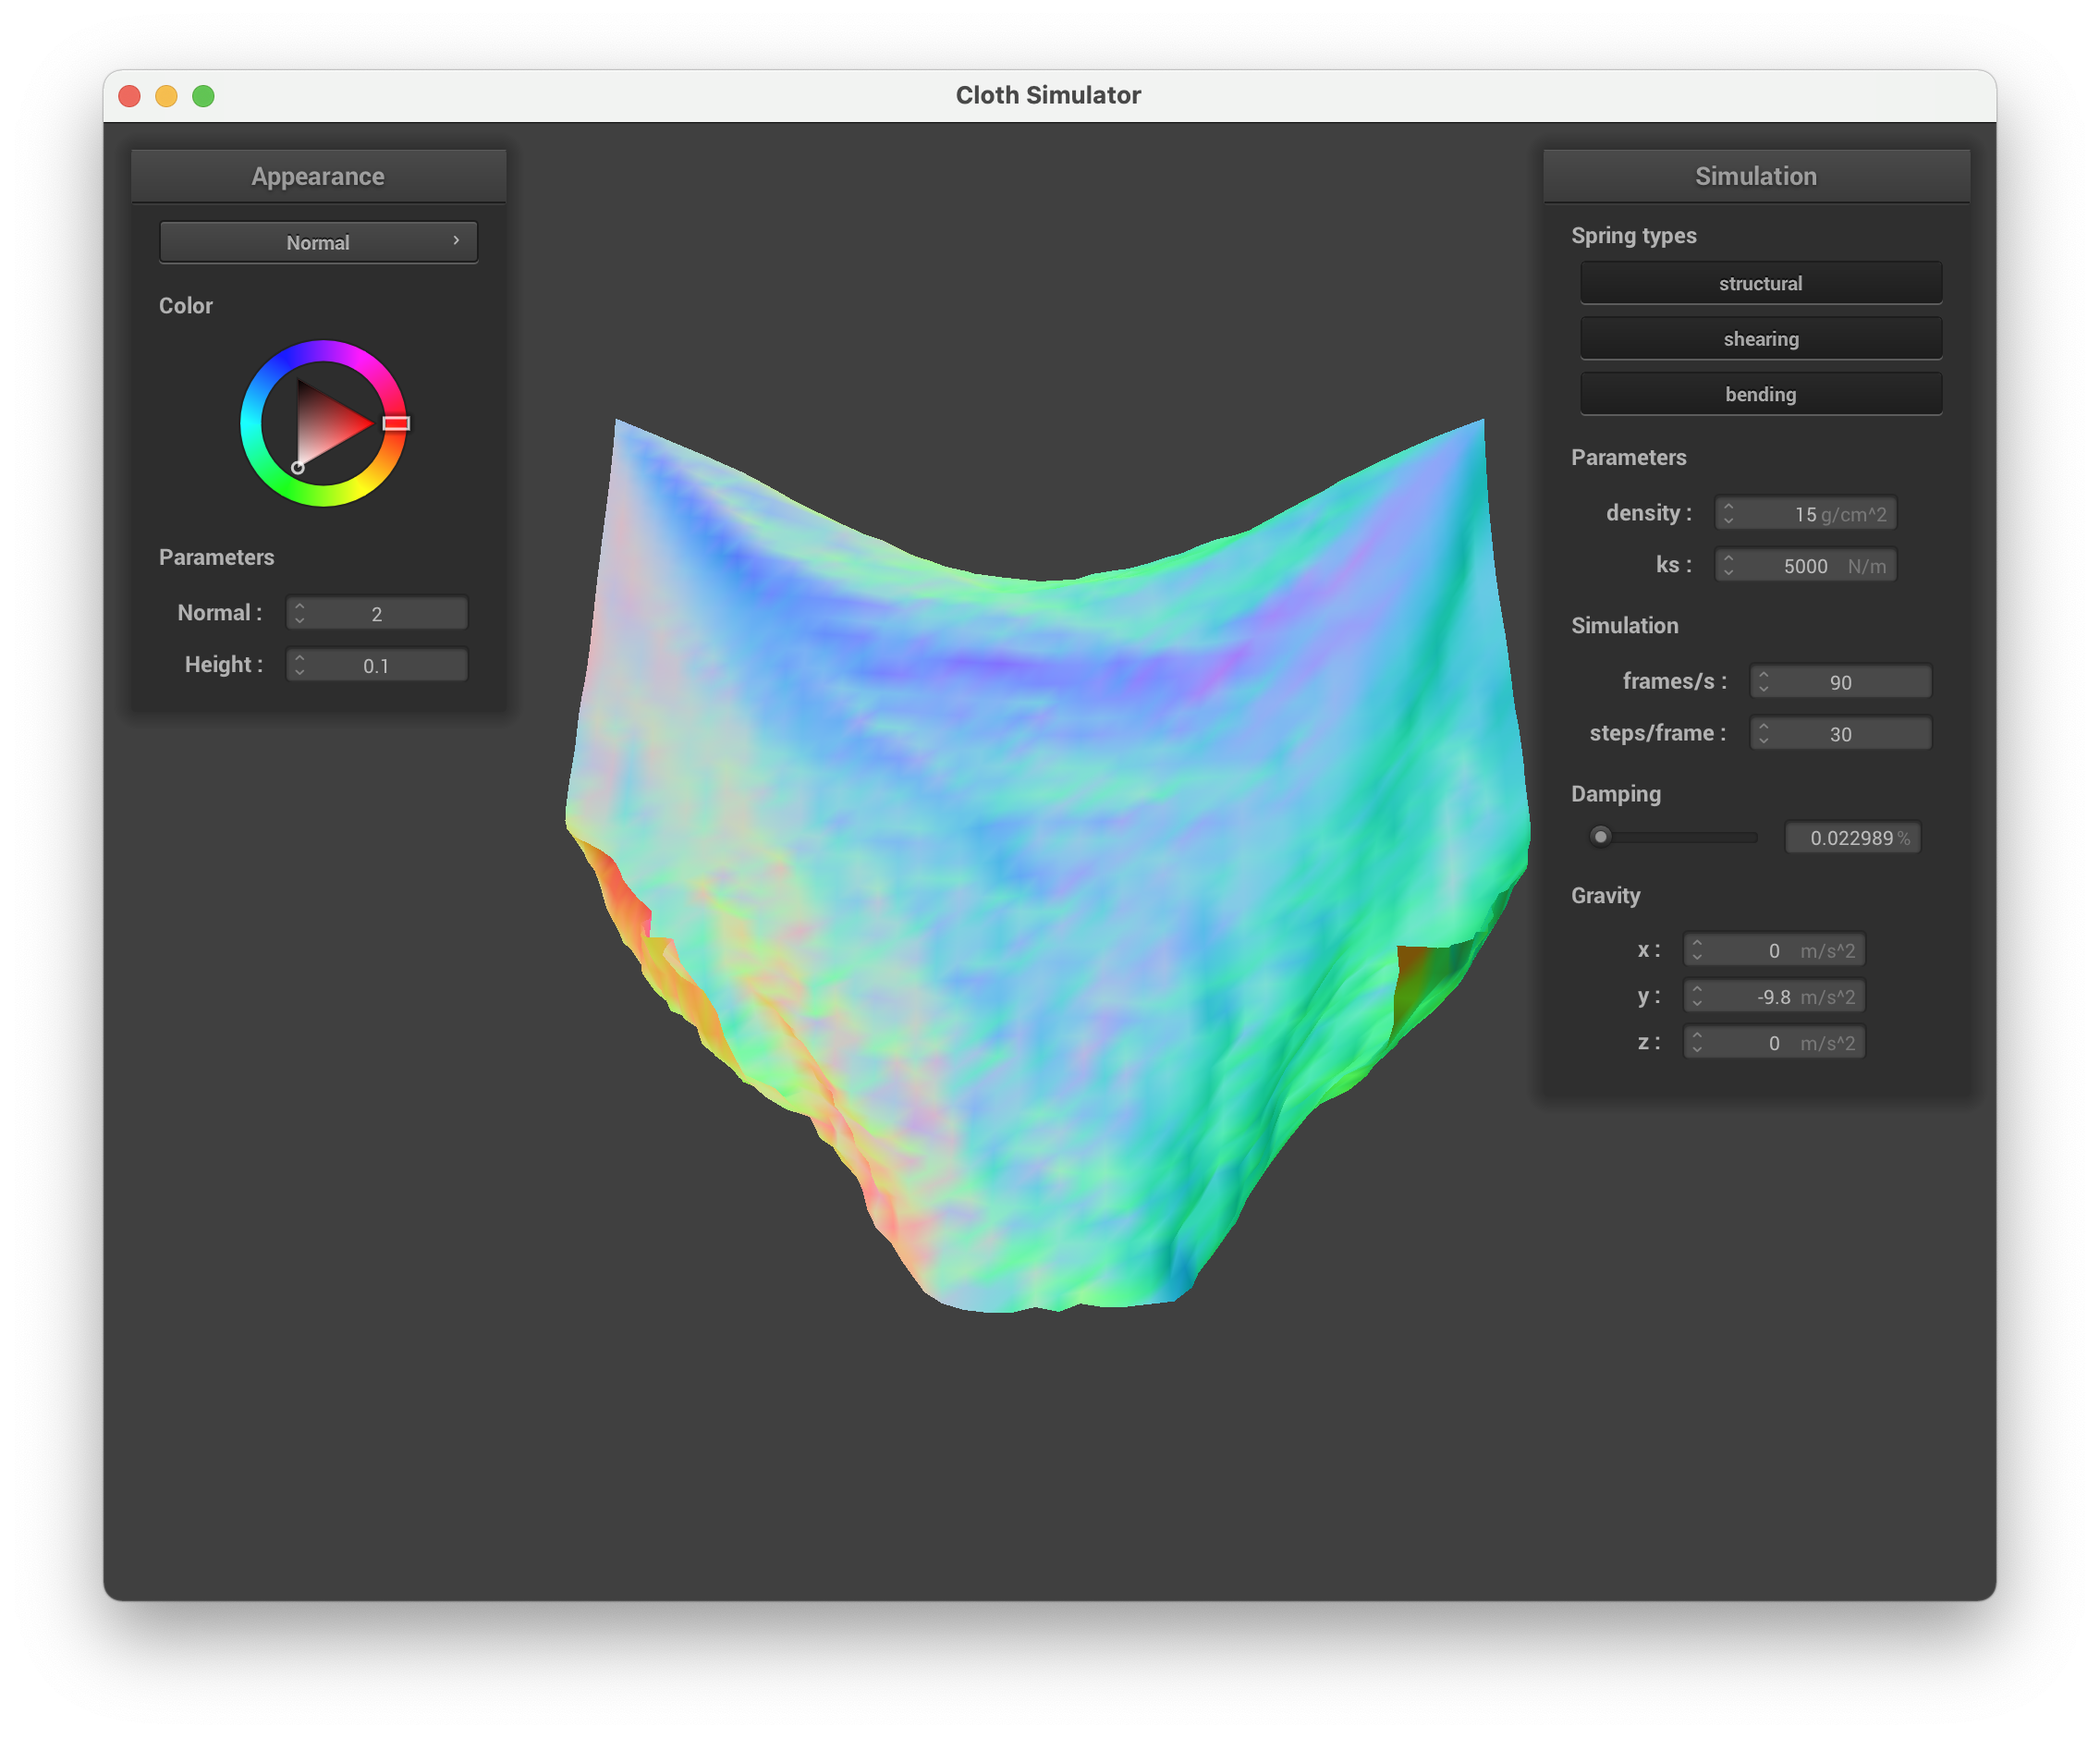
Changing the damping value makes the cloth fall at different speeds. A higher damping value leads to the cloth falling at a slower rate compared to when the damping value is lower which is when the cloth falls faster. This happens because a higher damping value will prevent the other forces taking their full force causing the cloth to fall slower. A higher damping value leads to the cloth falling smoother and with less ripples since the forces are more uniform compared to when the damping value is lower and the forces act with more ripples and variation.
|
|
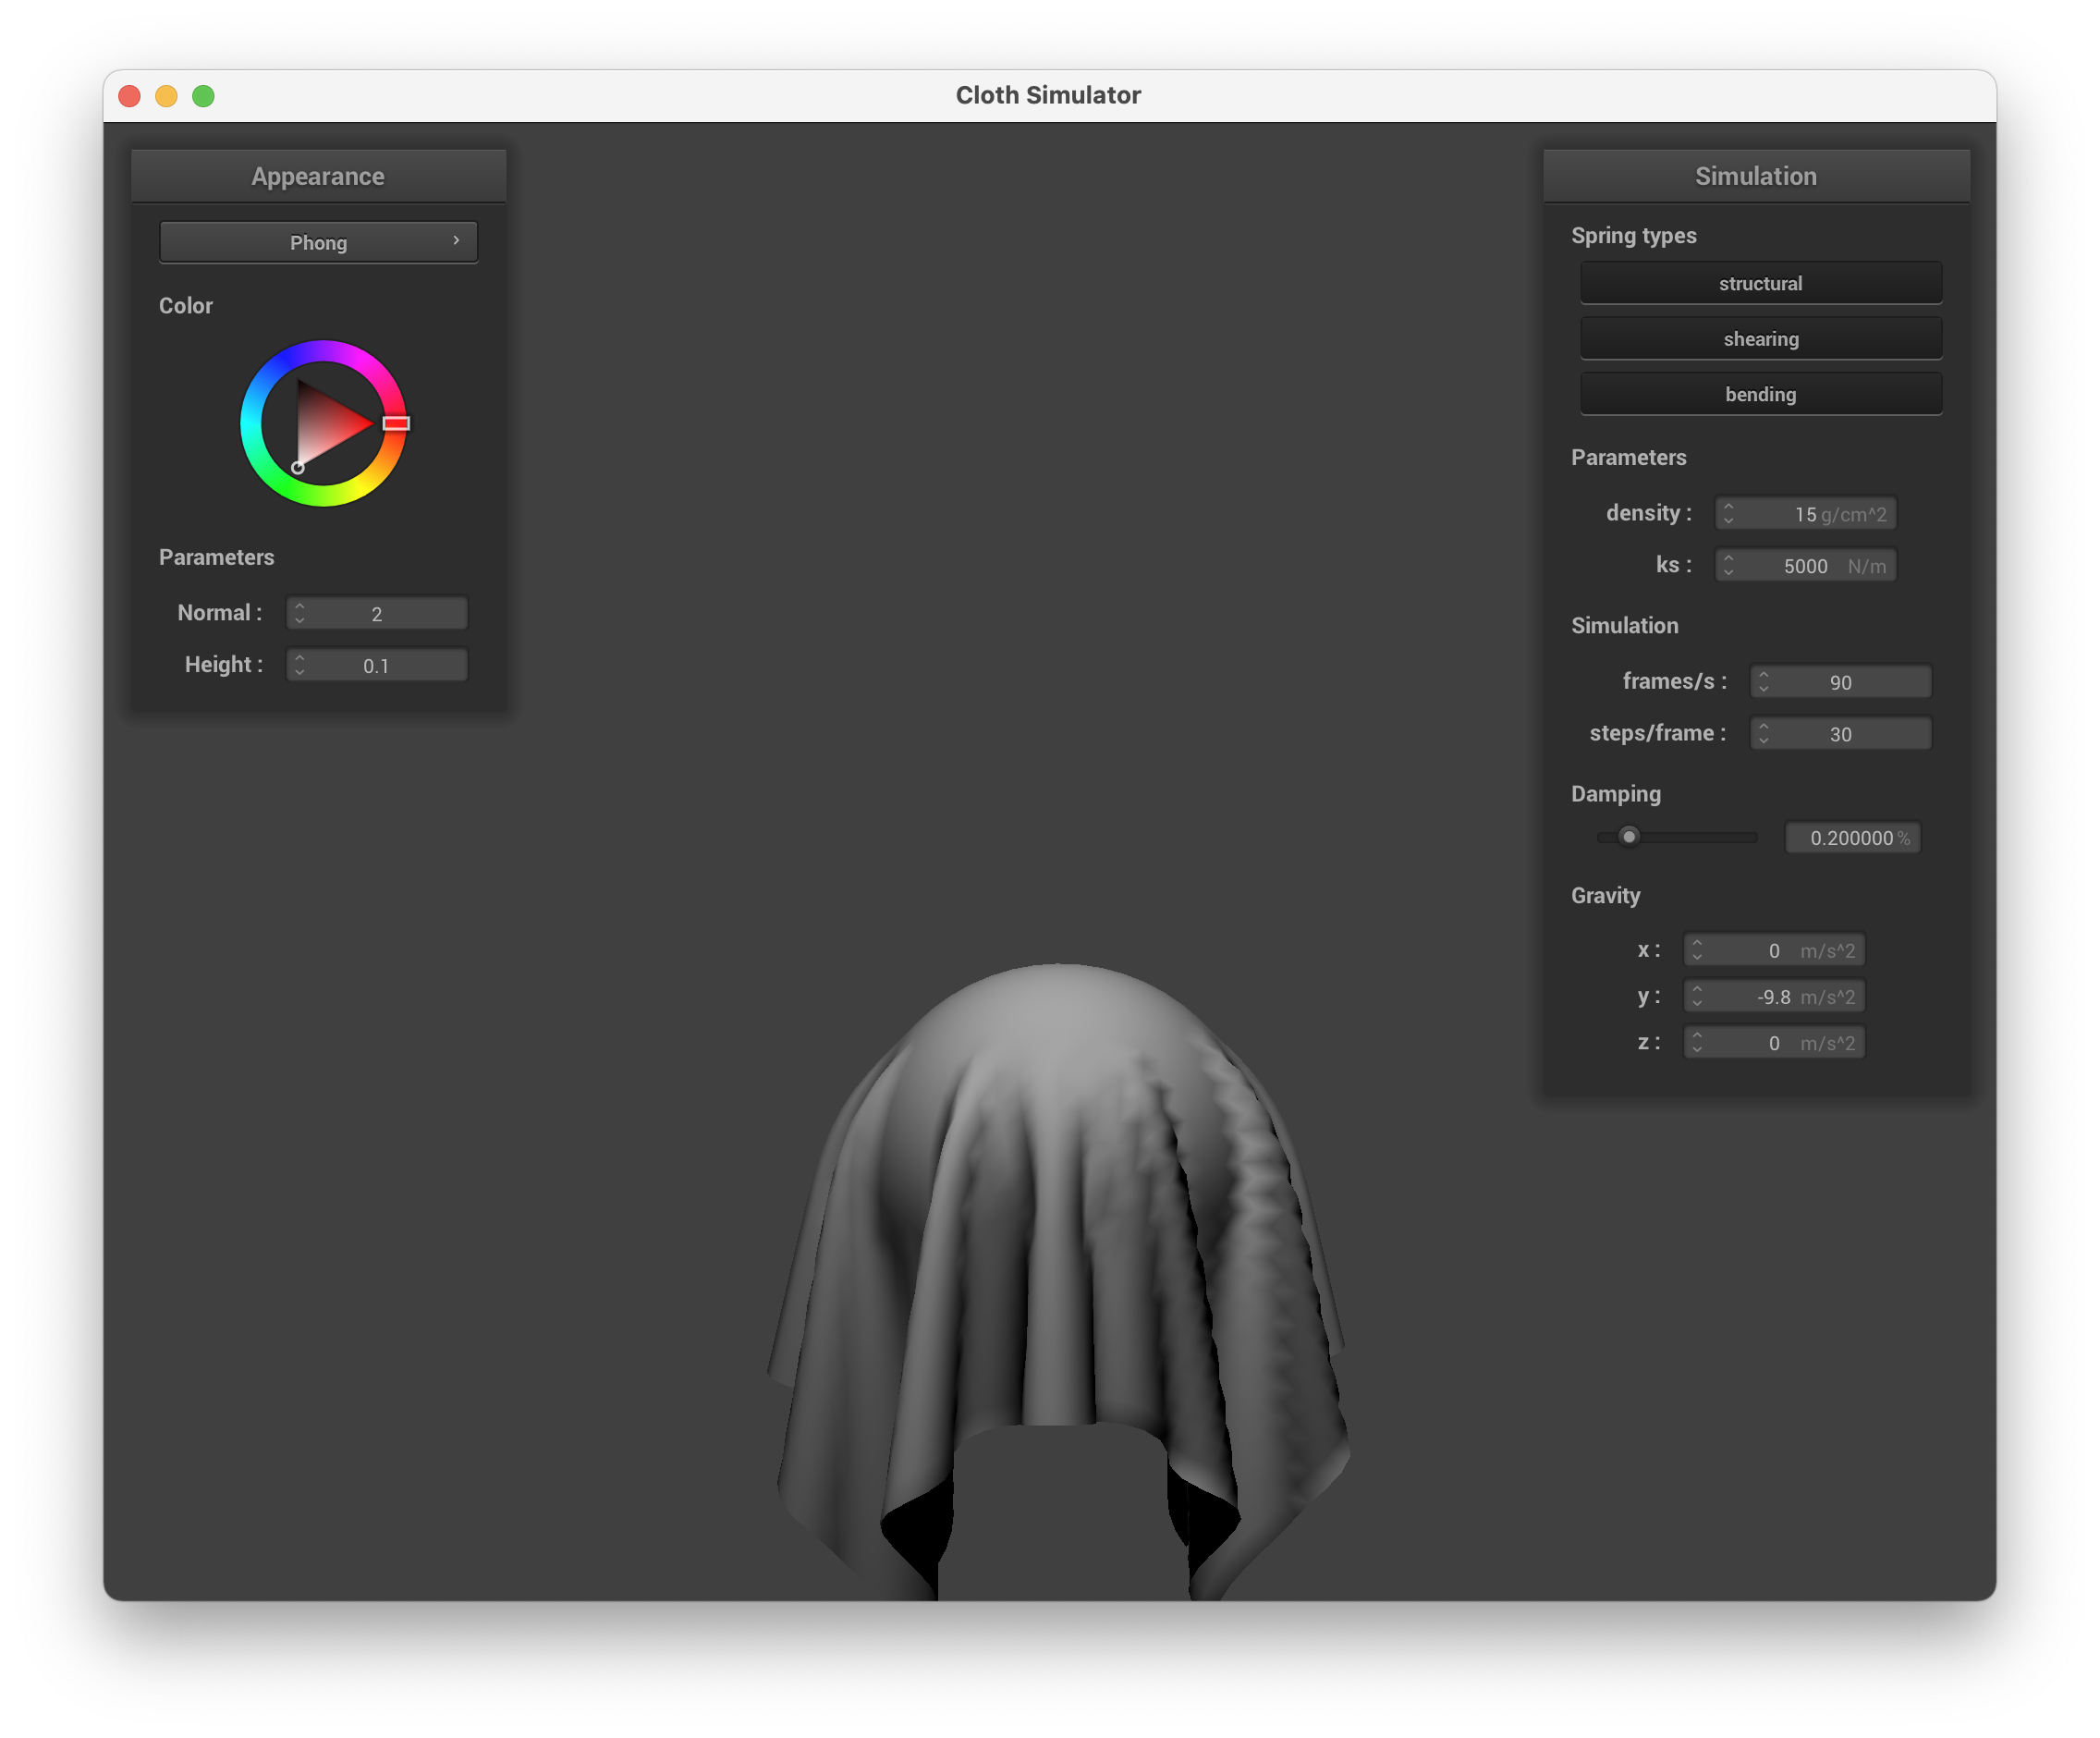
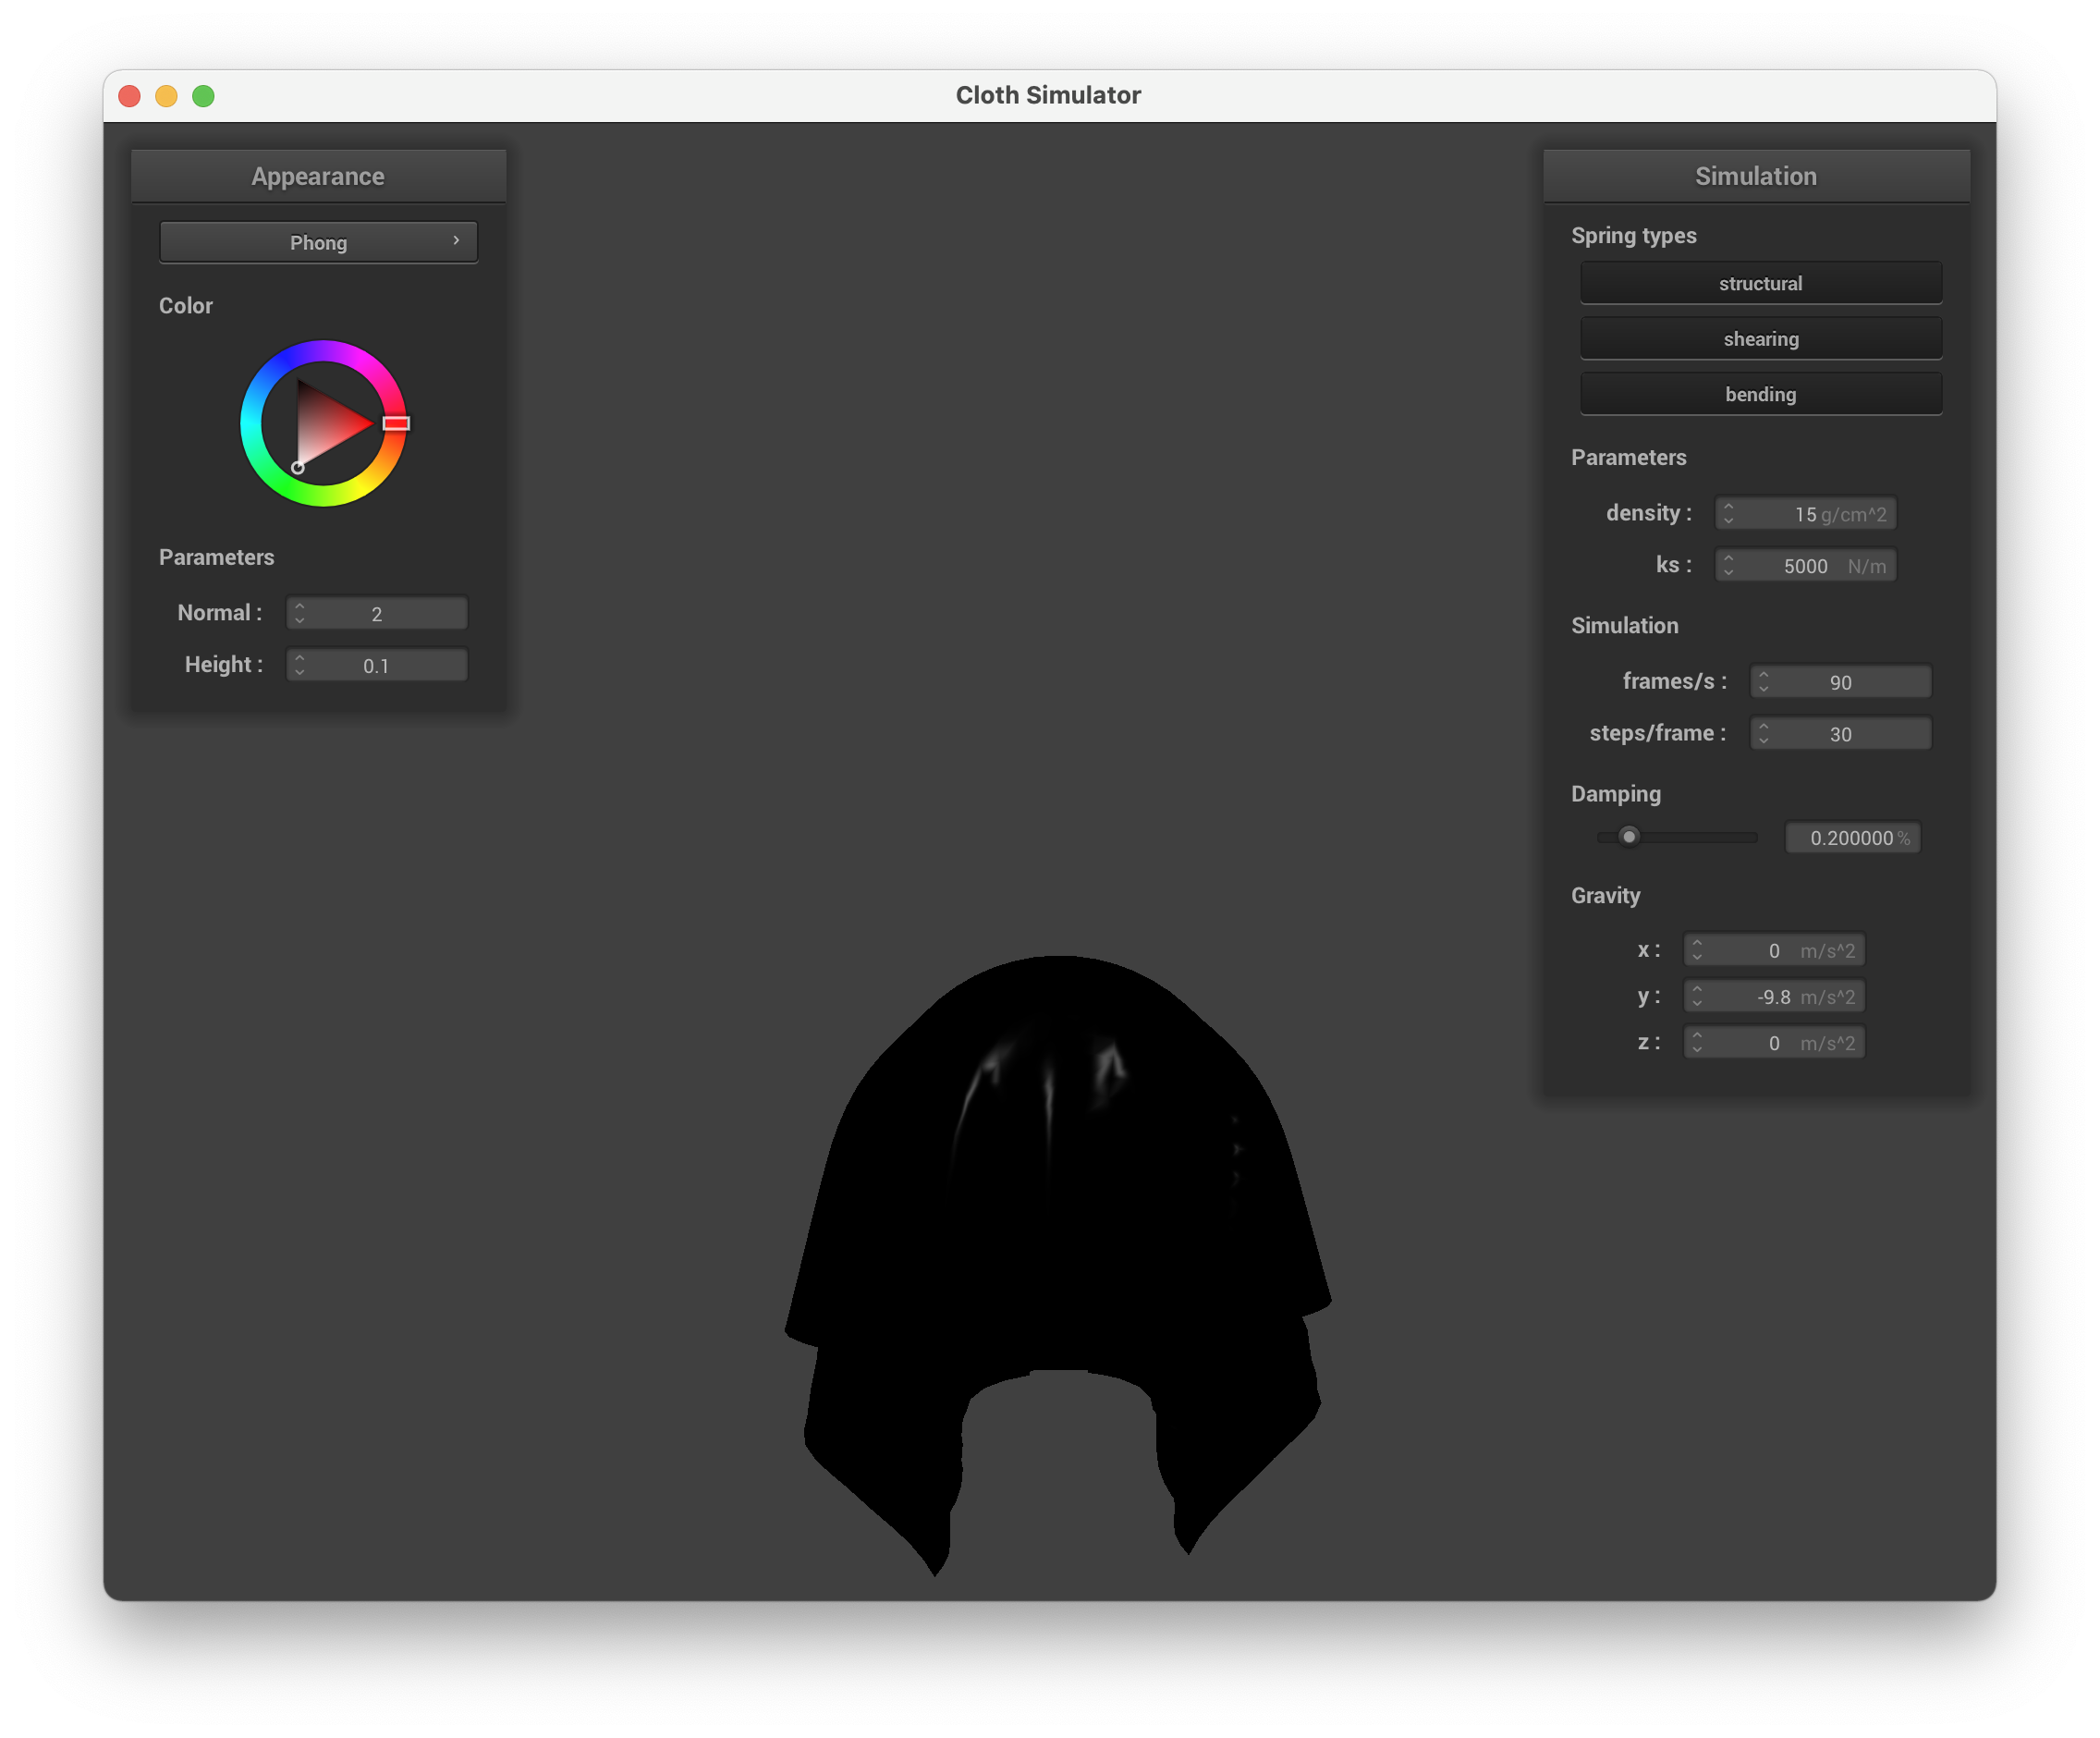
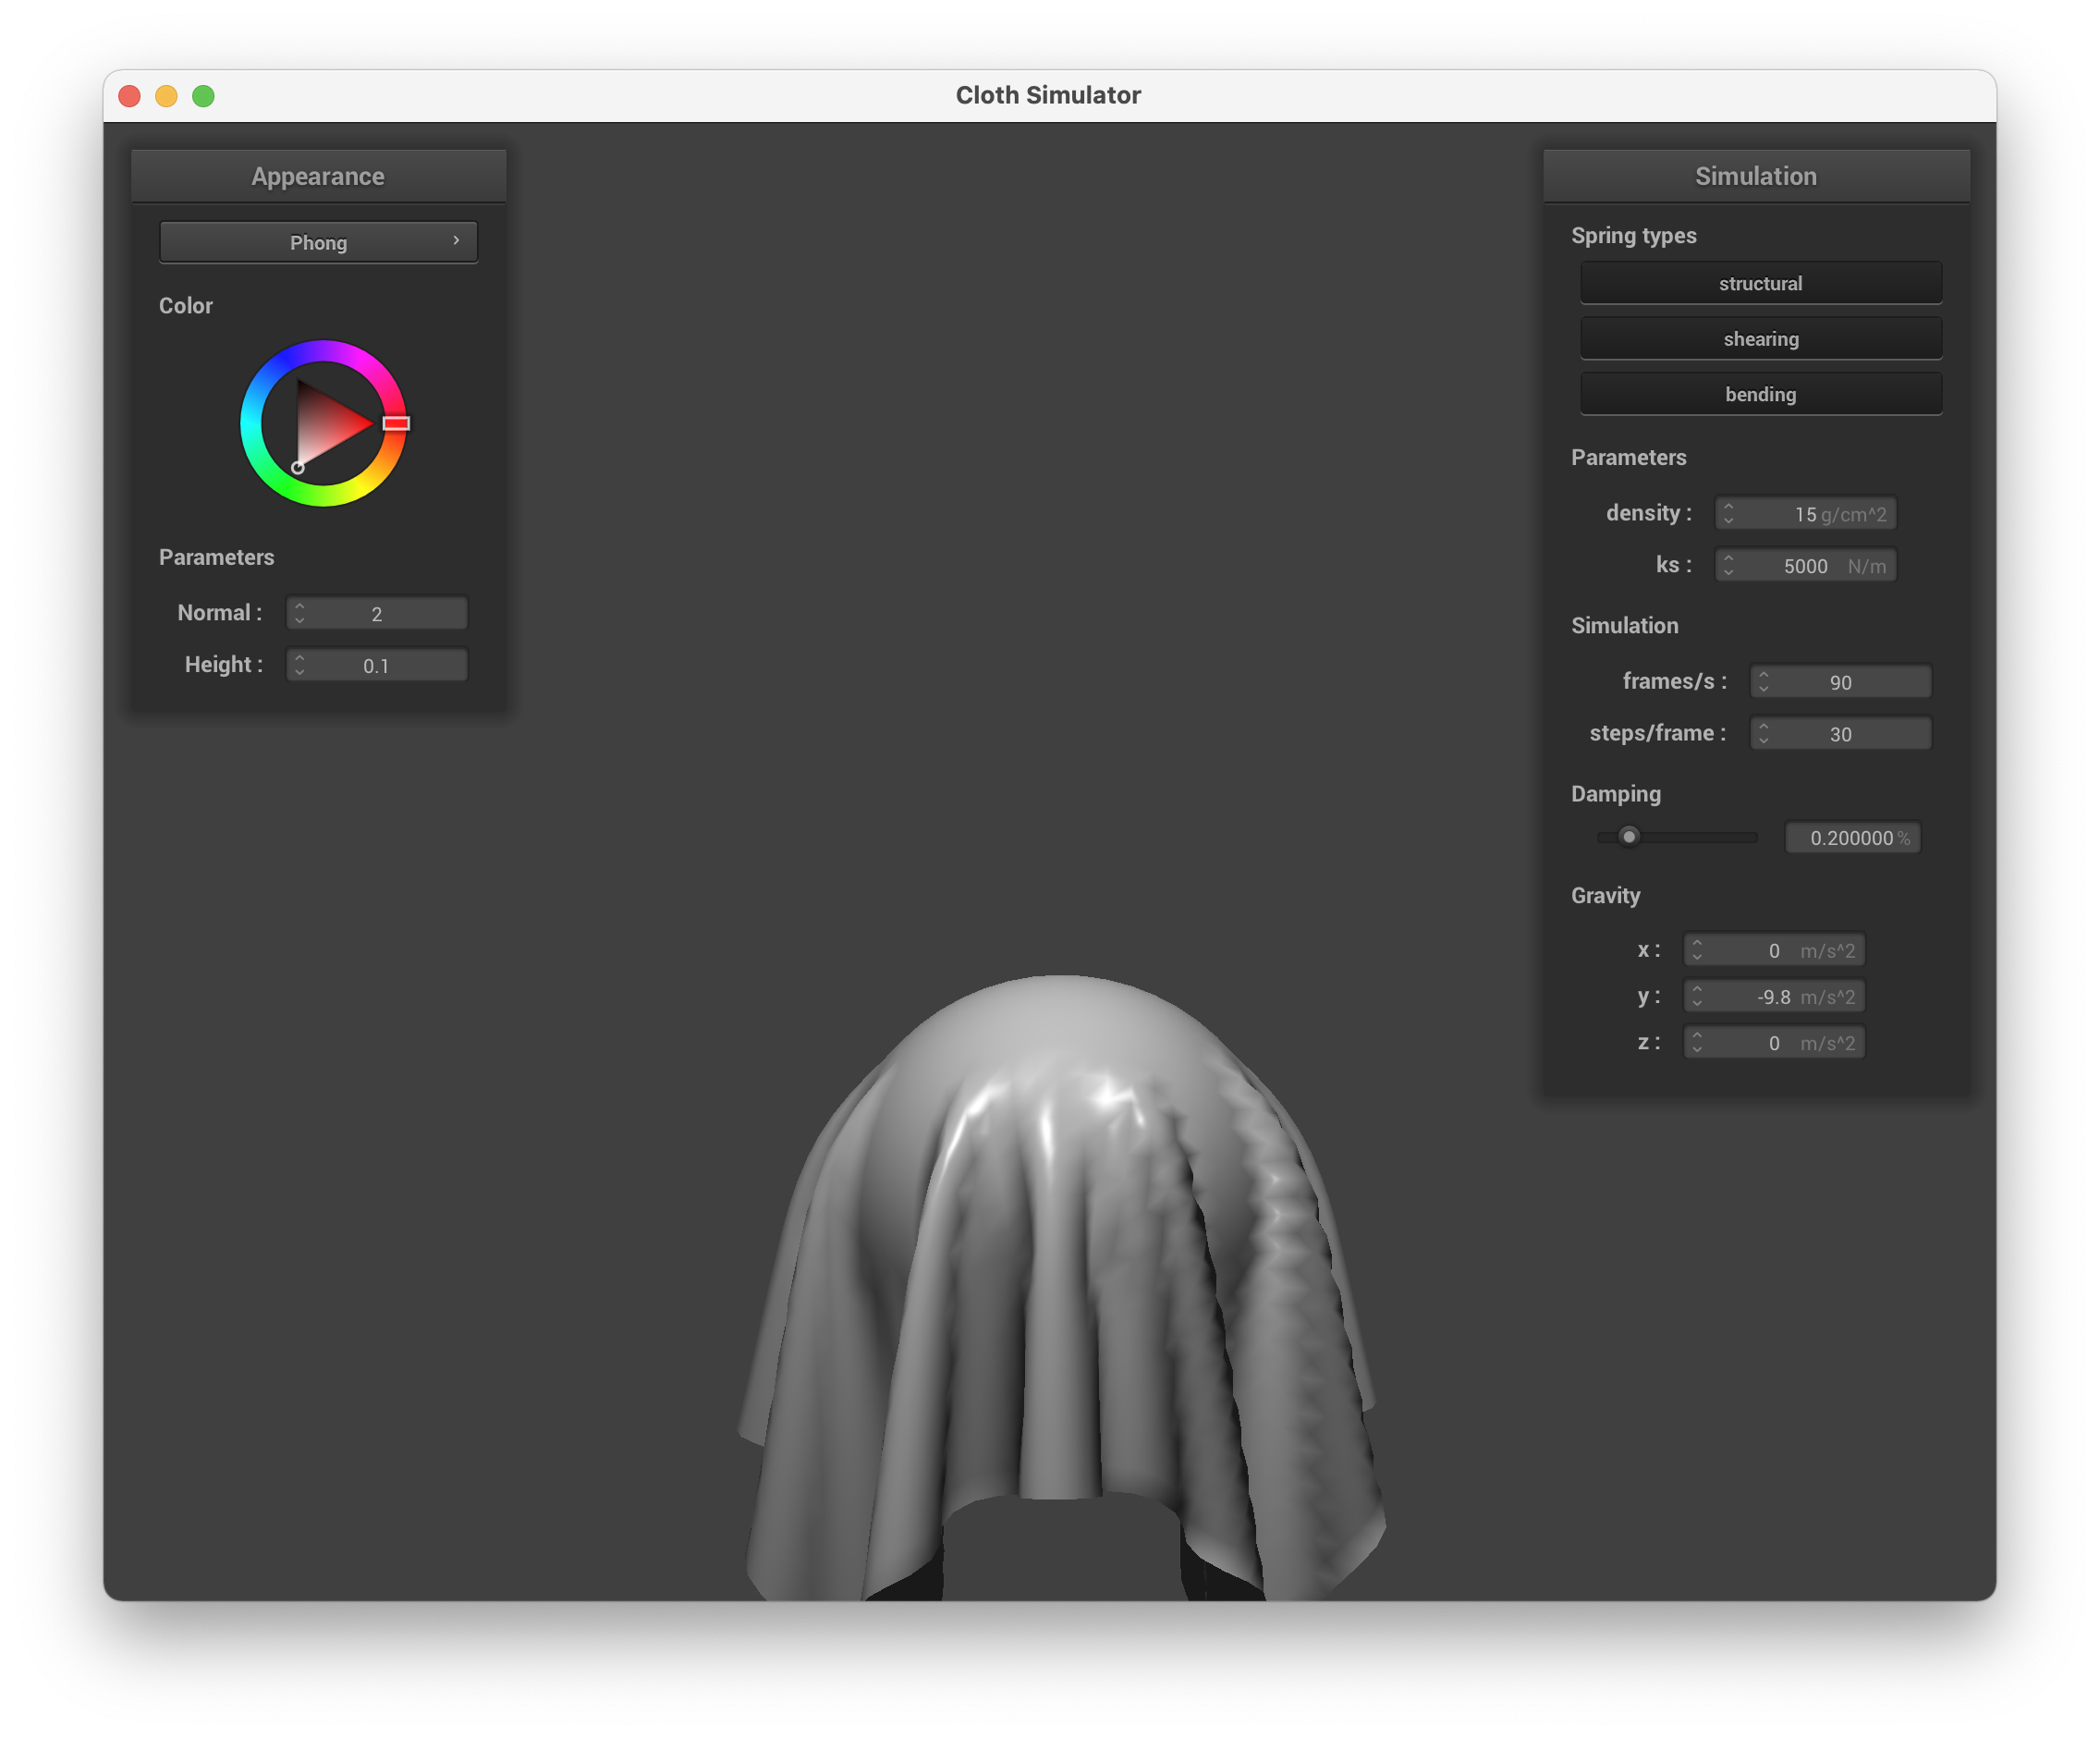
Part III: Handling Collisions with Other Objects
For part 3.1, we implemented Sphere::collide, where we implemented the collision between our cloth and a sphere. To do so, we first check to see whether the given point mass of the function is inside the sphere by checking to see whether the magnitude between the position of the point mass and the origin of the sphere is less than the radius of the sphere. If so, we know a collision has occurred, so we calculate the point at which the point mass intersects the surface of the sphere in its trajectory and use that point to determine the amount of correction (stated as a vector) needed for the point mass to not go into the sphere. We scale the correction vector by 1 - friction to get our resulting correction vector and use it to update the point mass with the correct position. Afterwards, we go into Cloth::simulate and call the collision function of each object in the collision_objects vector on every point mass to make sure object collisions are accounted for in our simulations. We didn't really need to debug this function but we did go into office hours to ask if our conceptual implementation was correct before implementing 3.1.
For part 3.2, we implemented Plane::collide which is similar to Sphere::collide except this time our collision object is a plane. First, we determine whether a collision by finding the point of intersection between the trajectory of the given point mass and the plane, finding the difference vector between the last position of the point mass and this intersection point, finding the difference vector between the position of the point mass and the intersection point, finding the dot product of those differences with the normal vector, and comparing the dot products to see whether the difference vectors point in different directions. If they do point in different directions, it means that the intersection point is between the position and the last position of the point mass and a collision has occurred. Using the intersection point, we find the amount of correction needed to move the point mass above the plane offset by SURFACE_OFFSET and then update the position of the point mass using the resulting correction vector scaled by 1 - friction. We were initially stuck on this part for several days since we kept on having an issue where our cloth would go through the plane. However, we resolved this when we realized that we were incorrectly detecting whether there was a collision. Once we used the new approach with dot products instead, our collision detection worked.
|
|
|
Part IV: Handling Self-Collisions
For part 4.1, we implemented Cloth::hash_position which subdivides the 3D box volume of the cloth into smaller 3D boxes (with dimensions as stated in the spec), maps the given point mass's position to its corresponding box, and returns a unique float representing the box it's mapped to. We calculate this unique value by using the first answer described in this article.
For part 4.2, we implemented Cloth::build_spatial_map which populates our unordered map data structure map by iterating through every point mass and adding the point mass to the vector which has it's hash position (found by calling hash_position as the key.
For part 4.3, we implemented Cloth::self_collide, which detects and reacts to collisions made between the folds of the cloth. To do this we first find the hash position of the given point mass and find the corresponding vector of point masses associated with the hash position using map in order to find the surrounding point masses. With this, we iterate through the point mass vector. We also create a vector which we called final initialized to 0s. If the current point mass is not the given point mass and the distance between the current point mass and the given point mass is less than 2 times a given thickness, a collision has occurred. We add the correction vector (which when added to the current point mass position gives a distance of 2 times the given thickness between the given and current point masses) to final. After iterating through the vector of point masses, if the number of corrections (which we keep track of in the iterations using an int num_corrections) is not zero, we add (final/num_cor) / simulation_steps to the position of our point mass.
The final part of 4 is to call these functions. To do so, in Cloth::self_collide, we call build_spatial_map and we iterate through the point masses and call self_collide on each one.
As for debugging, in the beginning of testing our self-collision, our cloth was not colliding with itself. We discovered that this was because we forgot the last step within 4, where we forgot to call the functions. Afterwards, we fixed a few pointer issues in our Cloth::self_collide to get part 4 to work.
|
|
|
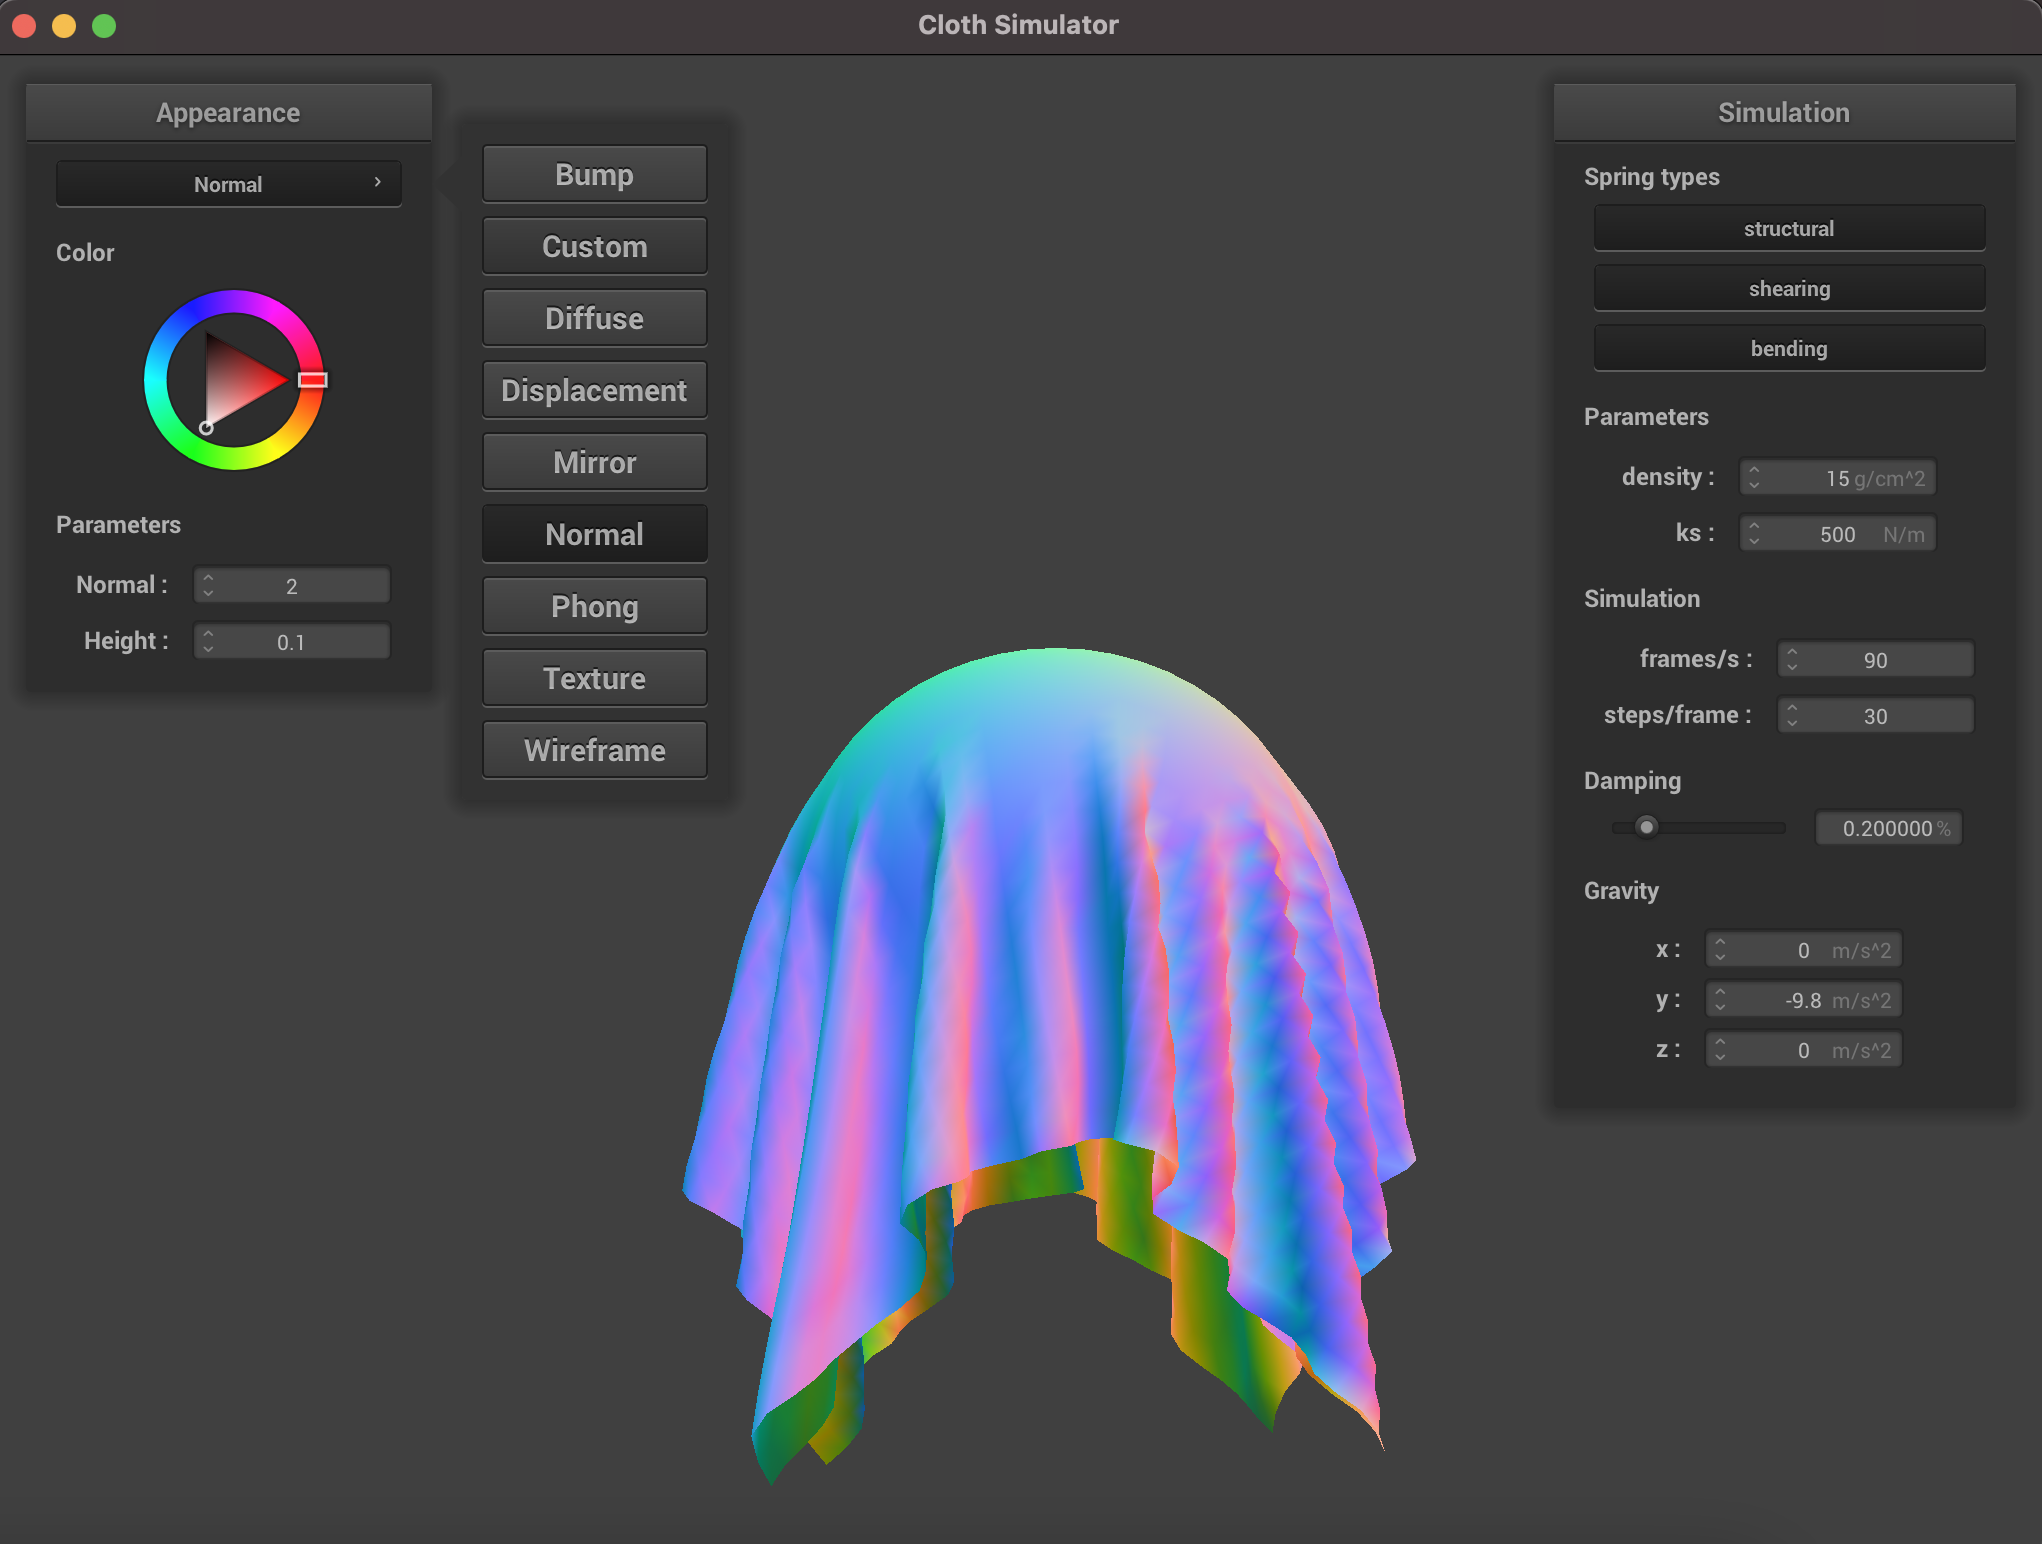
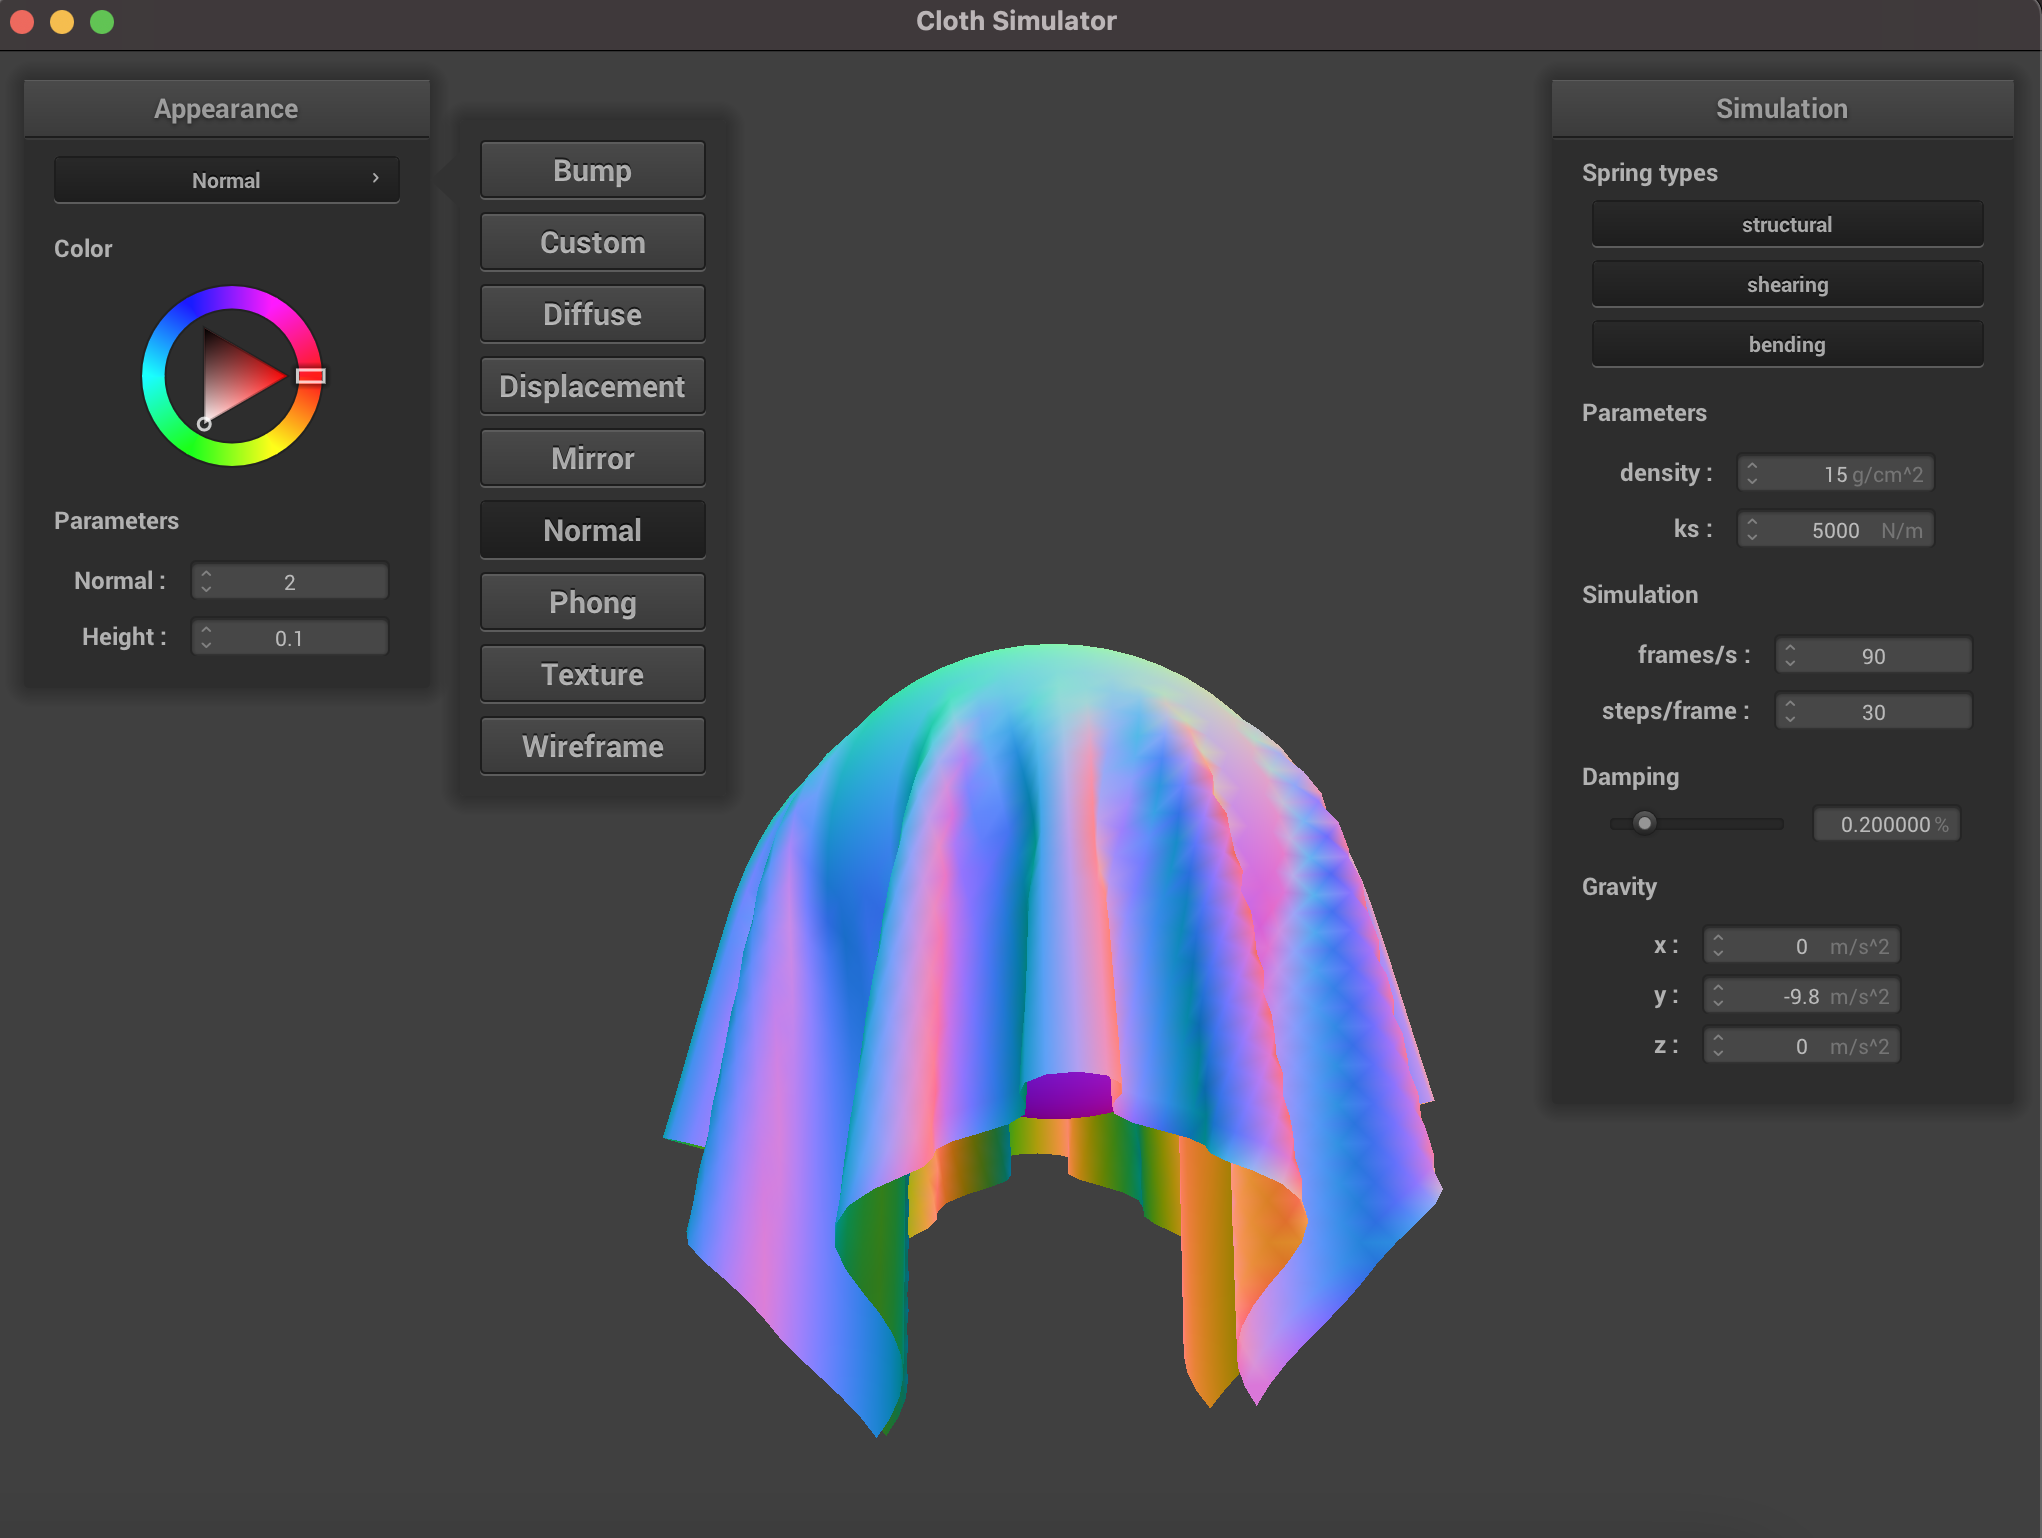
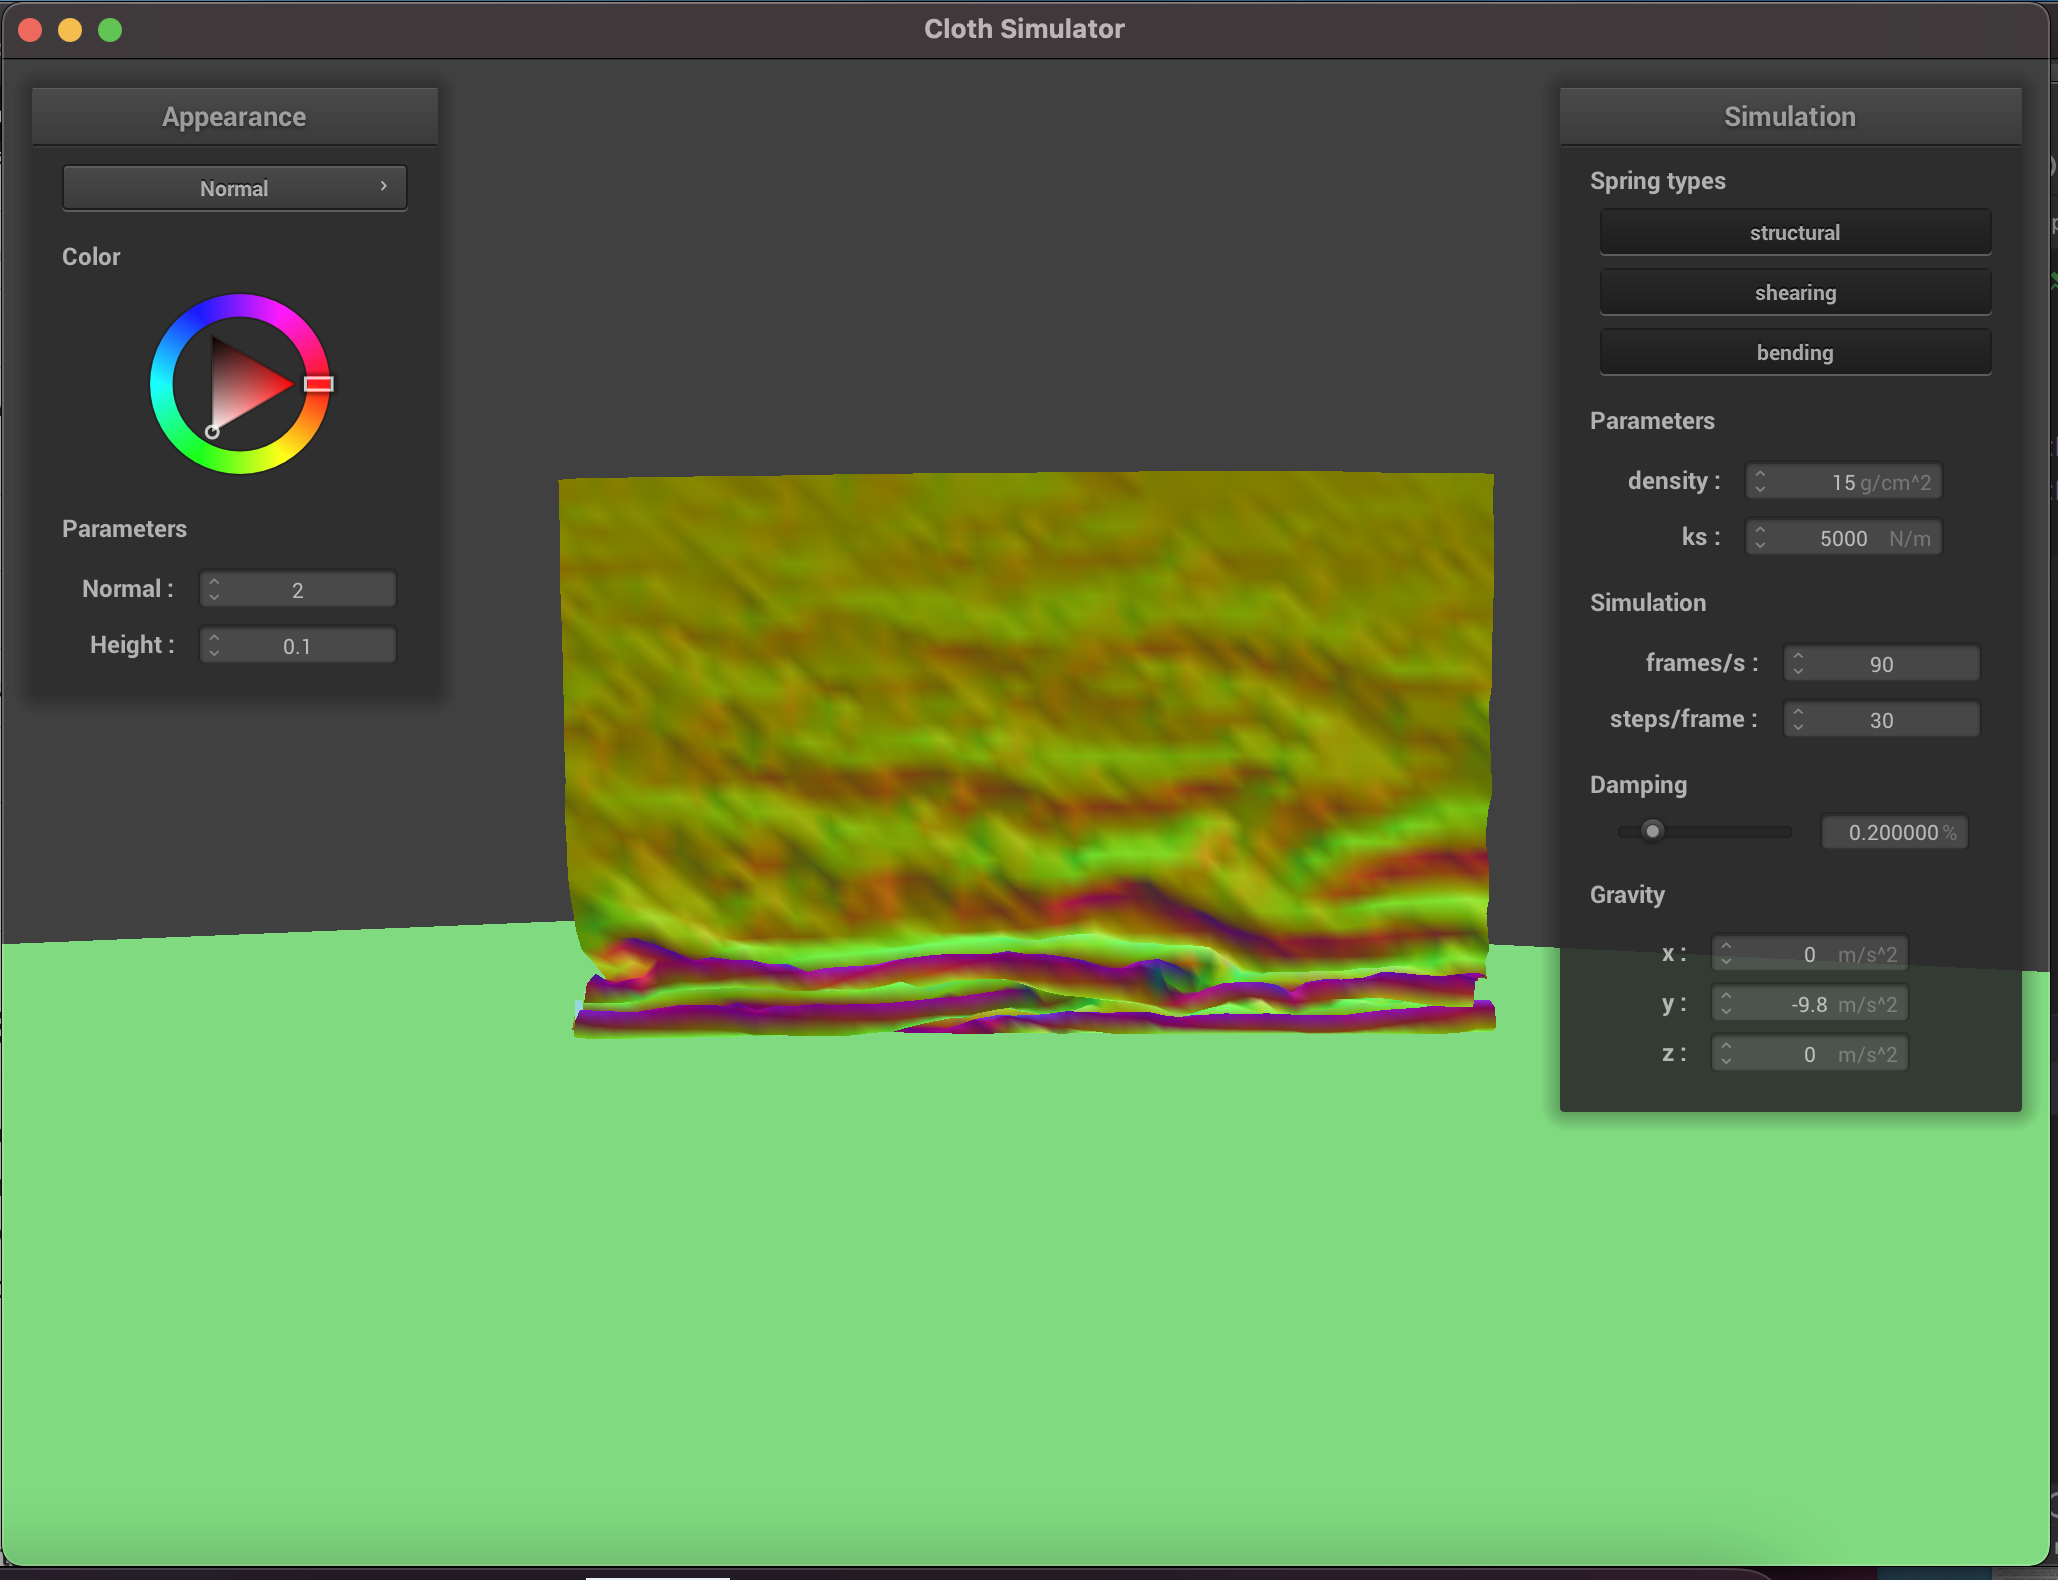
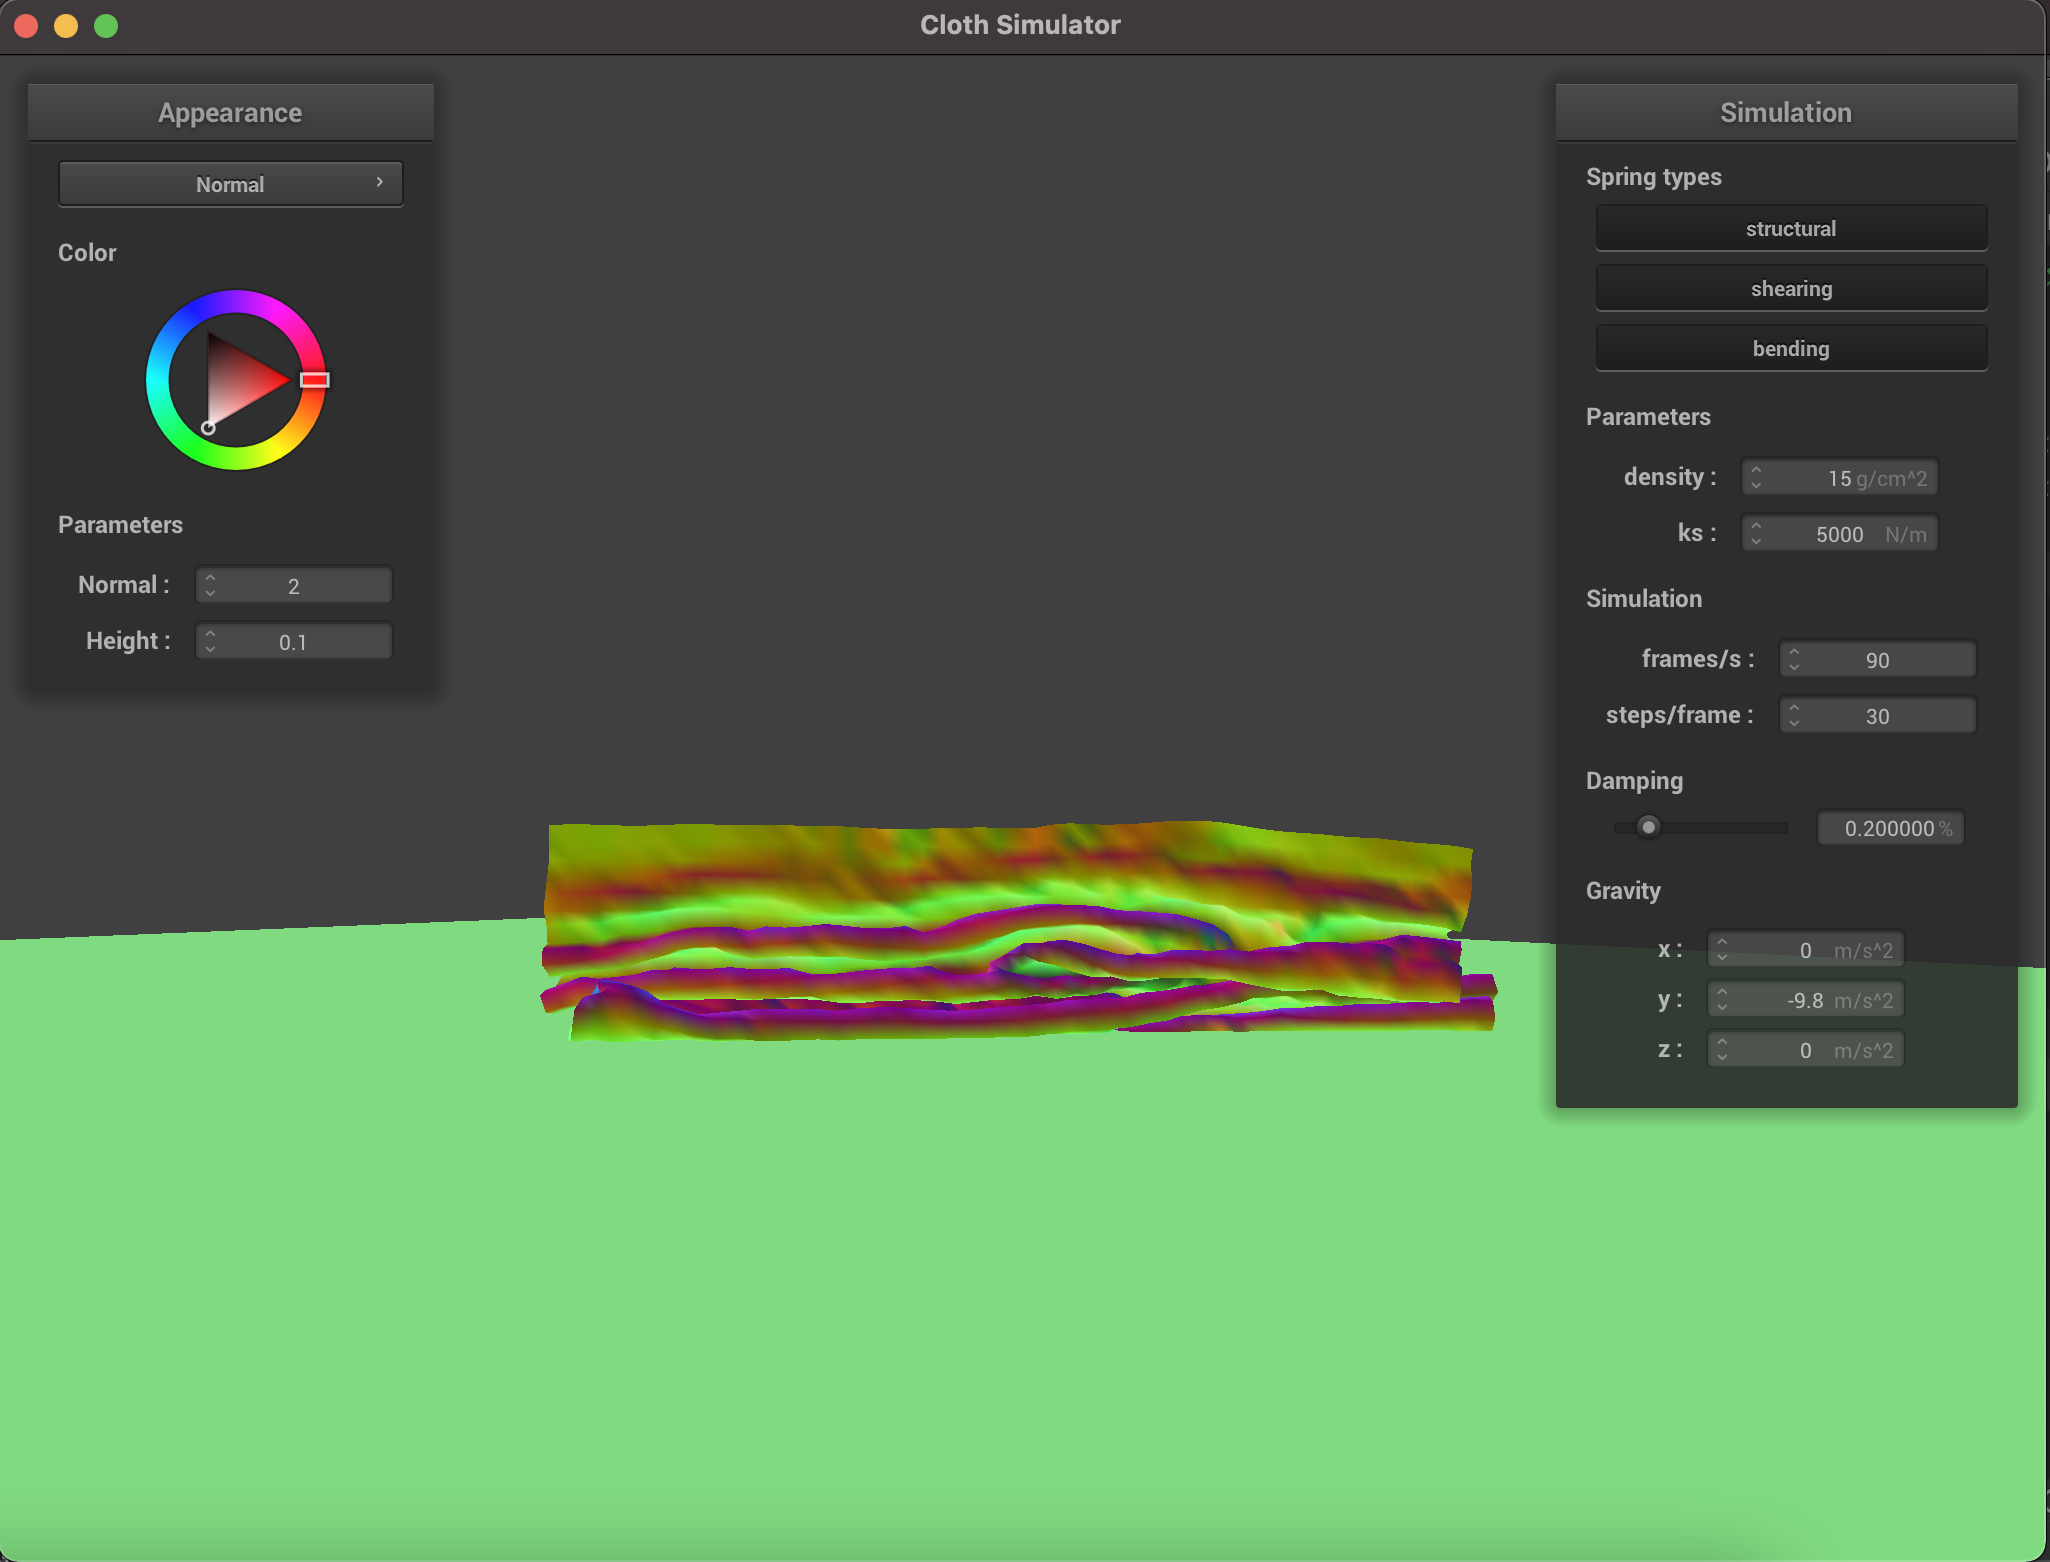
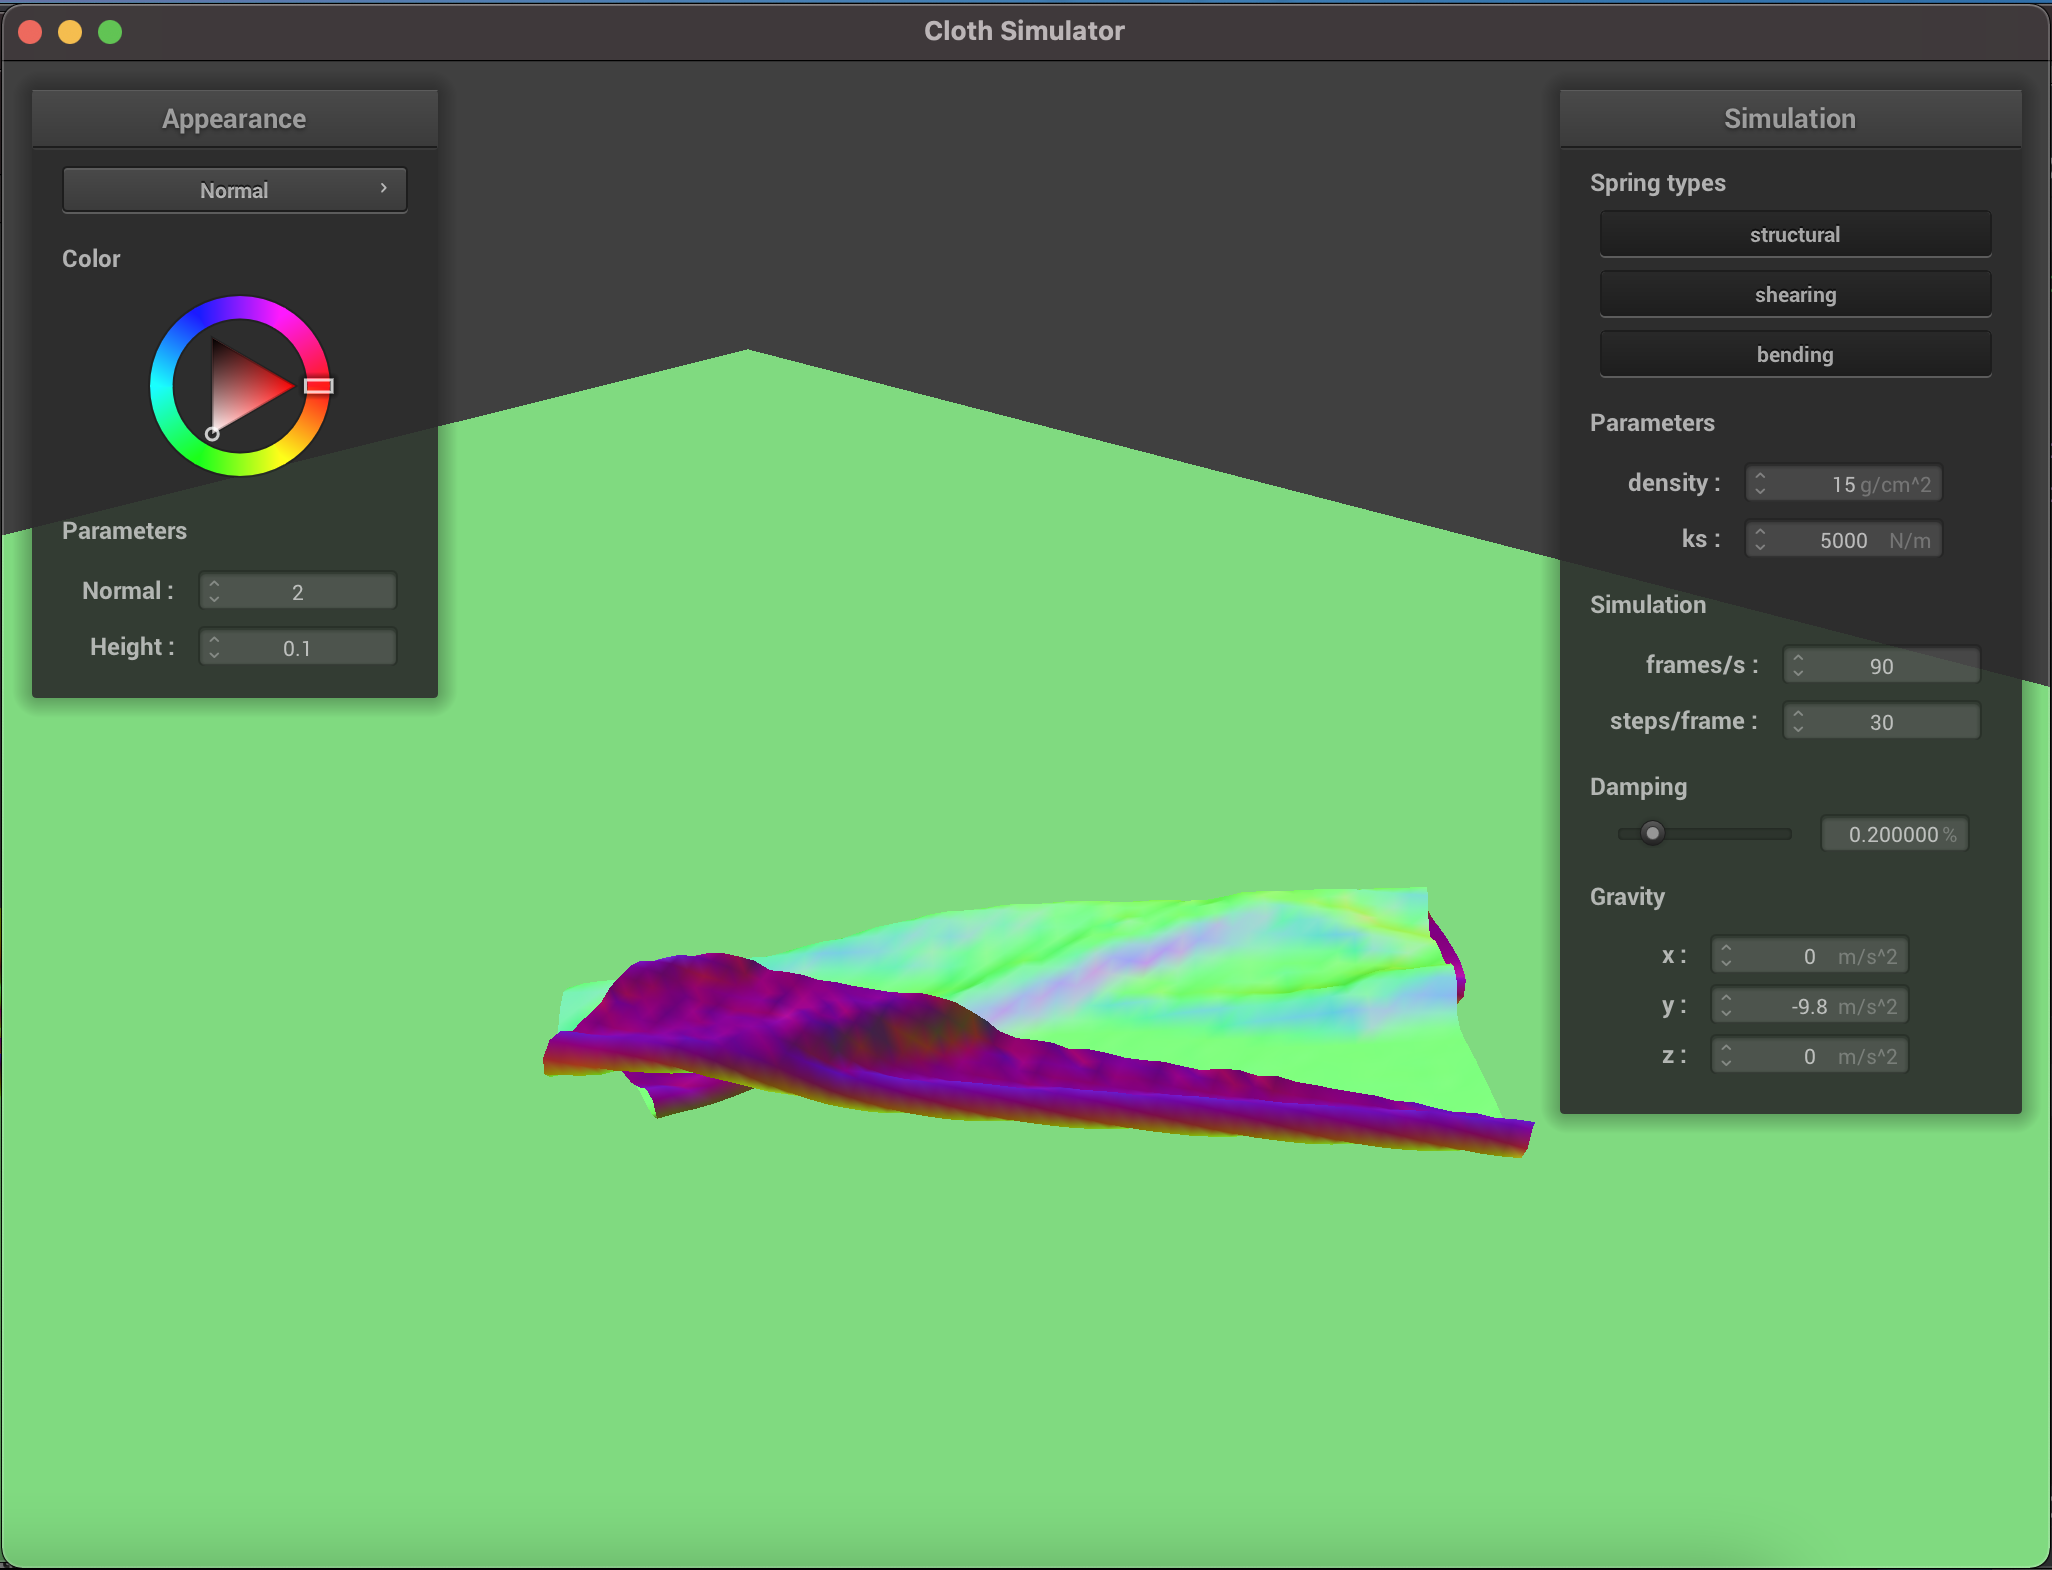
When varying our spring constant, the results are similar to that of part 3. When the spring constant is 500 N/m, the cloth almost becomes a stick when it falls onto the plane and then disappears. However, when the spring constant is 50,000 N/m, the cloth doesn't seem to bend very much and instead almost looks like a blanket when it's at its resting state on the plane. When the density is 5 g/cm^2, the cloth falls slowly and seems more bouncy. However, when the density is 30 g/cm^2, the cloth falls more quickly, has many more folds, and seems very flat on the plane in its resting state.
|
|
|
|
Part V: Shaders
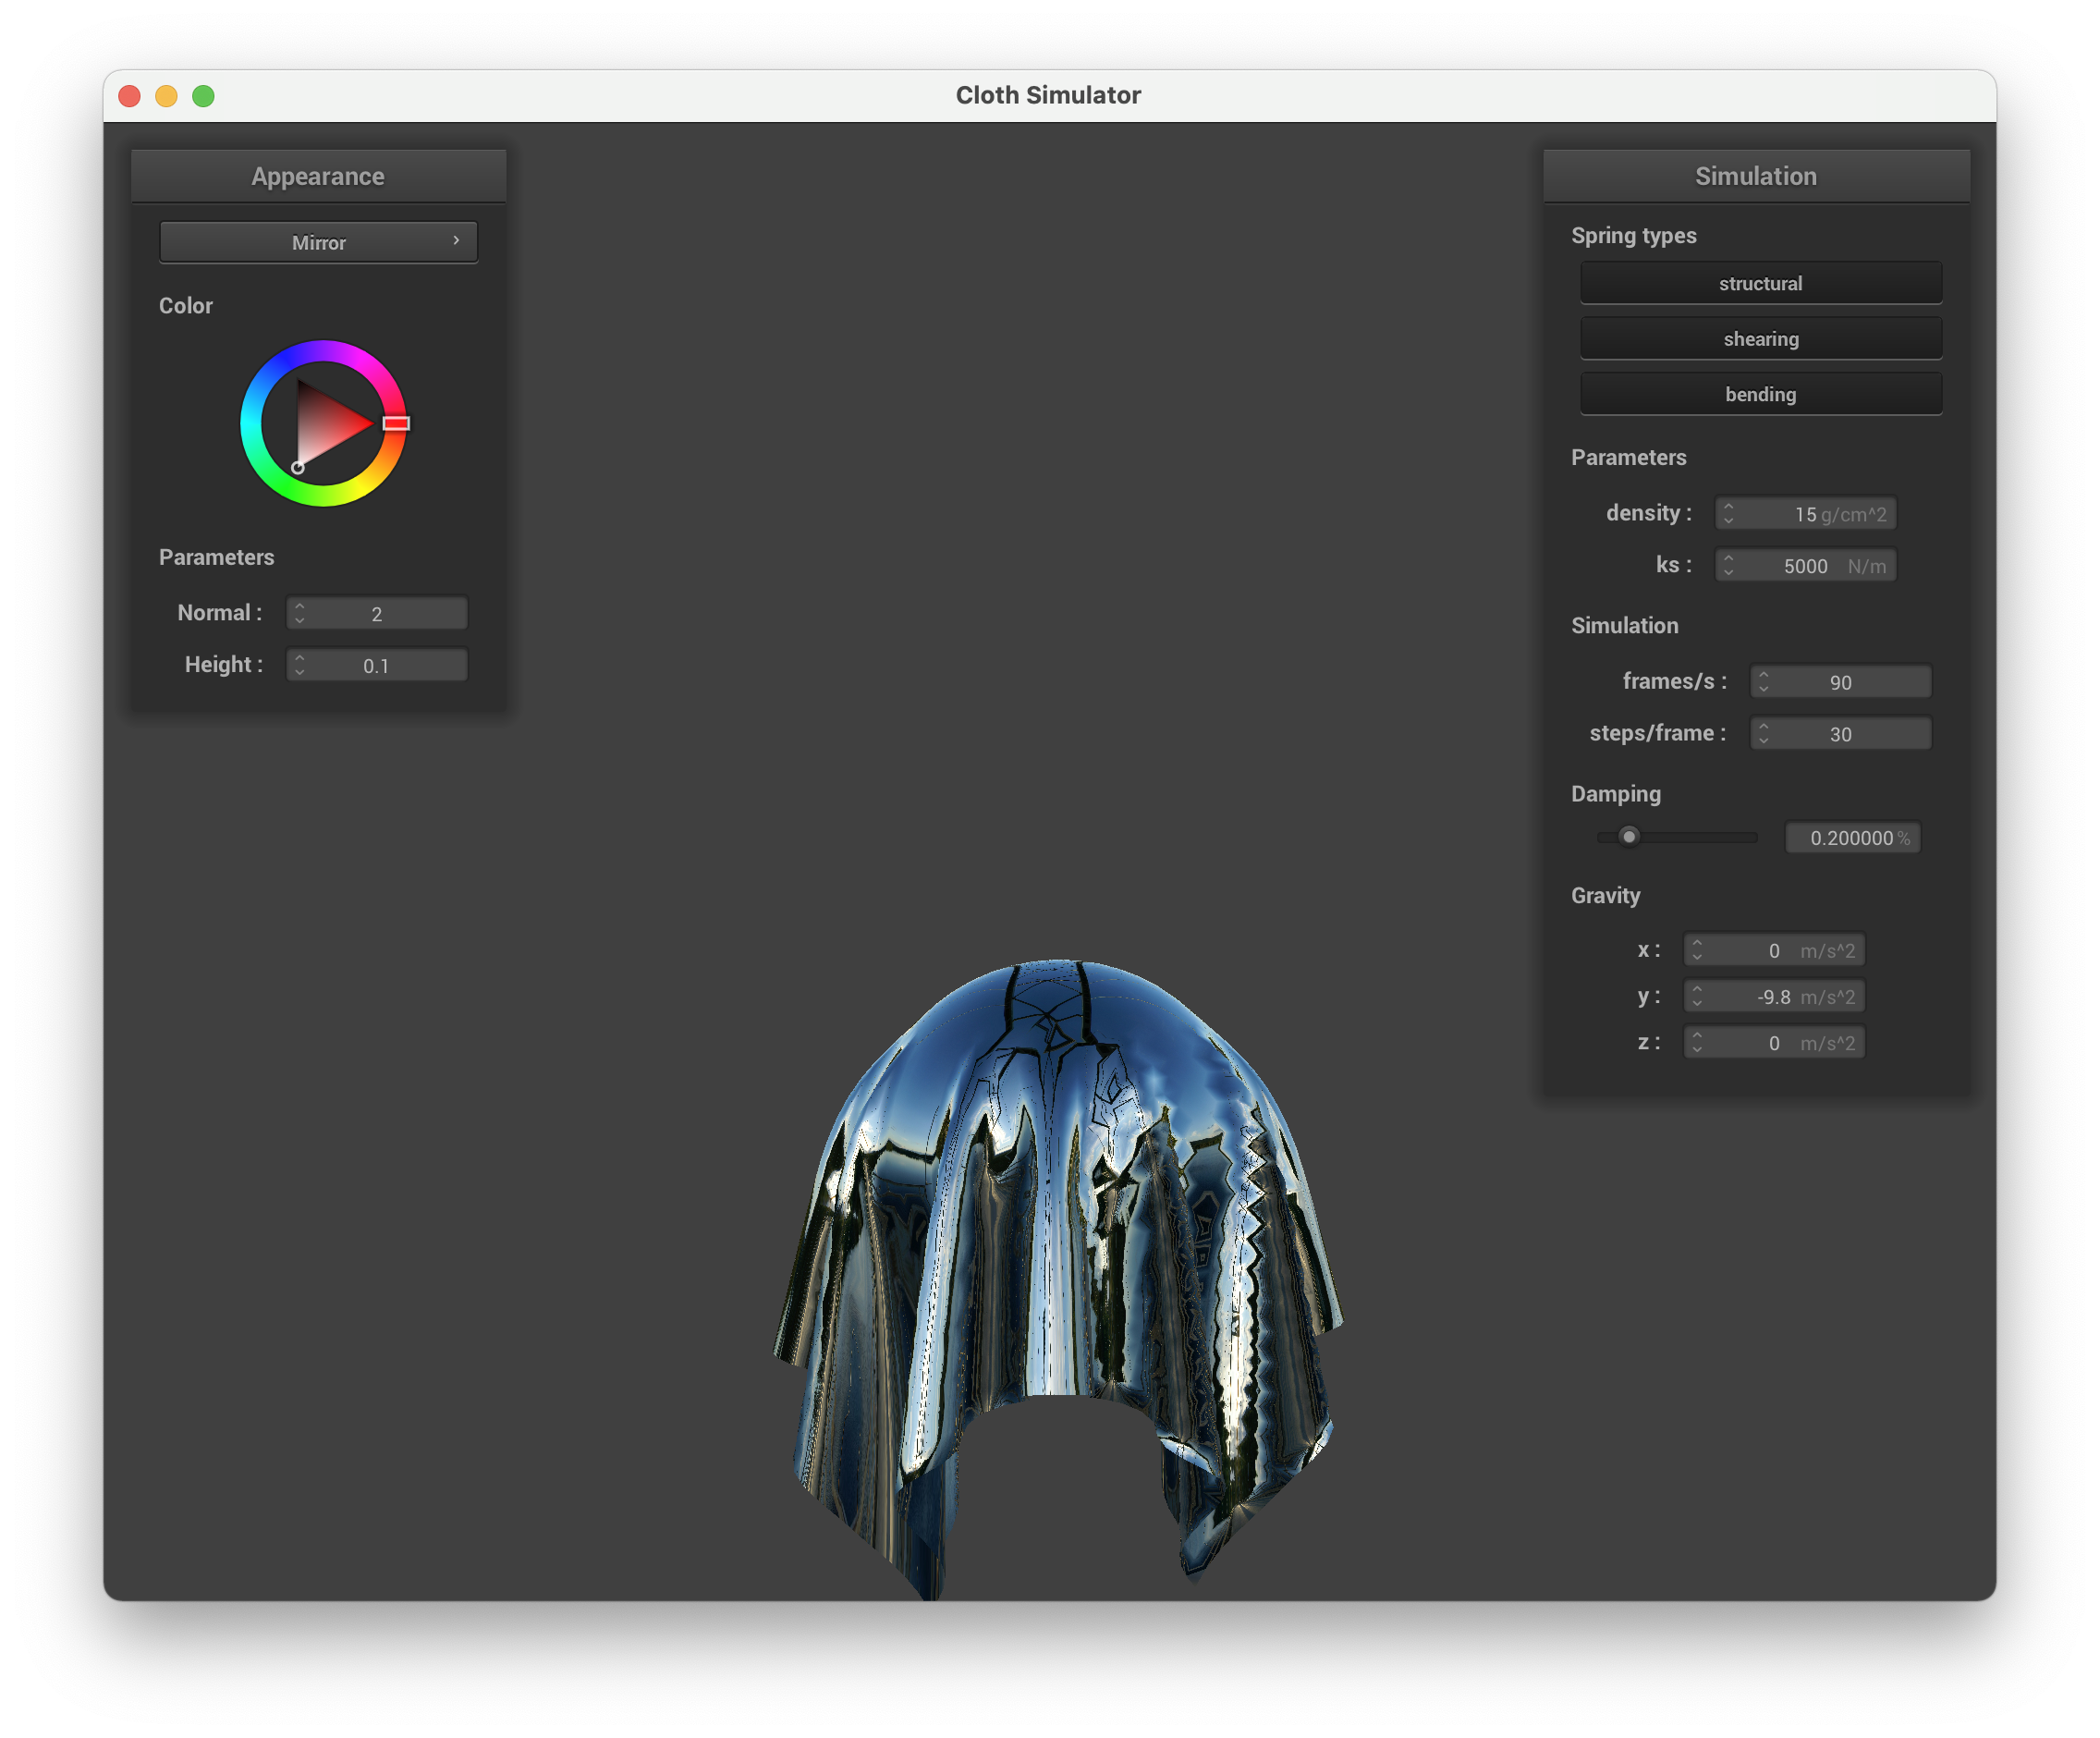
For part 5.1, we implemented diffuse shading. We set the out_color to the u_light_intensity / radius ^2 * max(0 vector, dot(v_normal, vector from u_light_pos to v_position)).
For part 5.2, we implemented blinn phong shading. We used the same code from diffuse shading. We got the max of the 0 vector and the dot product of the v_normal and the sum of the vectors from the u_light_pos to the v_position and the vector from the u_cam_pos to the v_position divided over the length of the sum of those vectors. We took that max and took it to the power of p which we set to 100. We found the reflection to be u_light_intensity / radius^2 * max^p. We finally set out_color to 0.1 * 1 vector + kd * diffuse + ks * reflection where ks is set to 0.5 and kd is set to u_color.
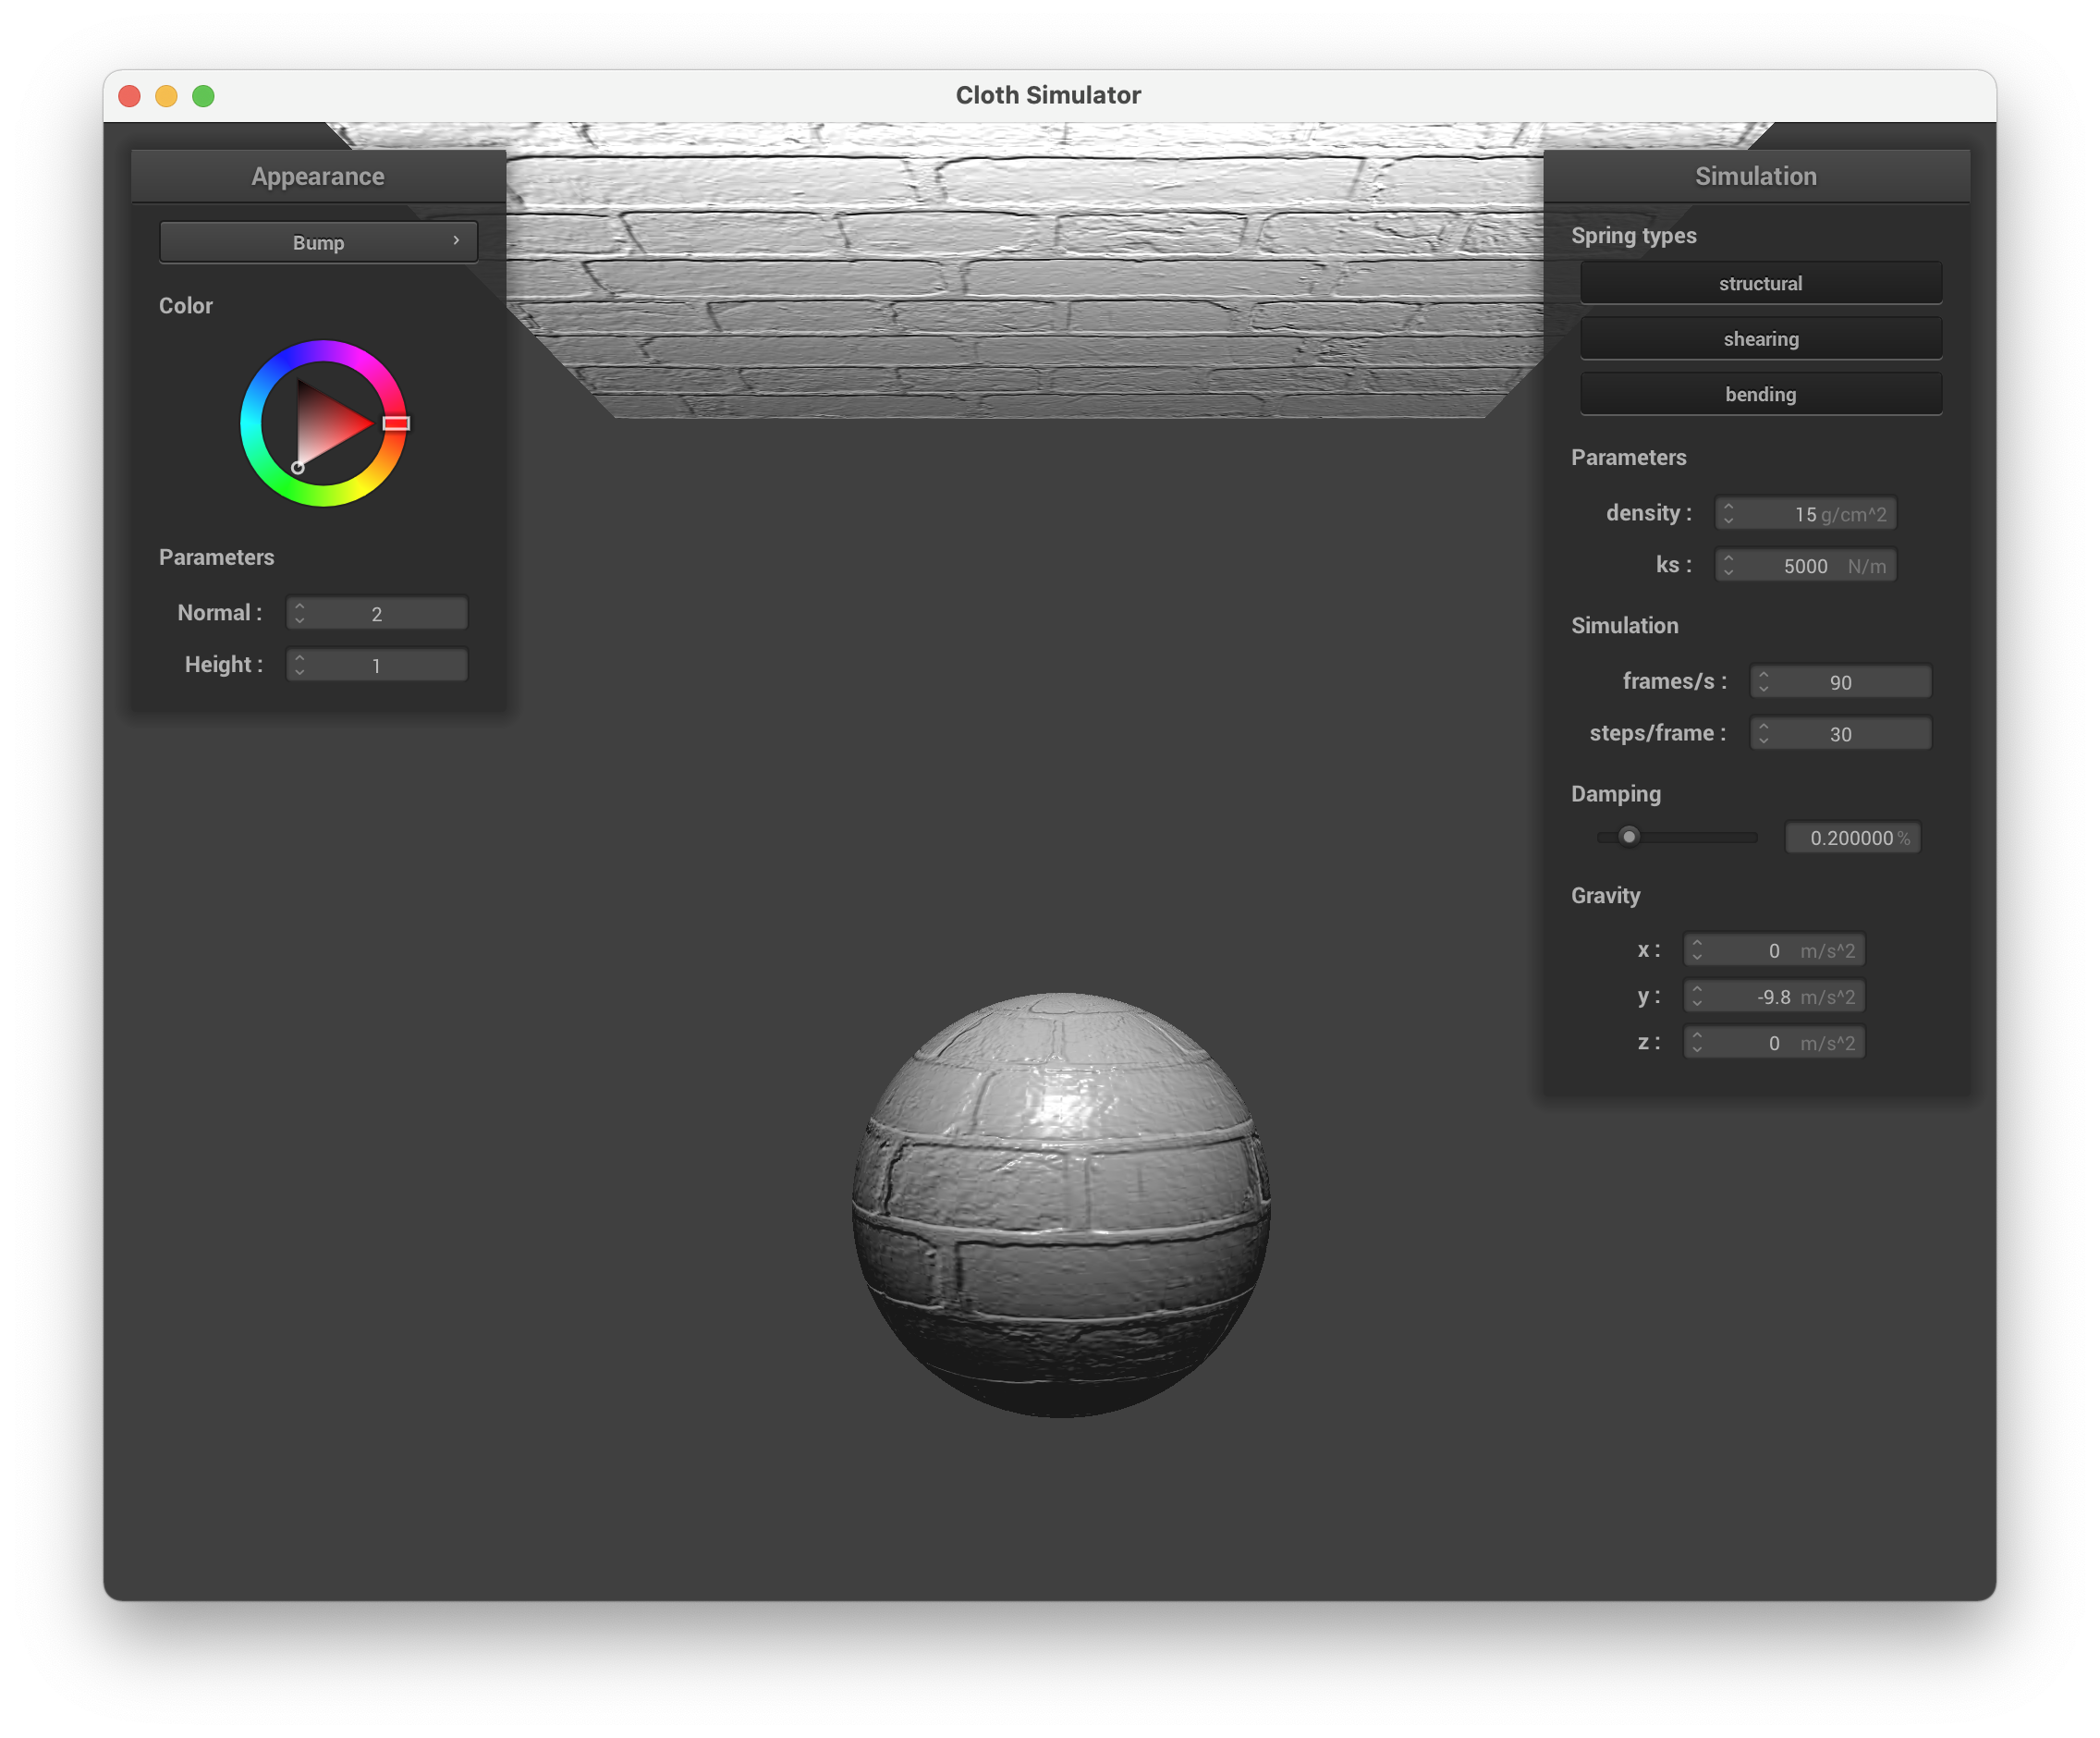
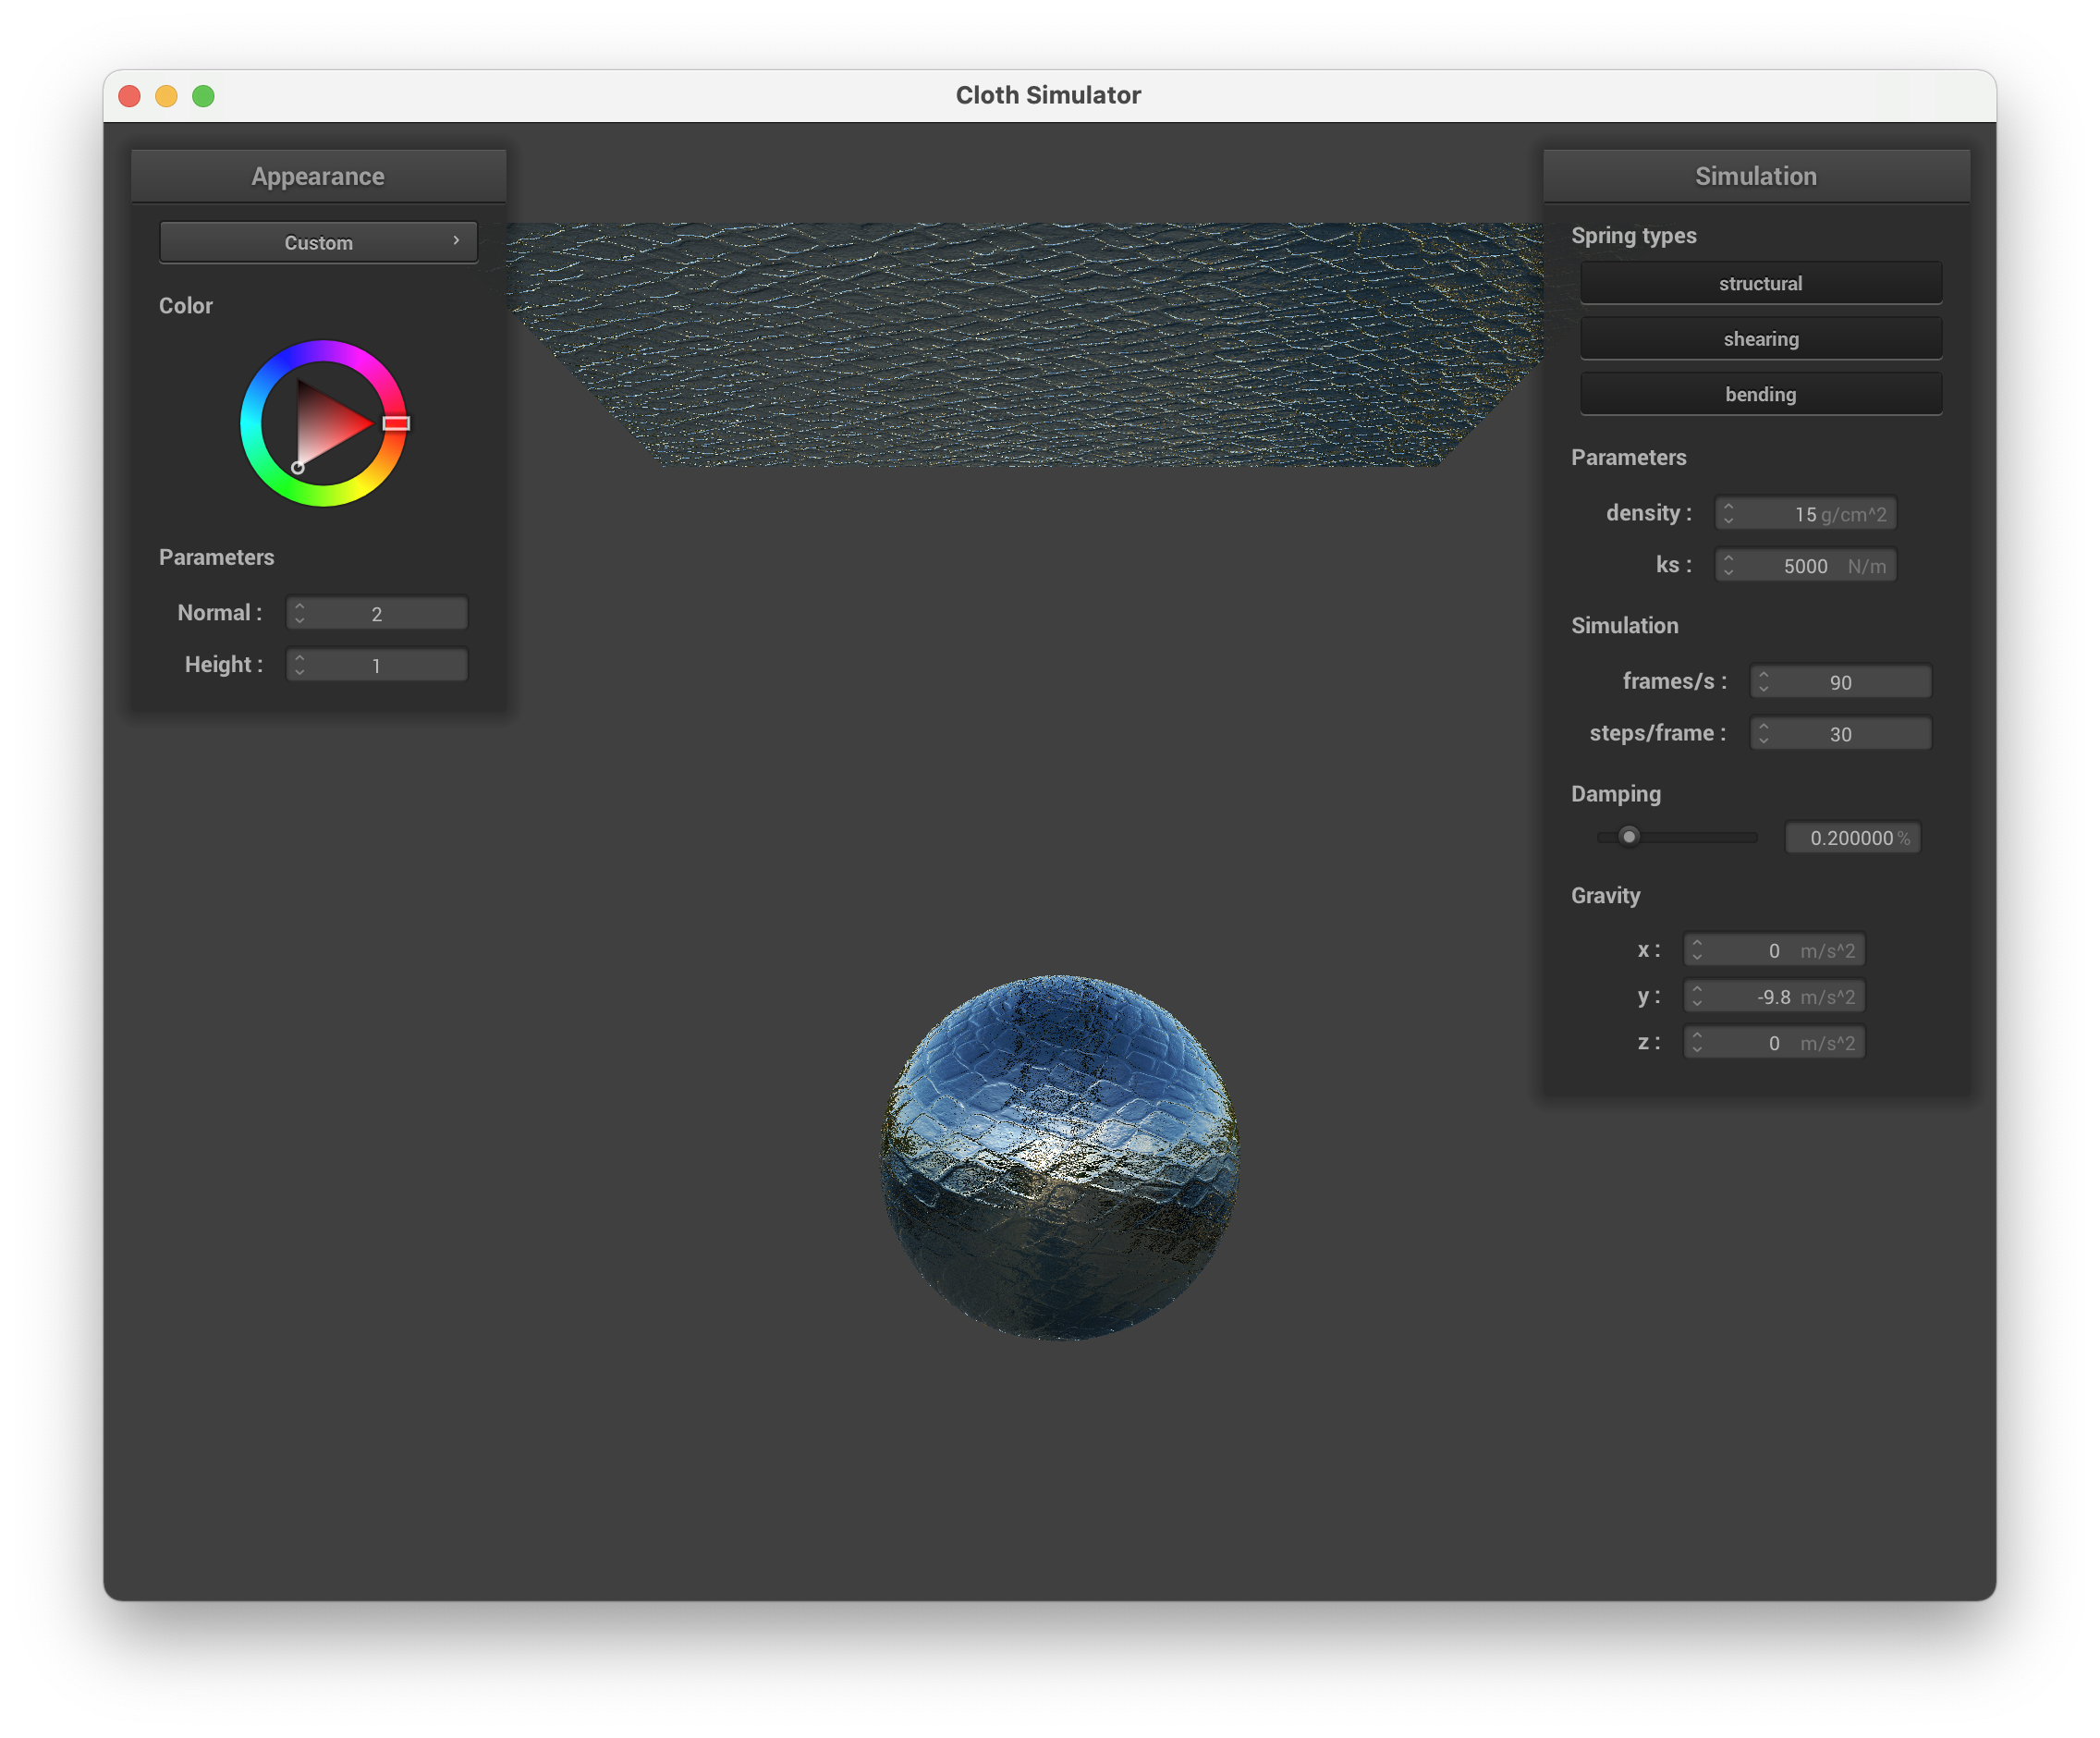
For part 5.3, we implemented texture mapping. We sampled v_uv using u_texture_1 and set that to the out_color.
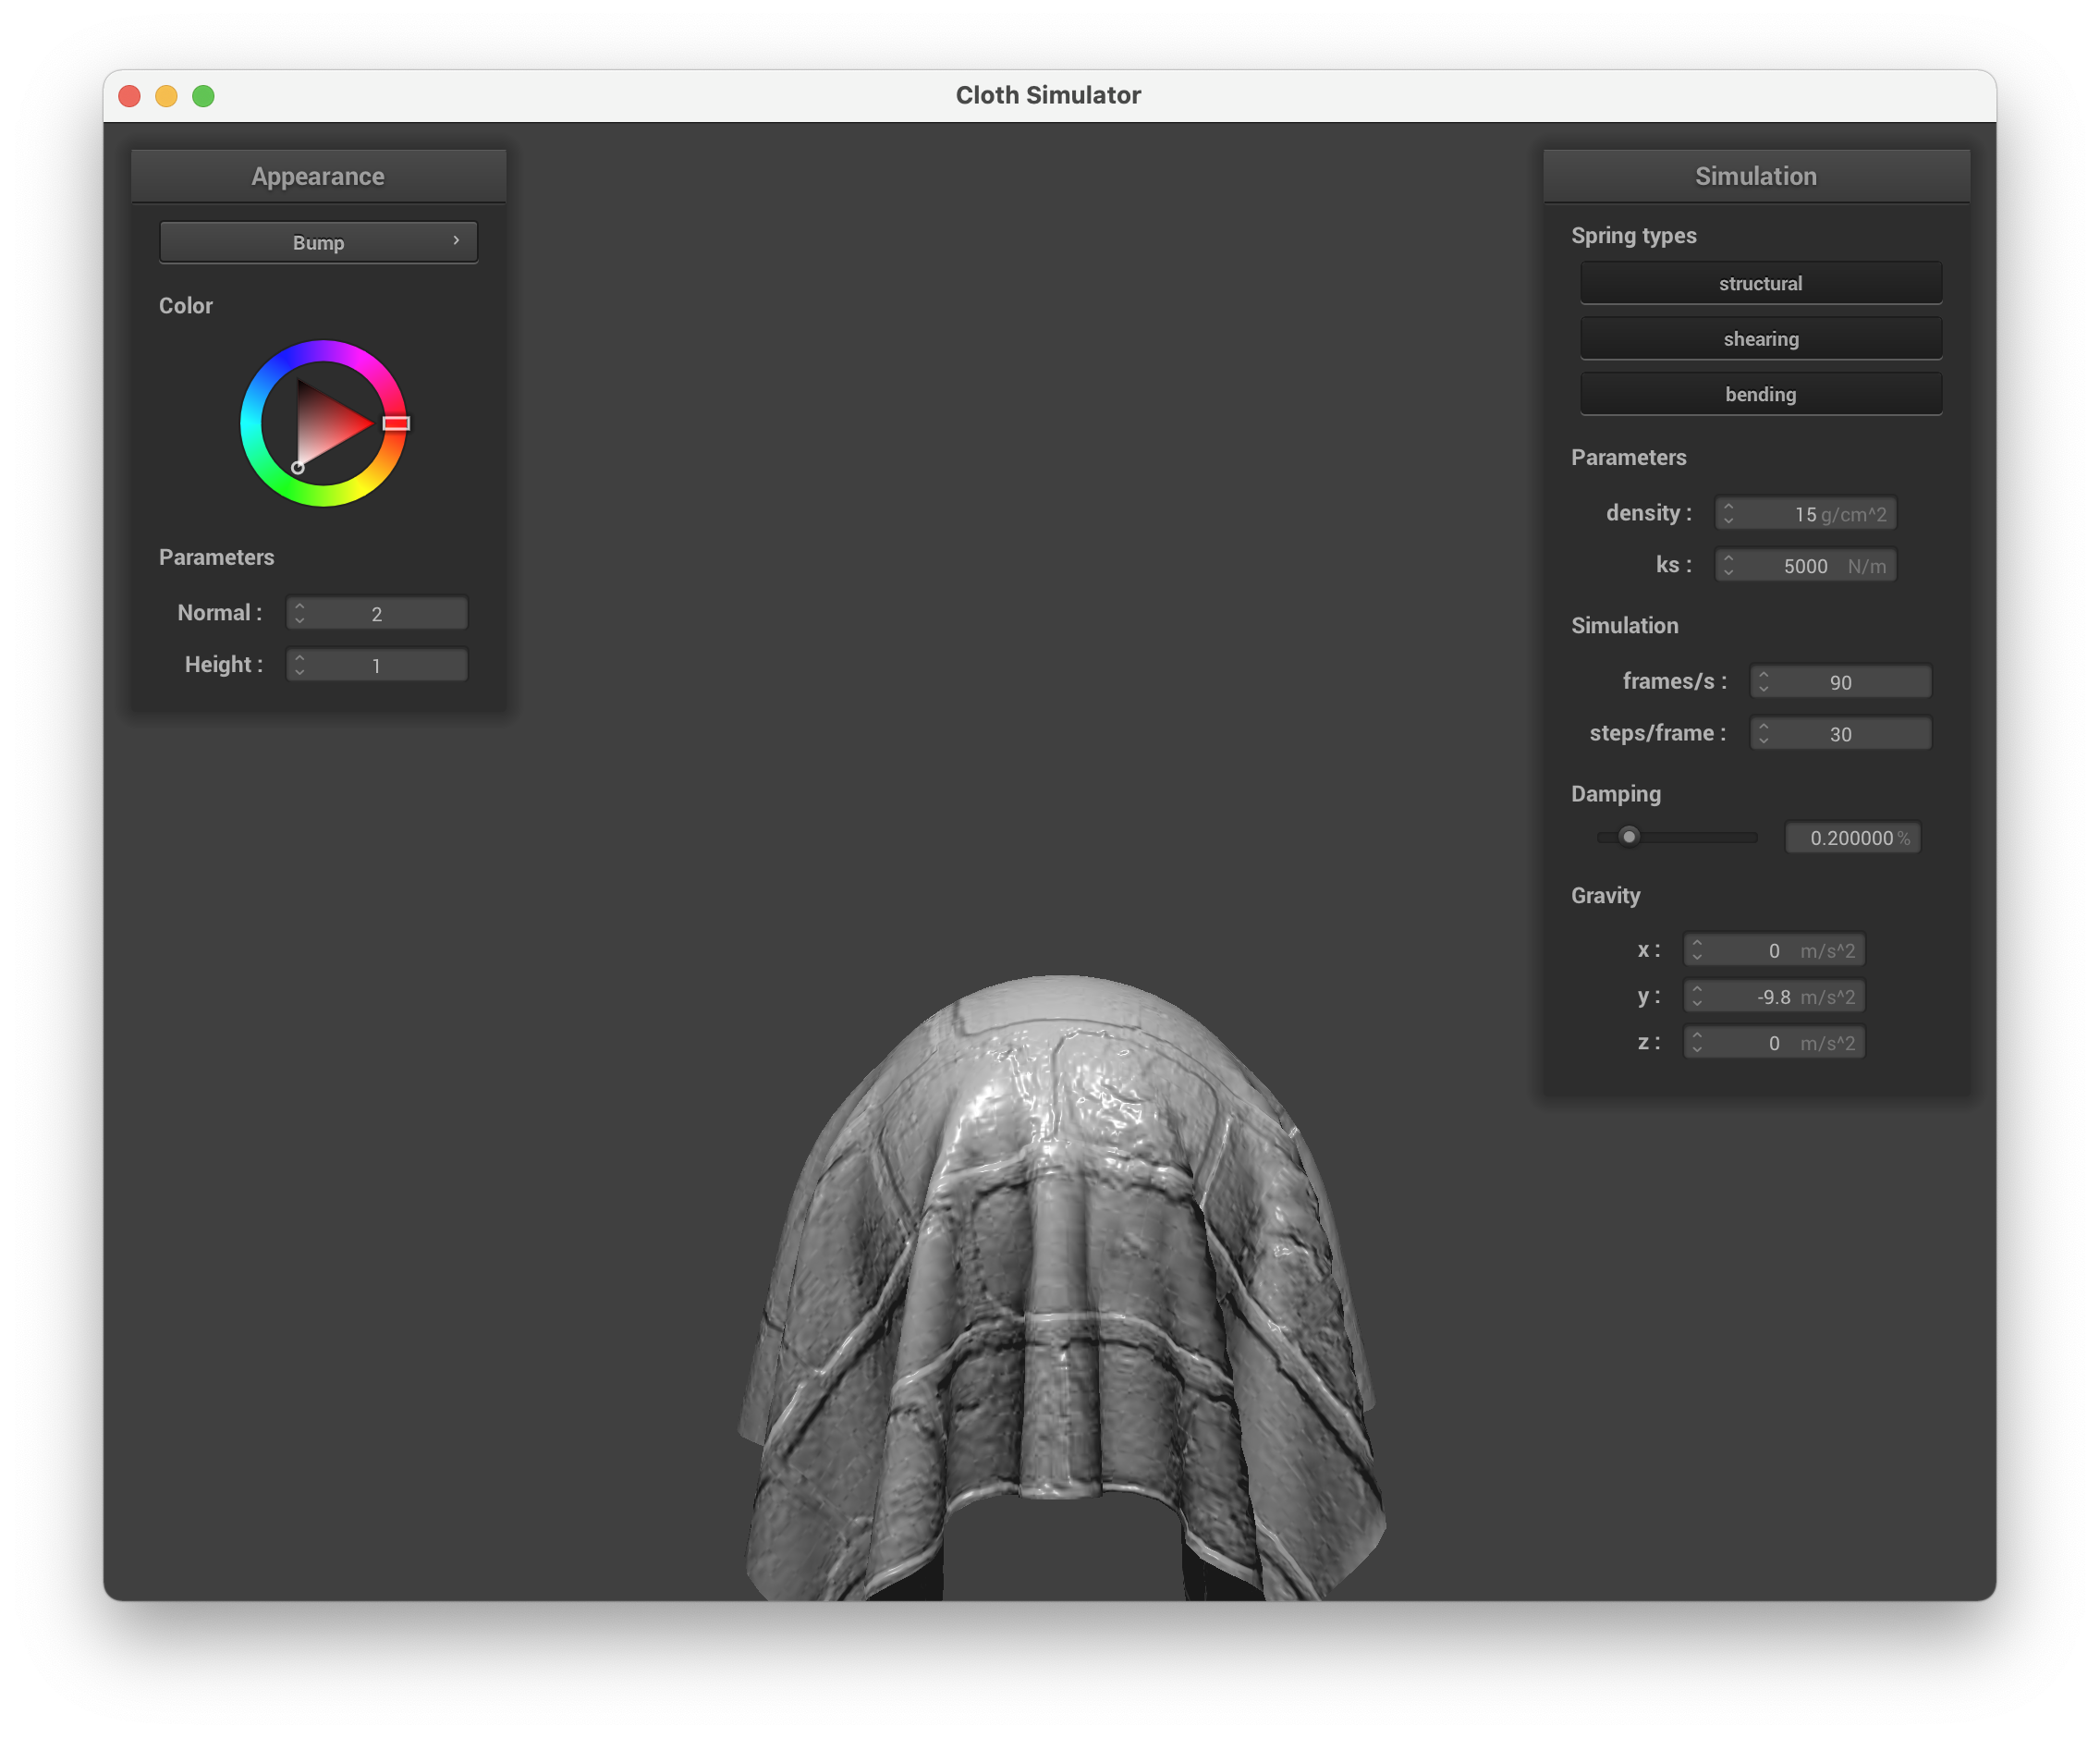
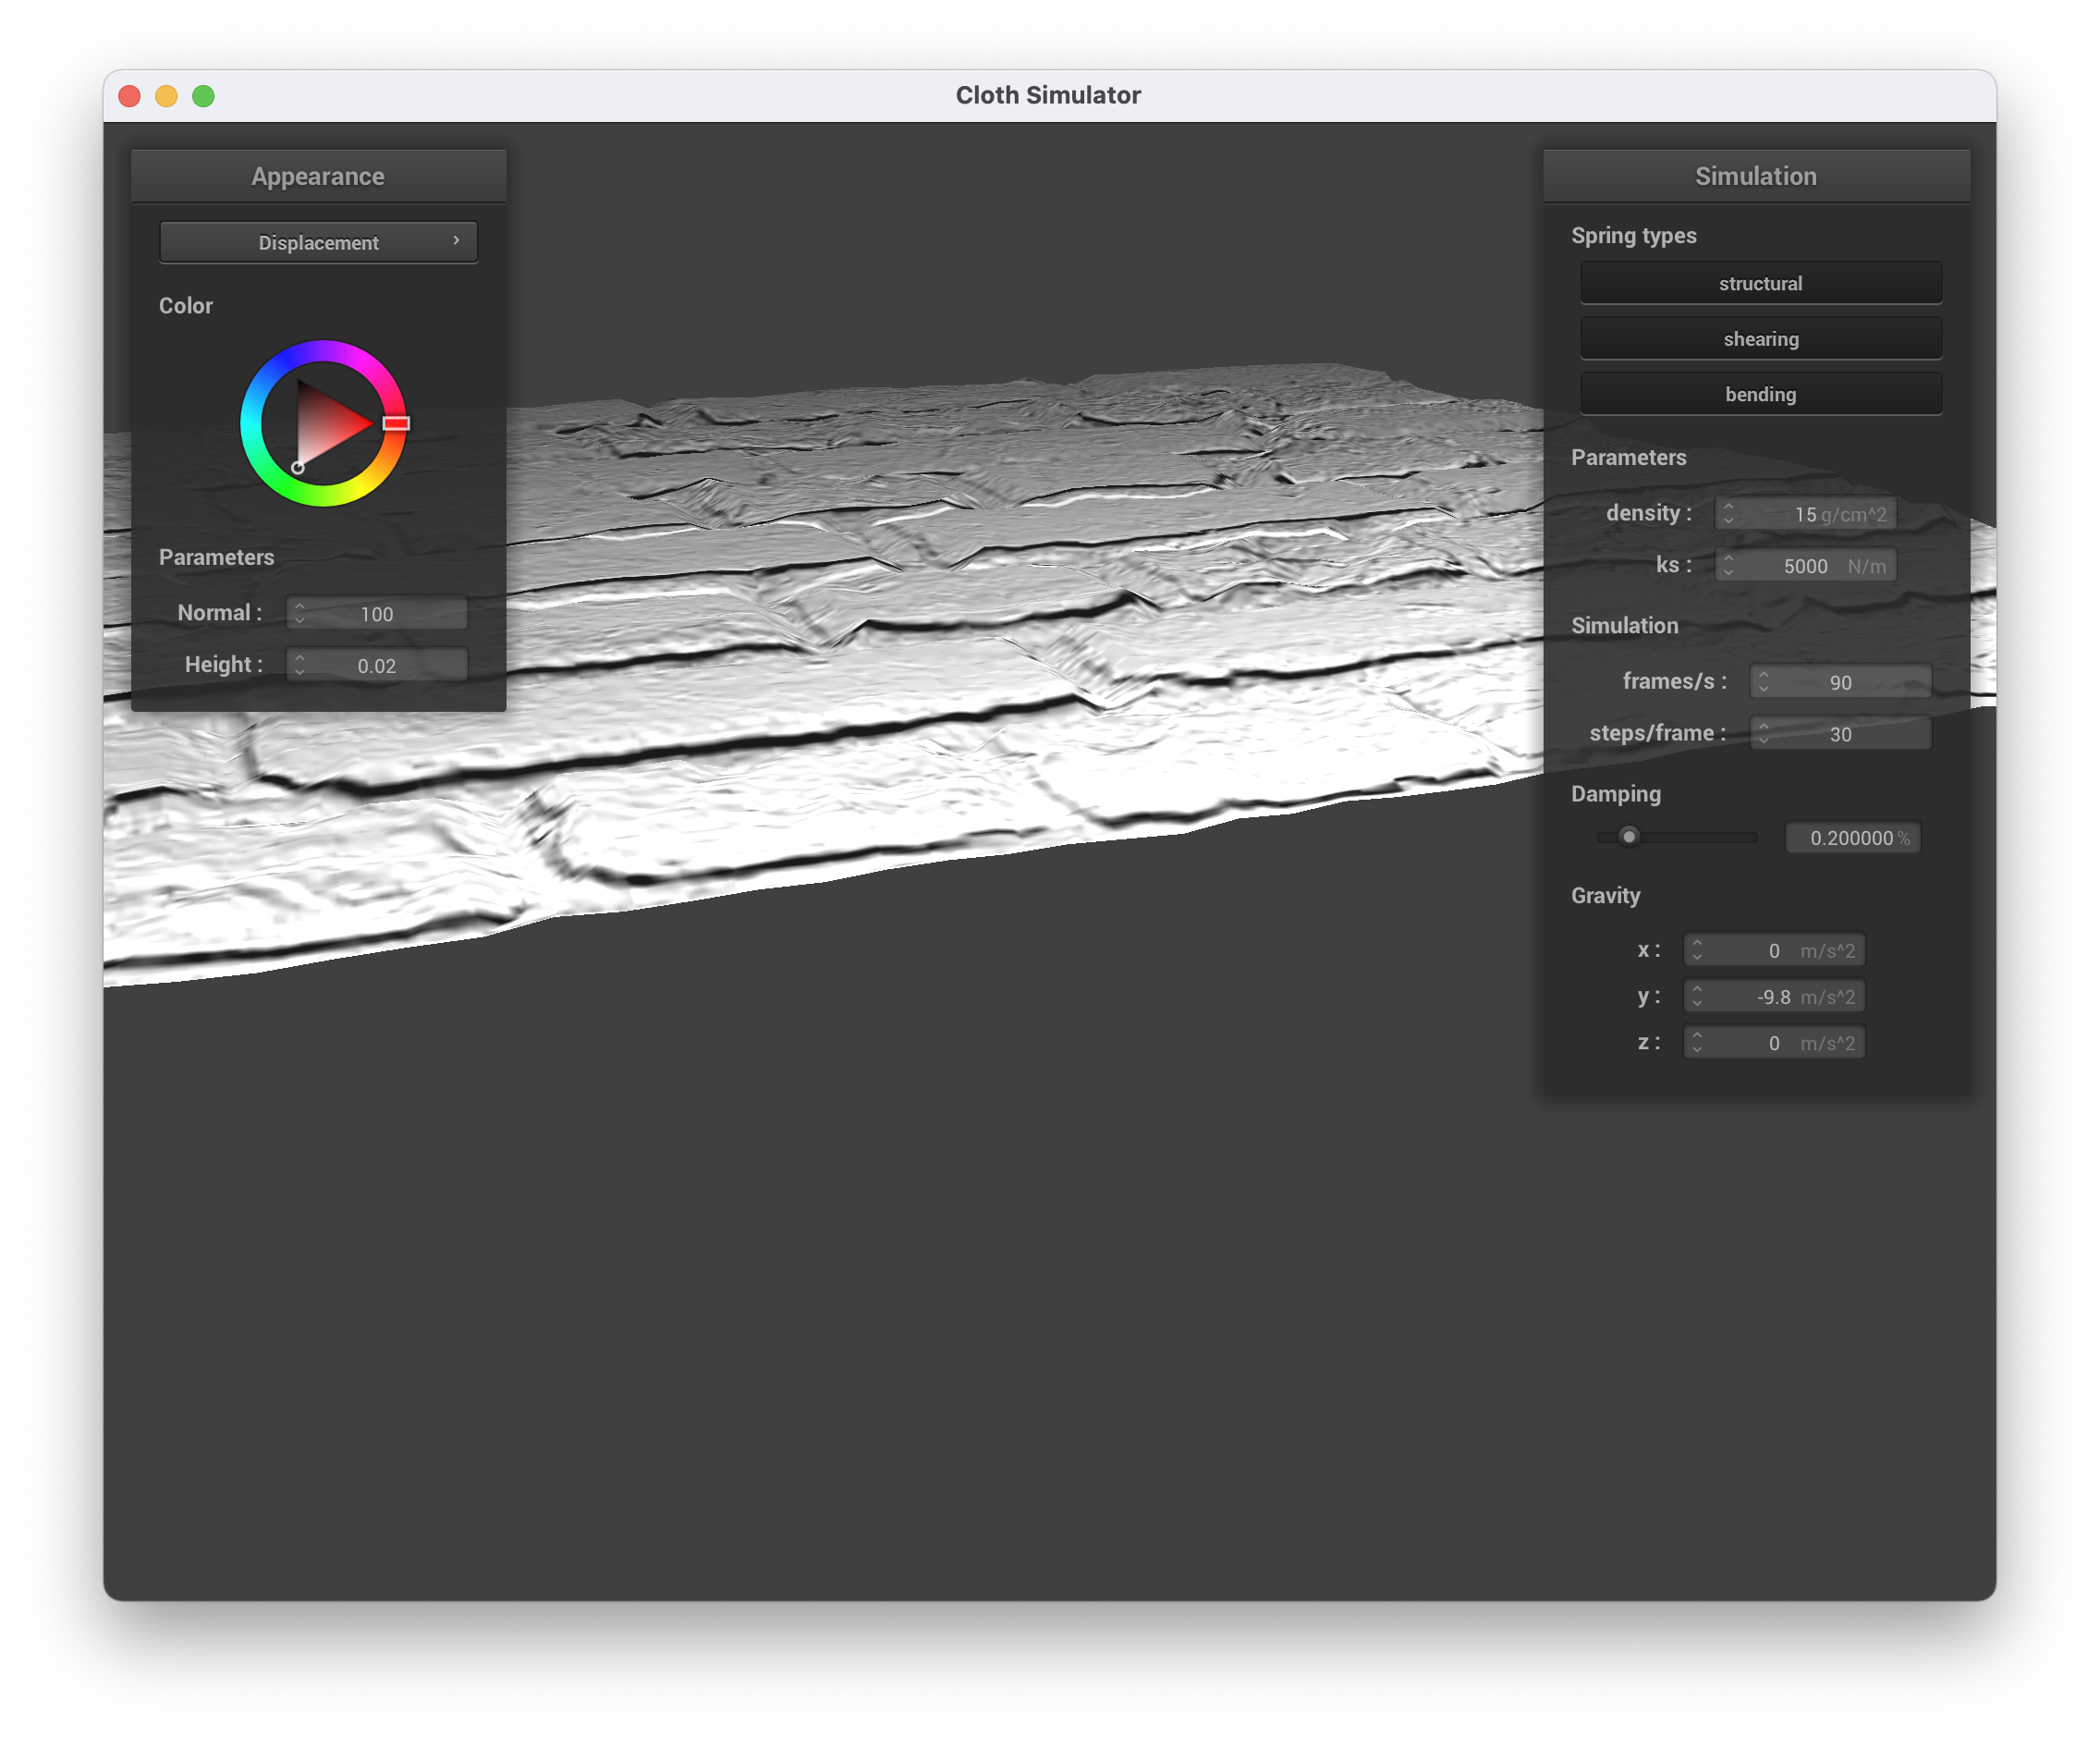
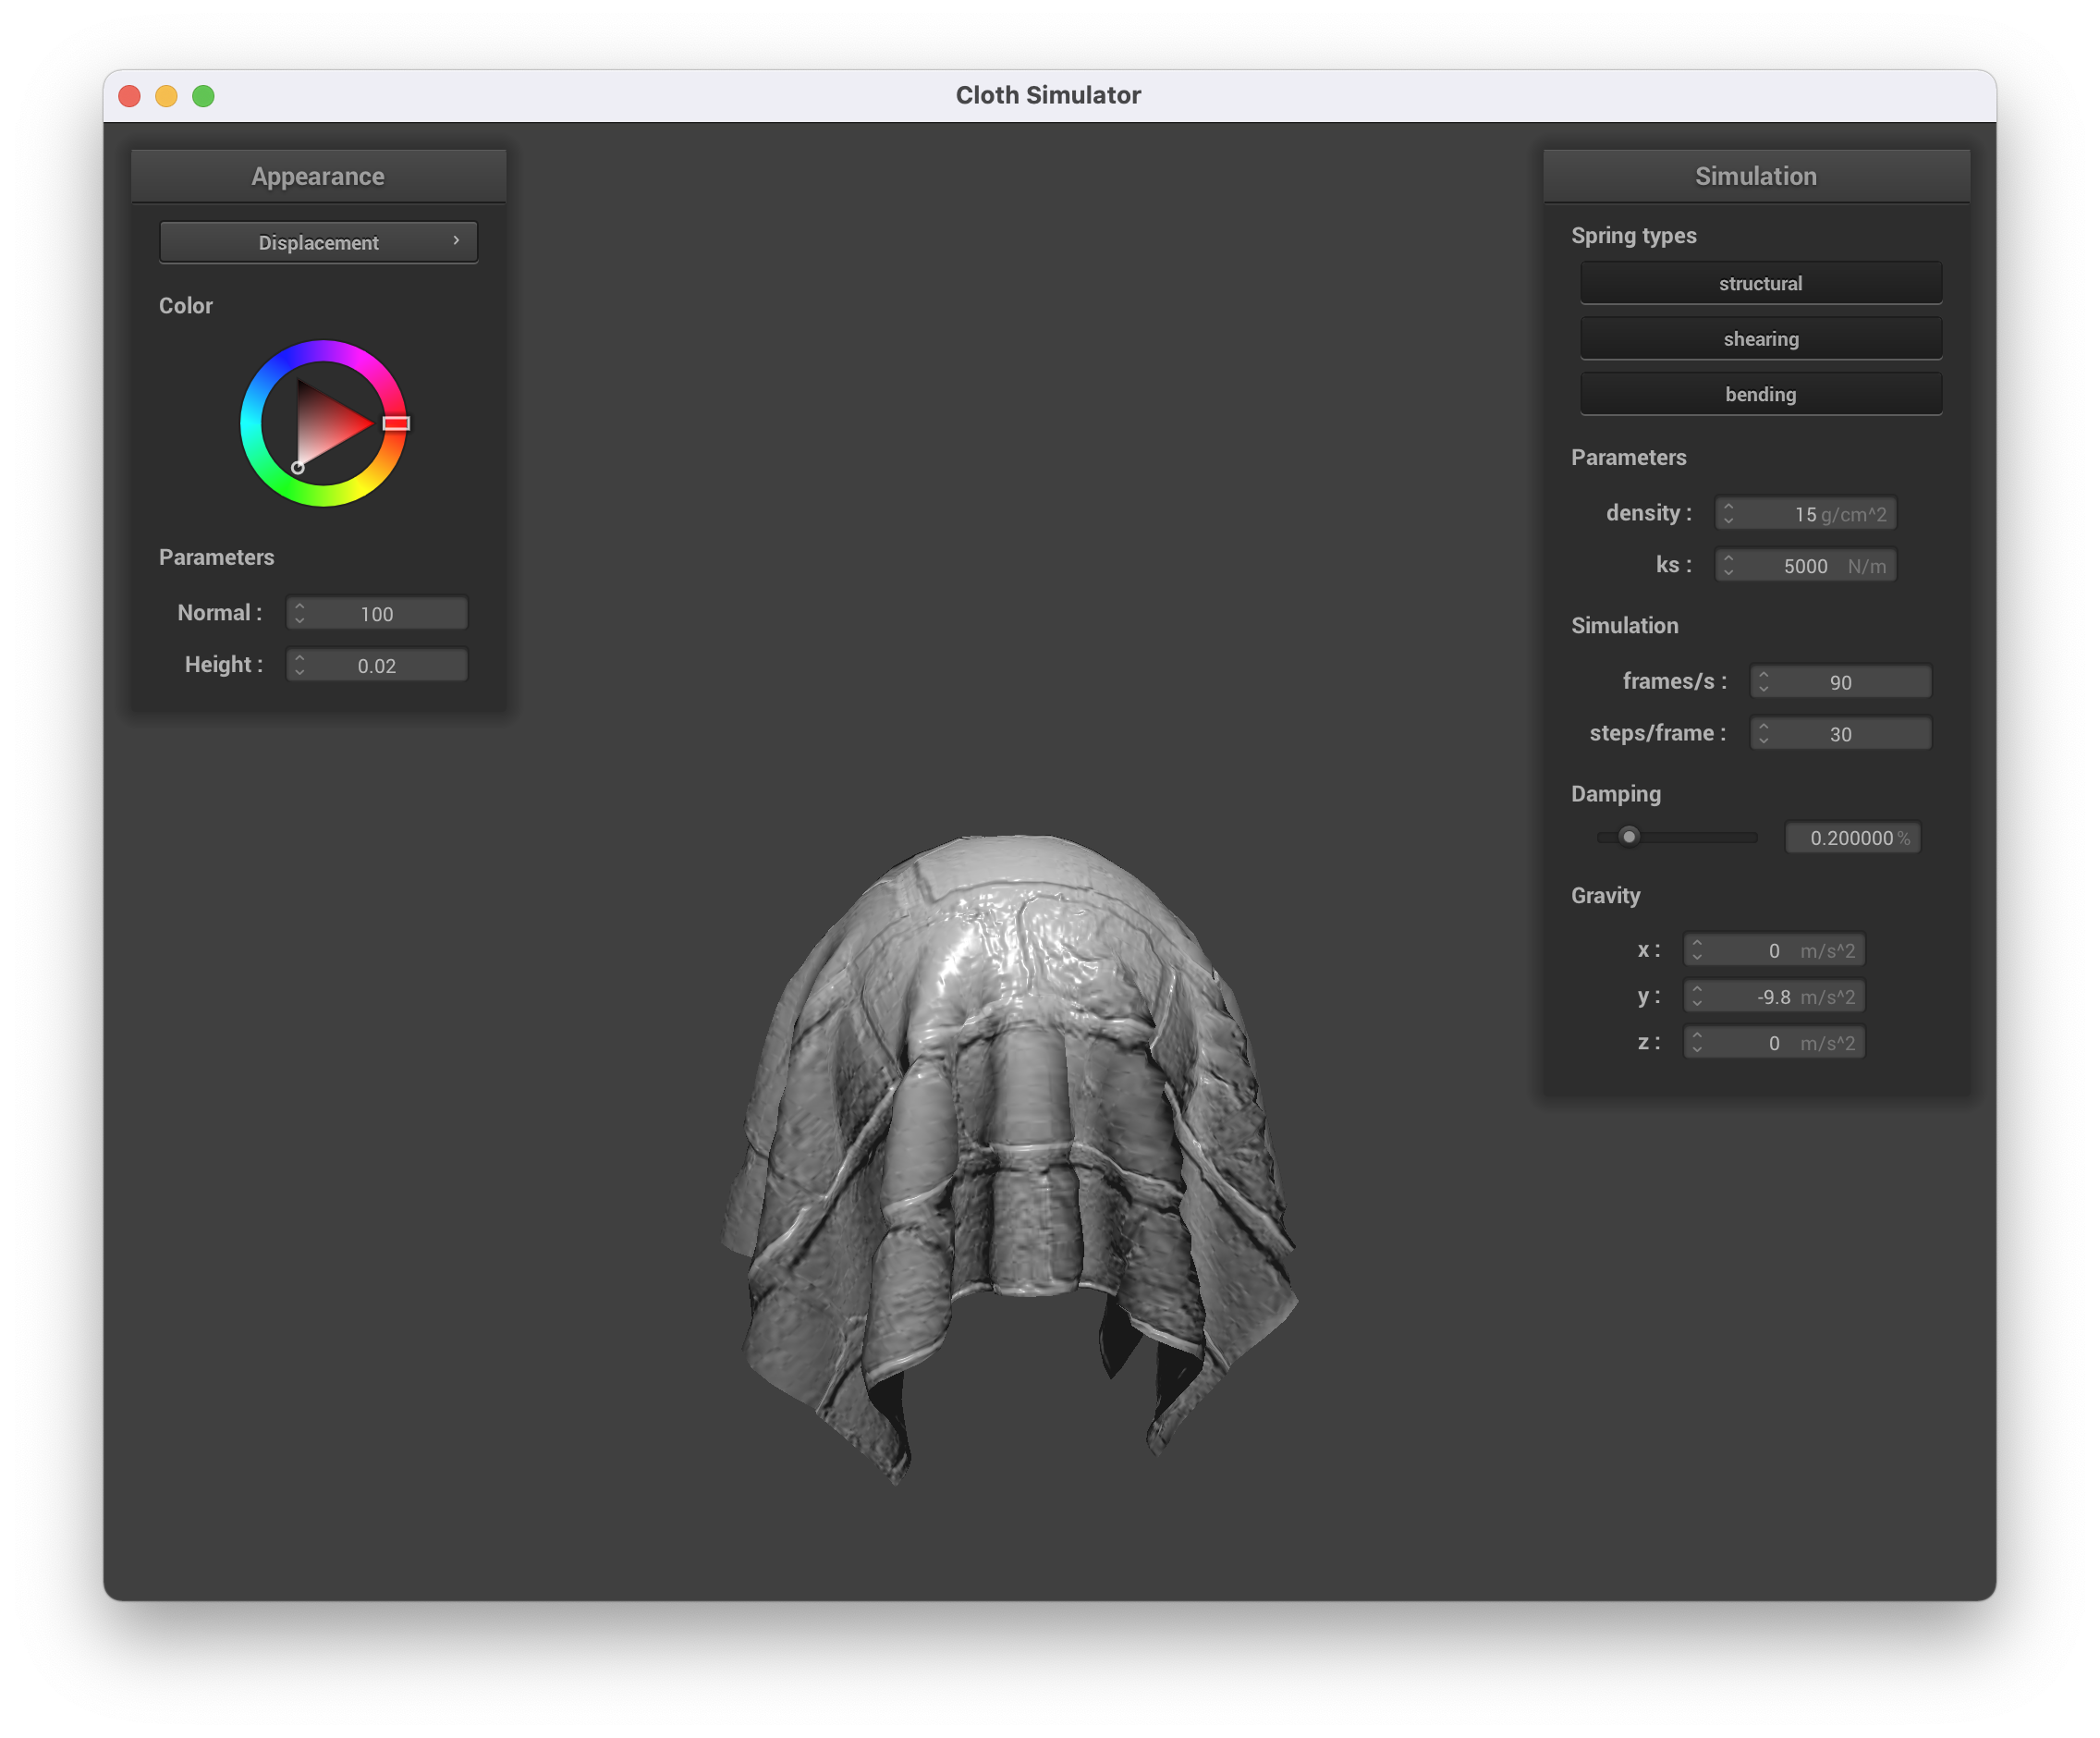
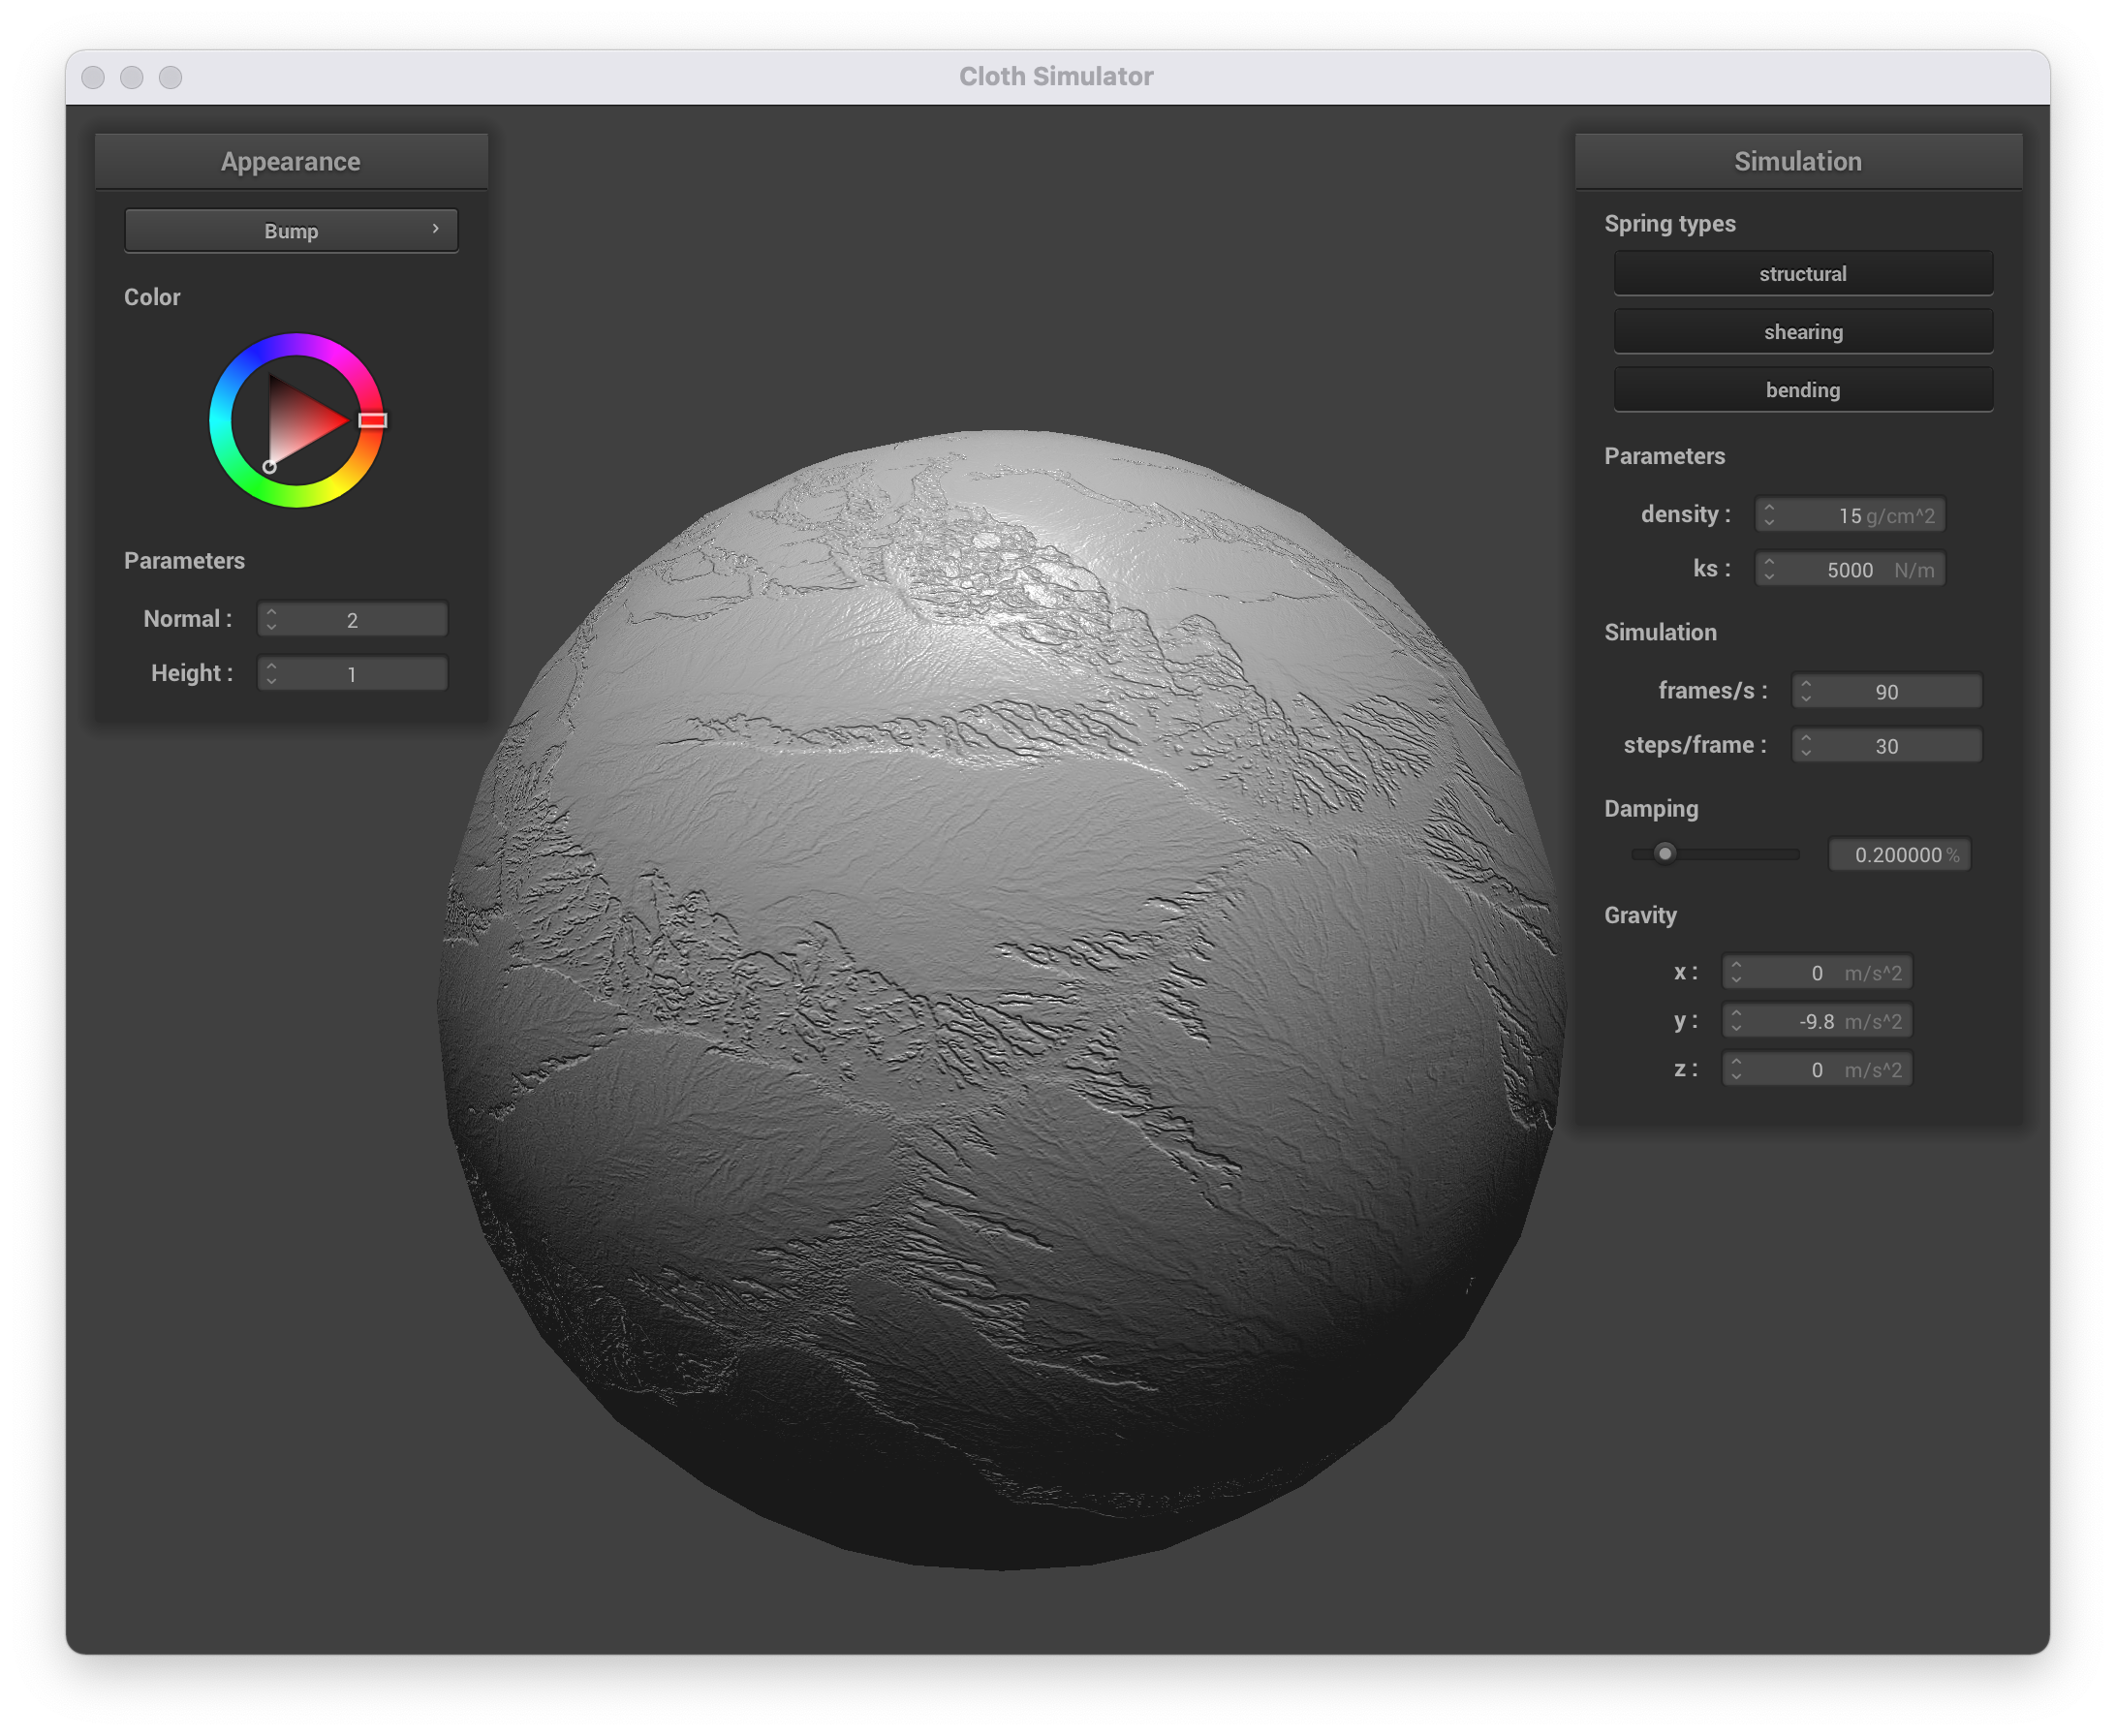
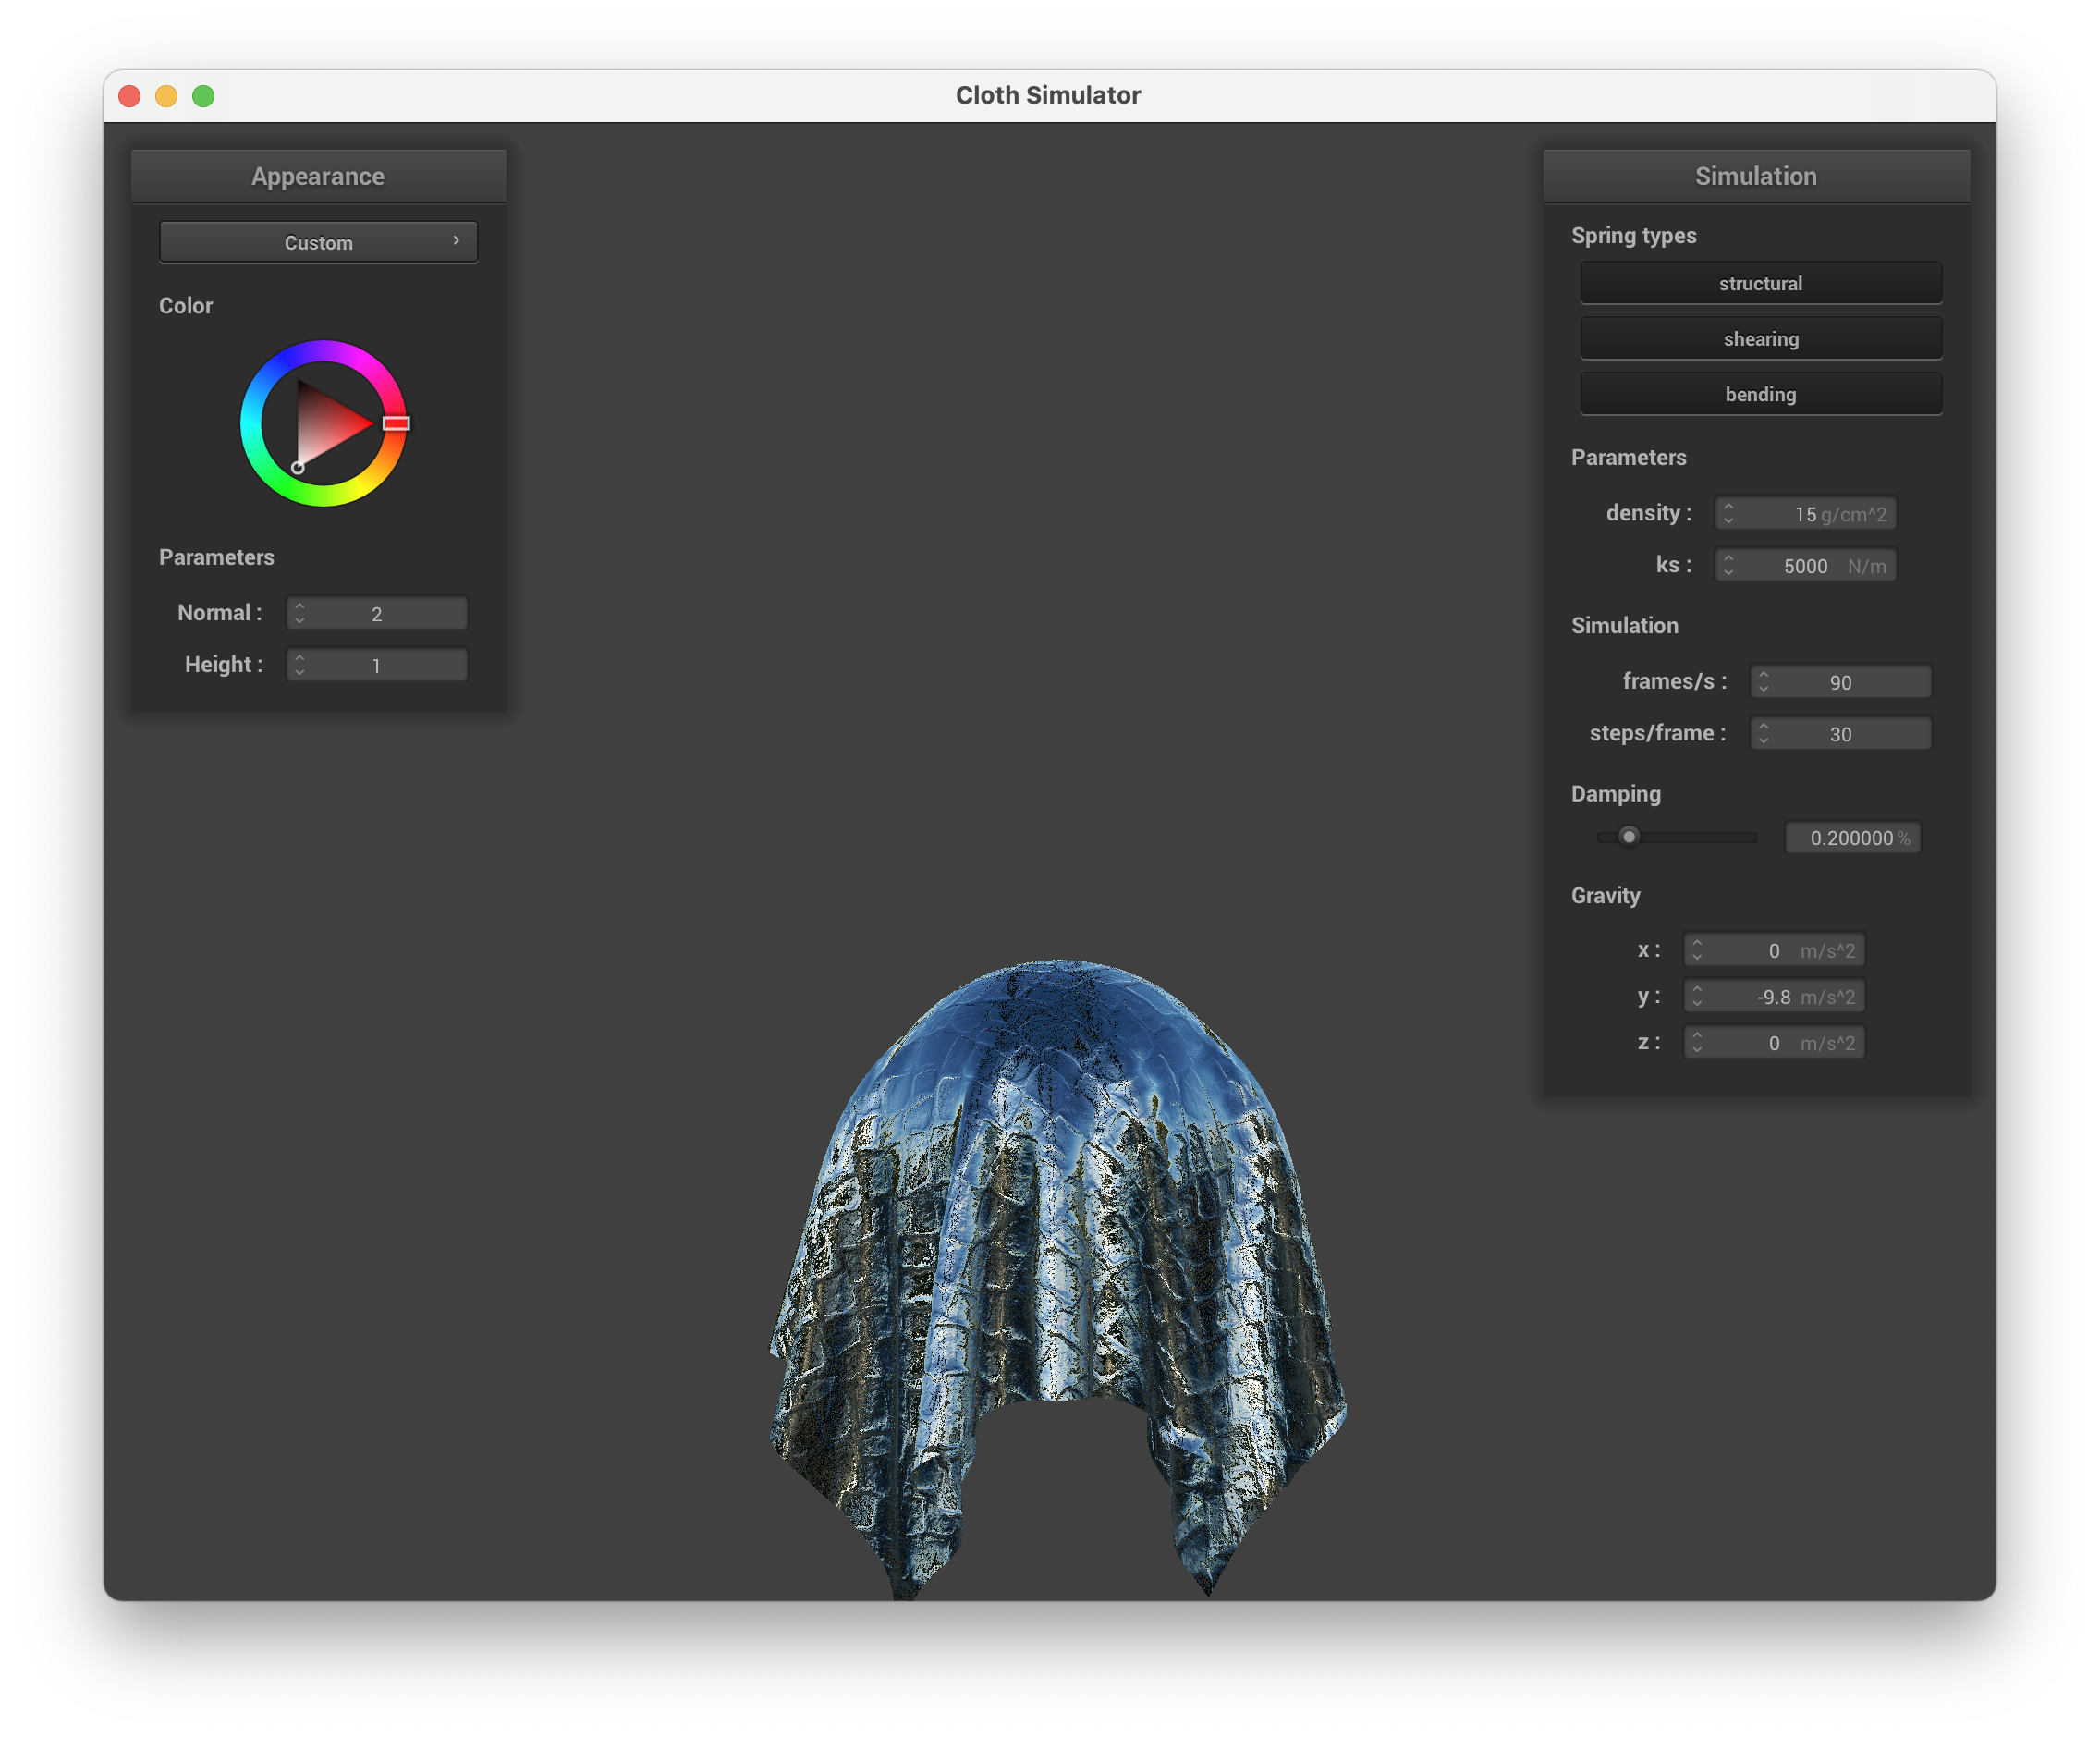
For part 5.4.1, we implemented bump mapping. We first got the tangent-bitangent-normal (TBN) matrix by combining the vectors v_normal, v_tangent, and the cross product of v_normal and v_tangent into one matrix. We then found du = (h(u + 1/w, v) - h(u, v)) * u_height_scaling * u_normal_scaling and dv = (h(u, v + 1/h) - h(u, v)) * u_height_scaling * u_normal_scaling where h returns the height encoded by a height map at texture coordinates u and v. We then created a vector for local space normal no = -1*du, -1*dv, 1. We then got the displaced model space normal vector nd = tbn * no. We then put this normal nd into blinn phong shading and set the result to out_color.
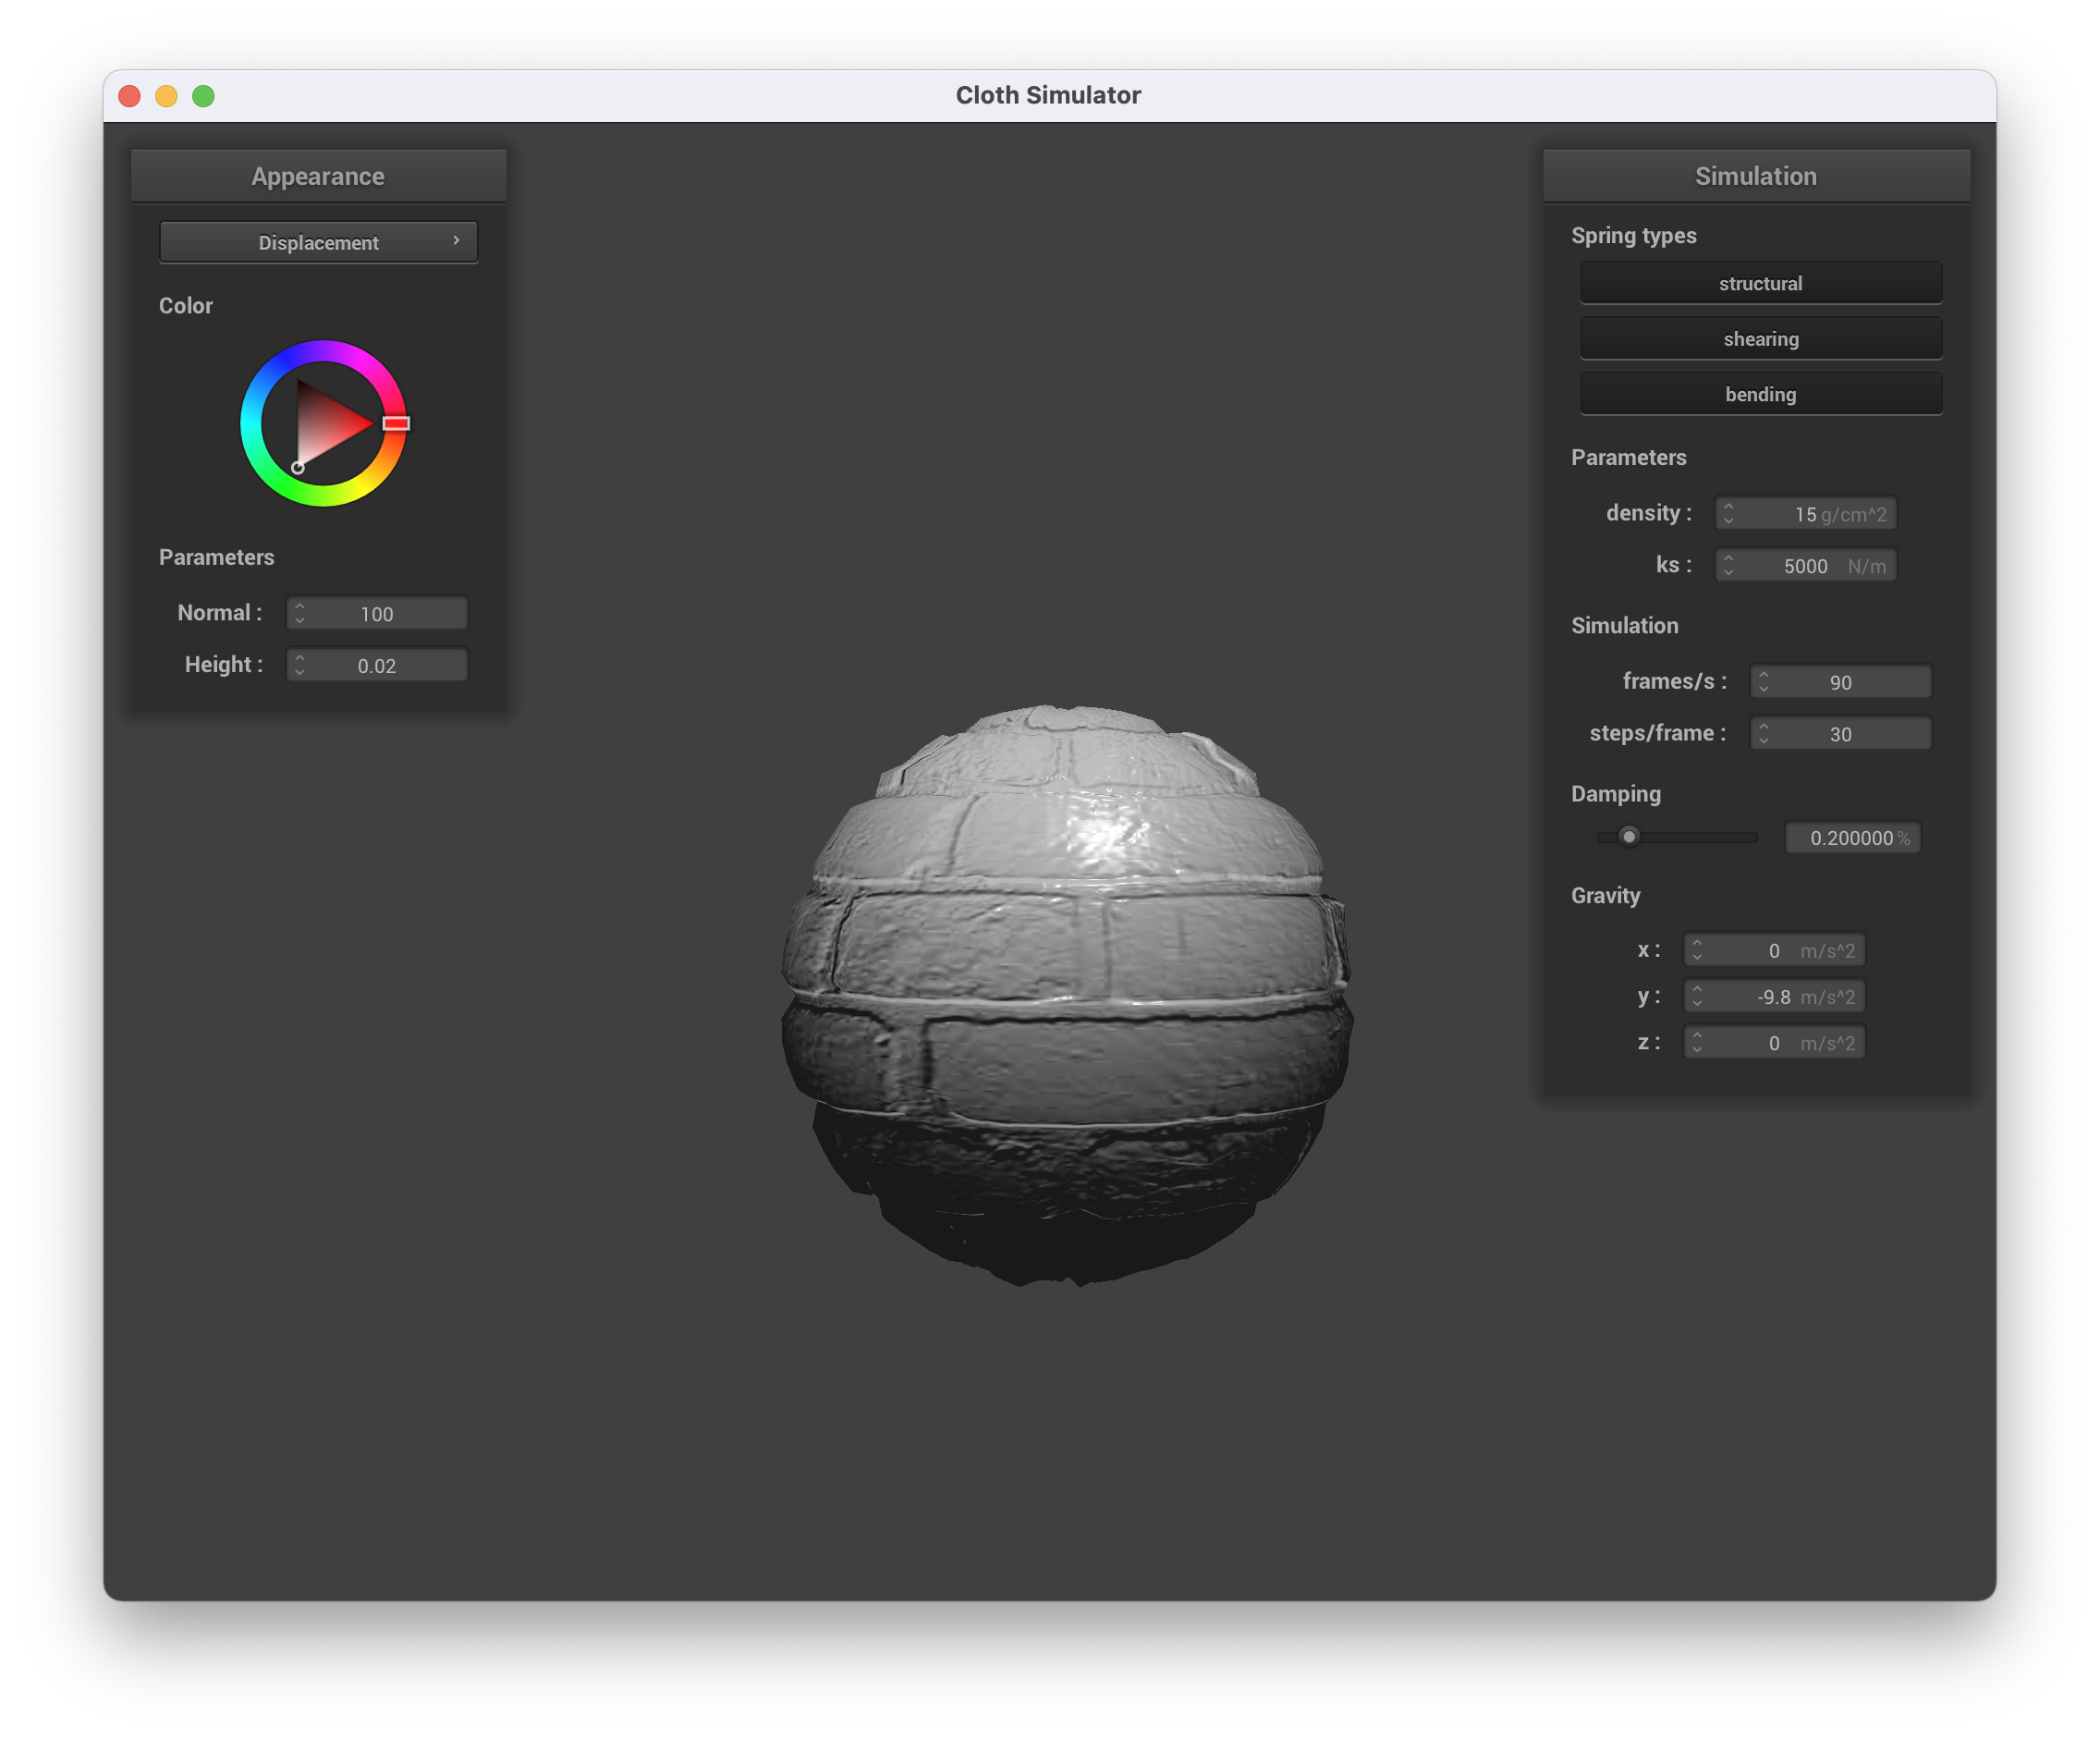
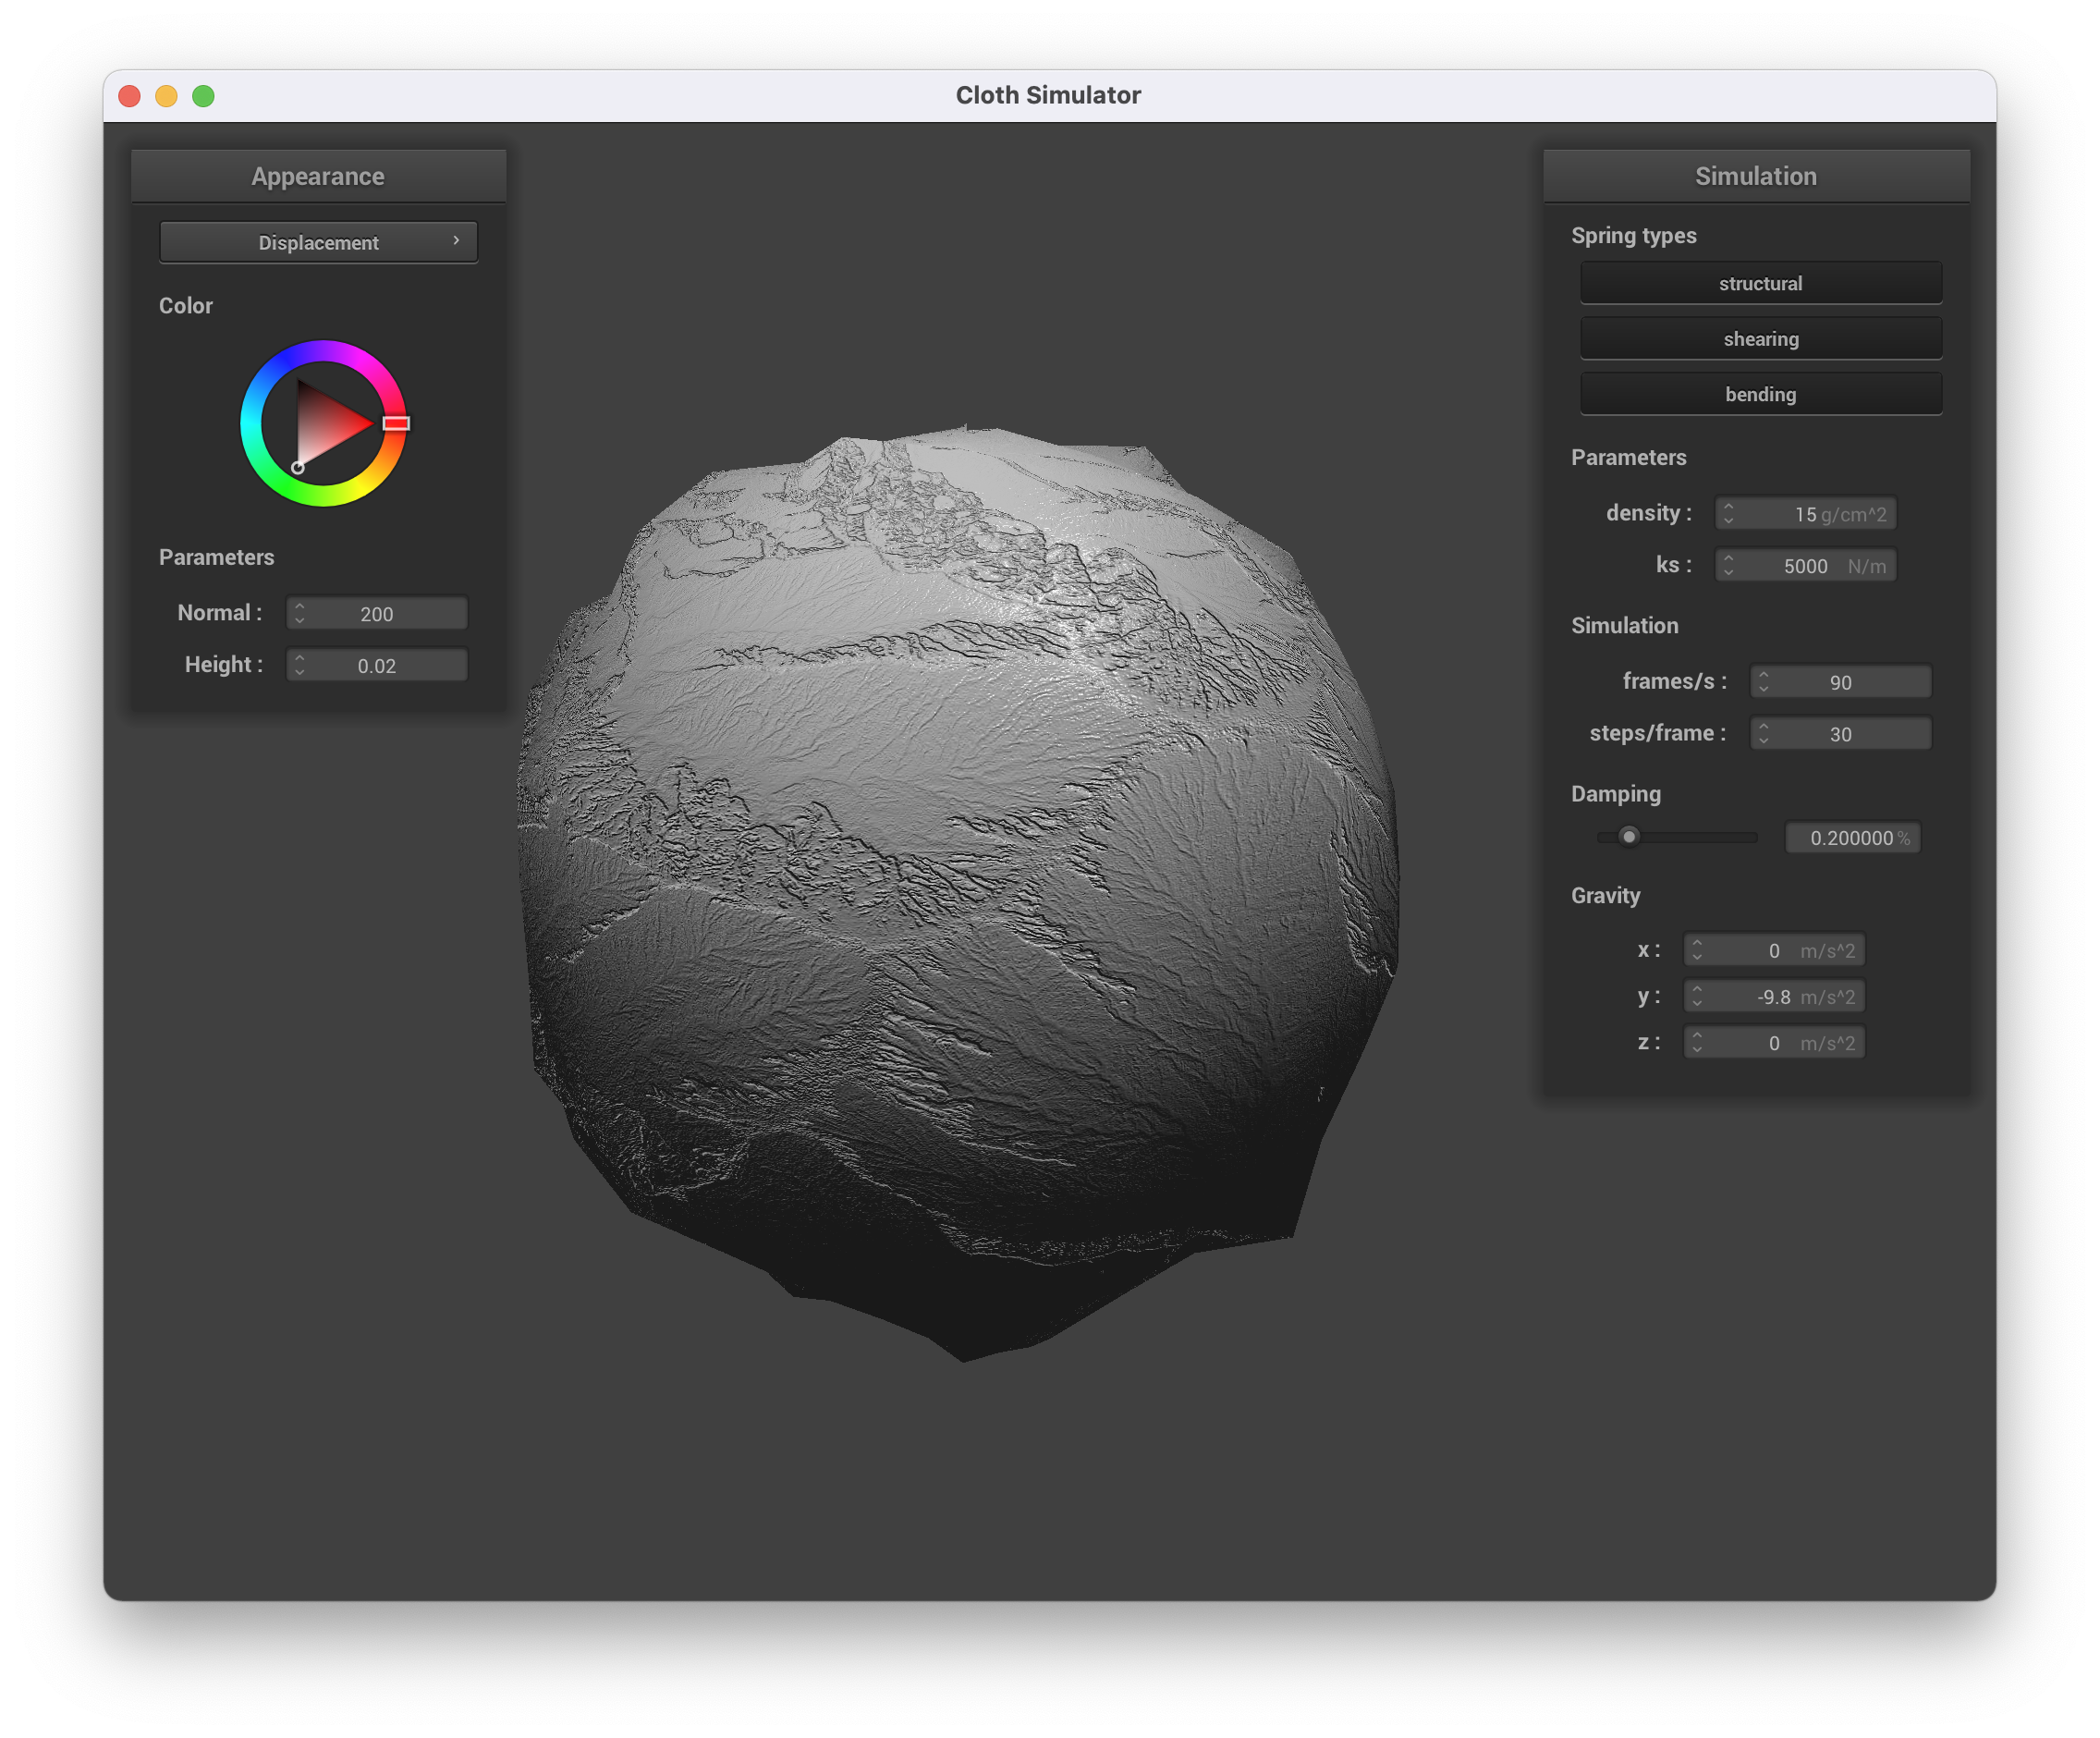
For part 5.4.2, we implemented displacement mapping. We copied over the code from bump mapping into the displacement.frag file. In the displacement.vert file we updated the v_position by adding v_normal * h(u, v) * height_scaling to change the geometry.
For part 5.5, we implemented environment mapped reflections. We found the outgoing eye-ray wo by getting the vector between the v_position and u_cam_position and dividing it by the length of v_position - u_cam_position. We then reflected wo by v_normal to get wi. We finally sampled wi using u_texture_cubemap and set that to the out_color.
For debugging, I had an issue where I didn't know how to calculate some values, but got clarifications during office hours. During bump and displacement mapping, we had some issues as well. We had a variable named h, so we couldn't call the h functions. We also had some parentheses in the wrong spot, which led to some lines in the bump mapping. For displacement, we didn't see results because we forgot to update the gl_Posittion.
A shader program takes in both a vertex shader and fragment shader. The shader program gives inputs to the vertex shader and the outputs of that will be inputted as the inputs to the fragment shader. The vertex shader applies transforms to the vertices by changing their positions and normal vectors. It then updates the gl_Position. The fragment shader then takes the fragments that result after rasterization and shades them by setting the out_color.
Blinn Phong shading combines ambient light, diffuse shading, and specular reflection to get the final shading. Each of these components are multiplied by their respective shading coefficients. Blinn Phong takes all of this into account to show a nice image that takes physics of light into consideration.
|
|
|
|
|
|
|
|
Texture Shading

|
|
Bump Mapping
|
|
Displacement Mapping
|
|
|
Coarseness
Changing the coarseness makes a small change in the bump mapping. It looks a little more round with higher a and o values. The change in displacement mapping is more noticable where the a and o values are higher. We can see higher effects in the higher bumps from the texture.
|
|

|

|
Environment-Mapped Reflections

|
|
Extra Credit: Custom Shader
We created a custom shader by combining the bump shader and mirror shader. We took the code from bump mapping and got the normal nd and used that to reflect wo to get wi. We then sampled from the u_texture_cubemap to get the out_color. We combined the code from bump mapping and mirror shader to get this new shader that is a combination of the two where we see the bumps and reflections.
|
|