Overview
In this project, we explored mirror and glass materials, as well as how aperture and focal distance can affect the depth of field effect. We implemented reflection and refraction by using Snell's law and Schlick's approximation to calculate the ratio of the reflection energy to the refraction energy in glass. Furthermore, we converted from the pinhole camera to thin lens camera by taking into account the lens radius and focal distance.
Part 1. Mirror and Glass Materials
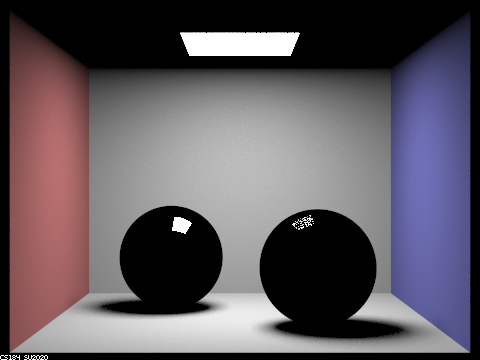
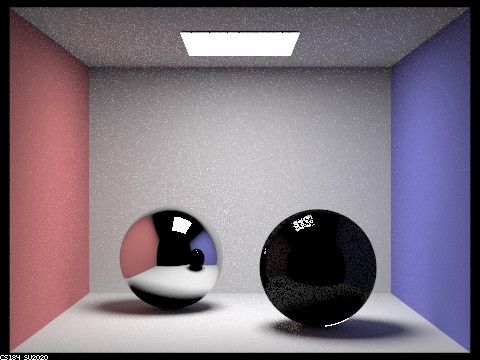
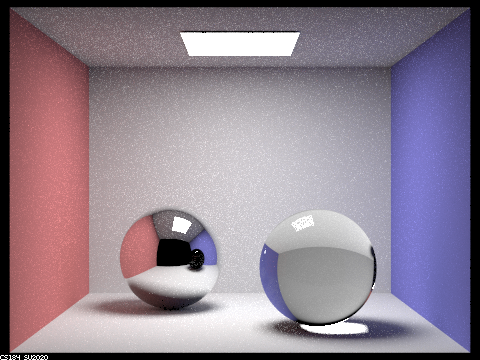
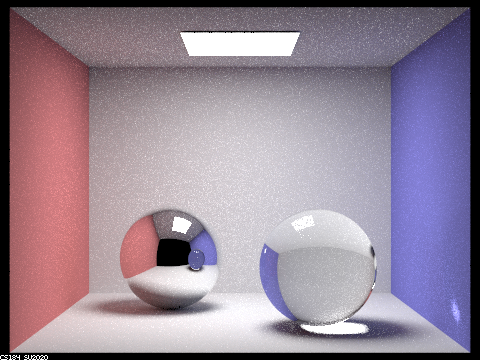
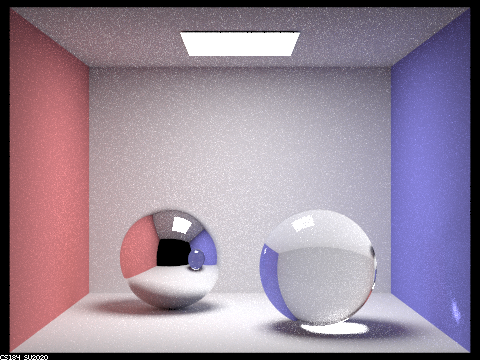
Show a sequence of six images of scene `CBspheres.dae` rendered with `max_ray_depth` set to 0, 1, 2, 3, 4, 5, and 100. The other settings should be at least 64 samples per pixel and 4 samples per light. Make sure to include all screenshots.

|
|
|
|
|
|

|
Point out the new multibounce effects that appear in each image.
With m=0 we see only the zero bounce illuminance from the area light. With m=1 we also see the one bounce reflection of the light on the surface of the sphere due to reflection. With m=2 we see reflections shown on the back sphere, but the glass sphere in the front is still mostly black except for some reflections of the light source. With m=3 the ray hits the surface of the glass sphere (depth 1), refracts through the sphere and hits another part of the sphere (depth 2) and then goes out of the sphere and hits the scene (depth 3). With m=4 we are able to see the reflection of the front sphere on the back sphere and focused points of light onto the wall (depth 1 is hitting the back sphere, depth 2 is hitting the surface of the front sphere, with depth 3 we refract and hit another point on the sphere, with depth 4 we leave the sphere and hit somewhere in the scene). With m=5 and m=100 we don't see many readily apparent new features appear. However, with 100 bounces the reflection of the light source is more distorted likely due to too much randomness with so many bounces and relatively fewer samples.
Explain how these bounce numbers relate to the particular effects that appear. Make sure to include all screenshots.
As explained above, as we include more bounces, more the entire scene gets lit up. For example, the transition from m=3 to m=4 allowed us to see the illuminated reflection of the front sphere in the back sphere rather than just a black sphere.
Part 2. Microfacet Material
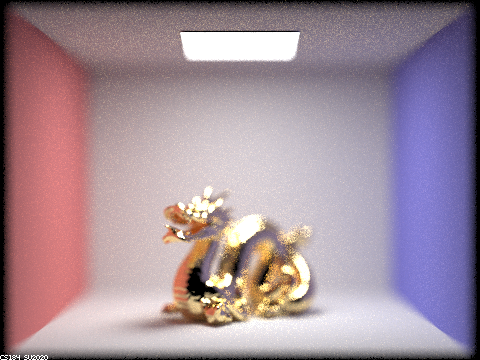
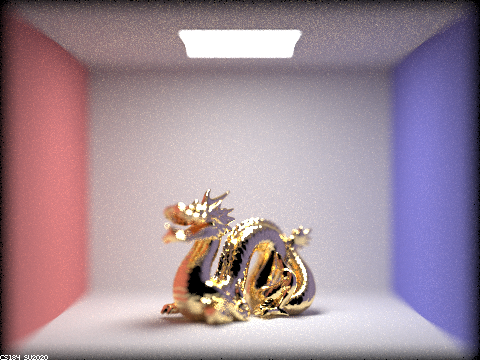
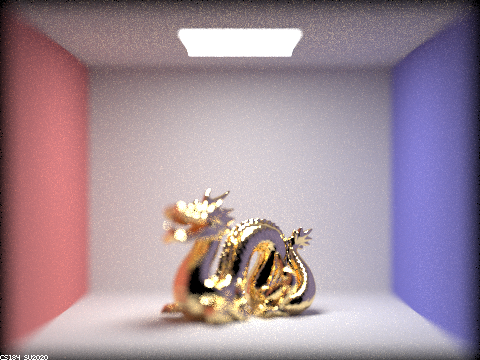
Show a screenshot sequence of 4 images of scene `CBdragon_microfacet_au.dae` rendered with $\alpha$ set to 0.005, 0.05, 0.25 and 0.5. The other settings should be at least 128 samples per pixel and 1 samples per light. The number of bounces should be at least 5. Describe the differences between different images. Note that, to change the $\alpha$, just open the .dae file and search for `microfacet`.
Your response goes here.
Show two images of scene `CBbunny_microfacet_cu.dae` rendered using cosine hemisphere sampling (default) and your importance sampling. The sampling rate should be fixed at 64 samples per pixel and 1 samples per light. The number of bounces should be at least 5. Briefly discuss their difference.
Your response goes here.
Show at least one image with some other conductor material, replacing `eta` and `k`. Note that you should look up values for real data rather than modifying them arbitrarily. Tell us what kind of material your parameters correspond to.
Your response goes here.
Part 3. Environment Lightl
Pick one *.exr* file to use for all subparts here. Include a converted *.jpg* of it in your website so we know what map you are using.In a few sentences, explain the ideas behind environment lighting (i.e. why we do it/how it works).
Your response goes here.
Show the *probability_debug.png* file for the *.exr* file you are using, generated using the `save_probability_debug()` helper function after initializing your probability distributions.
Your response goes here.
Use the `bunny_unlit.dae` scene and your environment map *.exr* file and render two pictures, one with uniform sampling and one with importance sampling. Use 4 samples per pixel and 64 samples per light in each. Compare noise levels. Make sure to include all screenshots.
Your response goes here.
Use a different image (if you did part 2, we recommend `bunny_microfacet_cu_unlit.dae`) and your environment map *.exr* file and render two pictures, one with uniform sampling and one with importance sampling. Use 4 samples per pixel and 64 samples per light in each. Compare noise levels. Make sure to include all screenshots.
Your response goes here.
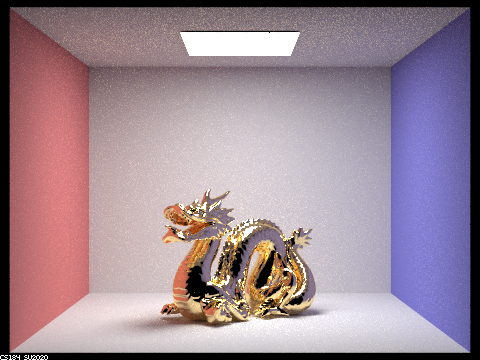
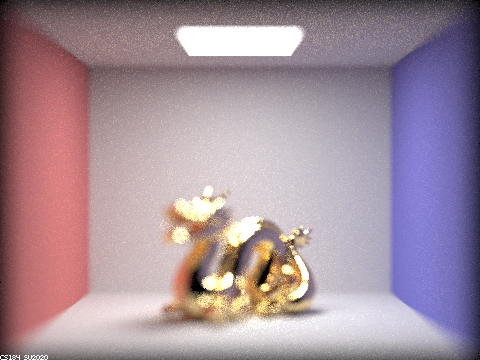
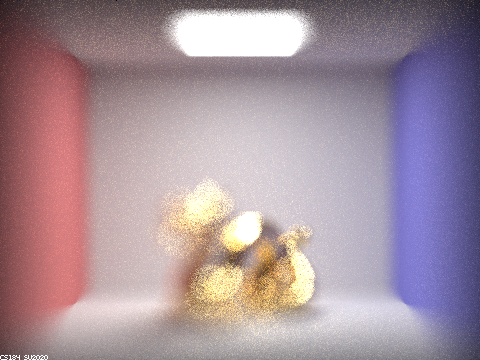
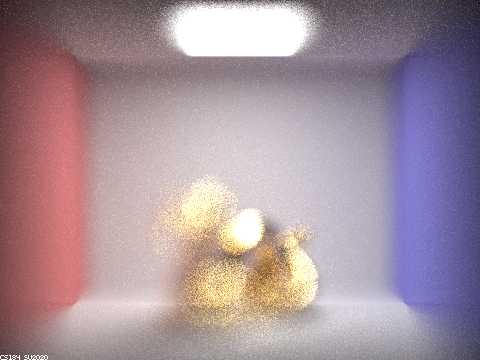
Part 4. Depth of Field
For these subparts, we recommend using a microfacet BSDF scene to show off the cool out of focus effects you can get with depth of field!In a few sentences, explain the differences between a pinhole camera model and a thin-lens camera model.
In the pinhole camera model, everything is in focus, but with the thin-lens camera model, only objects that are on a plane that is at focalDistance of the lens are in focus. We can see in the following pictures that the thin lens camera's output relies on the aperture. The higher the aperture, the more shallow the depth of field is. In terms of focal distances, as we increase the distance, we see the focus shift more towards the back of the dragon. For example with a focal distance of 4.4, the camera is "too close" and we can see that it is focused on the very front of the dragon (i.e. its front foot). But as we increase the distance, the focus shifts back to the neck of the dragon, the body of it, and finally the tail of it.
Show a "focus stack" where you focus at 4 visibly different depths through a scene. Make sure to include all screenshots.
|

|
|
|
Show a sequence of 4 pictures with visibly different aperture sizes, all focused at the same point in a scene. Make sure to include all screenshots.
|
|
|
|