CS 184: Computer Graphics and Imaging, Spring 2020
Project 1: Rasterizer
Calvin Wong, CS184
Overview
A lot of this project was learning about bounds checking, interpolating/blurring to antialias, and translating between
different coordinate systems to do some cool transformations! Interpolation and averaging larger samples was a key concept
in a lot of these. For example, blurring similarities between supersampling with rate of 4 and bilinear texel/pixel sampling showed up,
the same idea of interpolating showed up in the barycentric coordinate system, etc. It was interesting that a lot of this
project's math wasn't too complicated (although maybe that's because it dealt with 2D), and rather more understanding some neat
applications of the math.
I learned a bit about programming in C++, and although I wish I had time for optimizations, I'd say it's pretty cool what I've made,
and I can take these ideas and apply it (for example making pixel art and pixel animations look less jaggy lol). Overall a solid introduction
to rendering 2D images!
Section I: Rasterization
Part 1: Rasterizing single-color triangles
To rasterize triangles, I go through all pixels of the bounding box of the triangle (so it's no worse
than checking if each sample is within the bounding box of the triangle), since I go from
the lowest x value of the 3 points to the largest x value of the 3 points, and the same for the y values.
I then check for each of these pixels if the pixel is inside the triangle by taking the dot product of the
vector from the pixel to each vertex with the normal of the vector from the vertex to a neighboring
vertex (making sure it's going vertex to vertex either always clockwise or always counterclockwise).
If all the dot products are greater than or equal to 0, the pixel is either right on 2 or less of the triangle
edges, or on the inside of the triangle (the finite plane of all the intersections of the half planes
that intersect with the normal, ie: where the centroid would lie), assuming all normals point towards
this inside.
If all the dot products are less than 0, then that means all the normals pointed away from the inside,
so this would still mean that we are inside the triangle. There is no way that all the products could
be less than 0 and not be inside the triangle, as this would mean the point intersects all three outer
planes, which would mean the point is not a point (it'd have to be a circle or plane or something that
isn't a point).
Then, we just color that point in the buffer using row major order indexing if it's inside the triangle.

Interesting that this kind of aliasing happened where it didn’t even register pixels.
Part 2: Antialiasing triangles
Supersampling is useful in making jaggies go away, creating smoother transitions between different colors.
To implement this, I changed rasterize_triangle to also account for the sampling_rate, calculating the step
then starting out at an offset of 1 / (2*sqrt(sample_rate)) because to go step spots in the sample buffer, I
would need to start out at that offset. The step was 1 / sqrt(sample_rate) because we need sample_rate
samples within the pixel, so sqrt(sample_rate) gave how much in the x and y, and 1 / that gave the actual
positional coordinate offset in terms of image coordinates.
The new changes required me to think about where to place supersamples, and I ended up putting
the supersamples for pixel i in positions i to i + sample_rate - 1 of the buffer, so that they
were sitting next to each other in the cache.
I also changed set_sample_rate and set_framebuffer_target to resize according to the sample_rate, essentially
increasing the buffer size proportionally to sample_rate (eg: if sample_rate was 4, I made the buffer
4 times bigger so I could fit all the supersamples).
Lastly, I changed resolve_to_framebuffer to take into account the new supersamples, taking the
groups of sample_rate supersamples and averaging their colors to put into the framebuffer.
The trickiest part was making sure that offset as well as the new row major indexing was correct, but it
fixed a lot of the jaggyness and lack of pixels shown in part 1, especially the green cube and
geometric shapes where the lines did not cover the antialiased parts. For example:
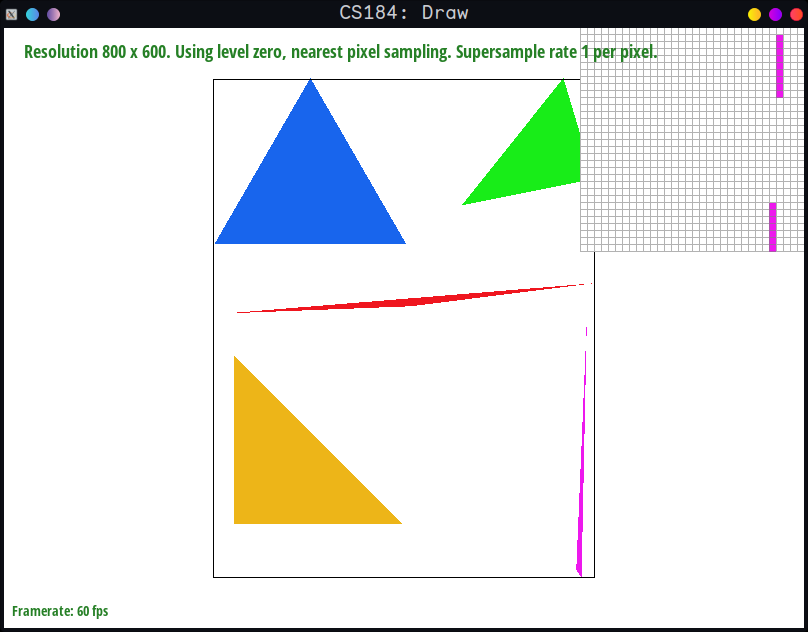 sample_rate = 1
|
 sample_rate = 4
|
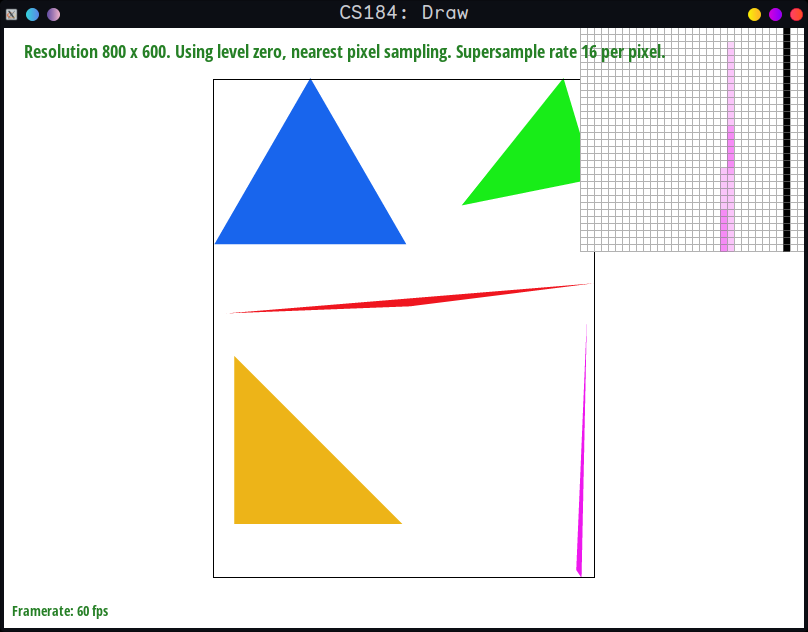 sample_rate = 16
|
In sample_rate 1, some pixels weren't registered because we
weren't able to sample finely enough, and thus didn't "catch"
the pixels.
With sample rate 4, it got better, because we sampled within
the pixel in 4 different spots and averaged, leading to
less gaps.
With sample_rate 16, it was the best, because we also made
the jaggedness disappear due to the increased sampling, which
created smoother and smoother transitions.
Part 3: Transforms
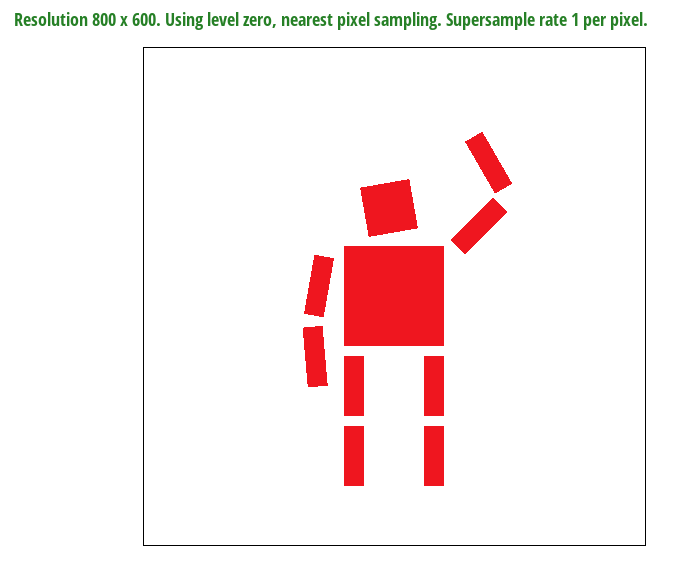
I made the robot wave with a slight head tilt, by adjusting the rotation and transforms of his arms and head. Say hello
to Bobot the Robot!
Section II: Sampling
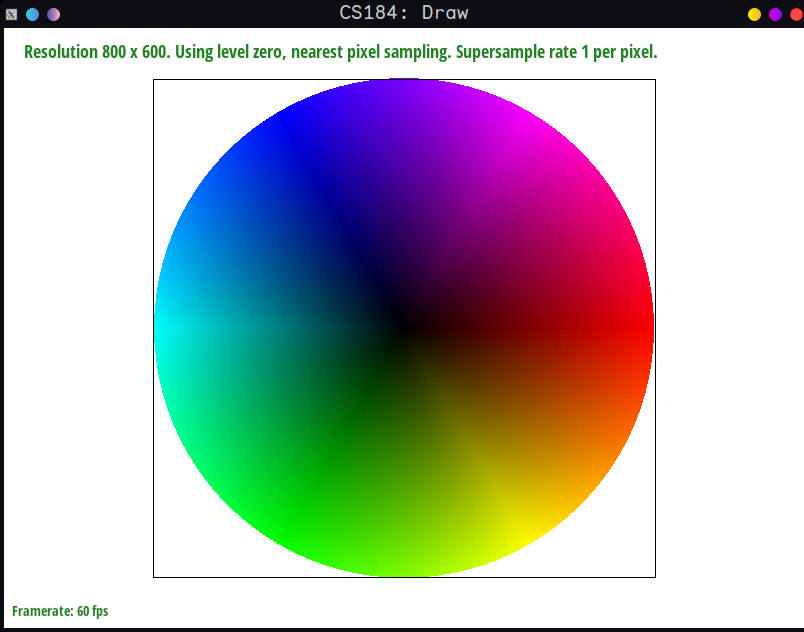
Part 4: Barycentric coordinates
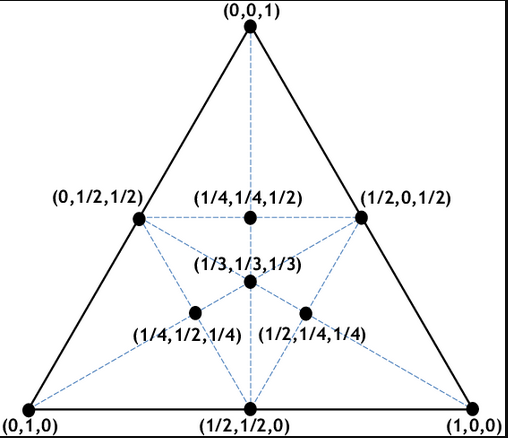
Barycentric coordinates are like if you take a triangle and point uv, and took the vector from each vertex
to the point uv then extended until it hit the side opposite the vertex, the normalized distance on a scale
of 0 to 1 from the point uv to the point where it hit the side opposite the vertex. For example, the centroid
in the image below is 1/3 for each because the distance from the centroid to each side is 1/3, where the
distance I'm referring to in terms of the line segments passing through the centroid from each vertex and
ending at the side of the triangle.
At a more basic level, it's sort of getting the interpolation value of 1 - the distance from each vertex. The farther it is from,
say, the vertex related to alpha, the lower the alpha value is going to be, on the range between 0 and 1.
In the image below, the right vertex is related to alpha, the left vertex to beta, the top vertex to gamma, for example.
Here is the color wheel:
Part 5: "Pixel sampling" for texture mapping
Briefly discuss the two different pixel sampling methods, nearest and bilinear.
Pixel sampling in the context of textures is essentially taking a position xy from the image space, finding the mapping to texture space as a uv coordinate, then getting the texture/color
from that uv coordinate and putting it at position xy. In other words, it's going from positions on a wrapped chocolate to the corresponding position on the flattened wrapper, getting the
color at that flattened wrapper position, then putting it on the wrapped chocolate.
I implemented this by building on part 4, using the barycentric coordinates to get a weighted sum of (uv0, uv1, uv2) dot (alpha, beta, gamma), which will be the uv coordinate I use to sample
from the texture. I then mapped the uv to an actual texel by multiplying the uv's x value by the texture's width - 1 (because of 0 indexing) and the y value by the
height - 1. I rounded these multiplied values because the texels are indexed by integers, and because we're trying to get the nearest texel. I lastly clamped the color rgb values between 0 and 1.
For bilinear, I retrieved the 4 nearest integer texels using floor and ceiling on the uv value, and calculated s and t as the distance in the x and y direction from the original uv values to the
floored uv values. I then lerped between the texel colors at the bottom left and bottom right, top left and top right using s, which was the lerp value for the x's, and then lerped between these
2 lerps using t, the lerp value in the y direction. I lastly clamped the rgb's to be between 0 and 1 and returned it.
Both nearest and bilinear sample texels similar to what we did in part 1, but nearest is kind of like having a sample_rate of 1, where bilinear is like having a sample_rate of 4.
Since we're lerping between colors with bilinear, it is more "accurate" than the sort of supersample averaging we did in part 2, since rather than
simply naively averaging between the 4 nearest texels, we take into account how close our original uv is to those texels when creating our
sampled texel color.
 Nearest, sample_rate = 1
|
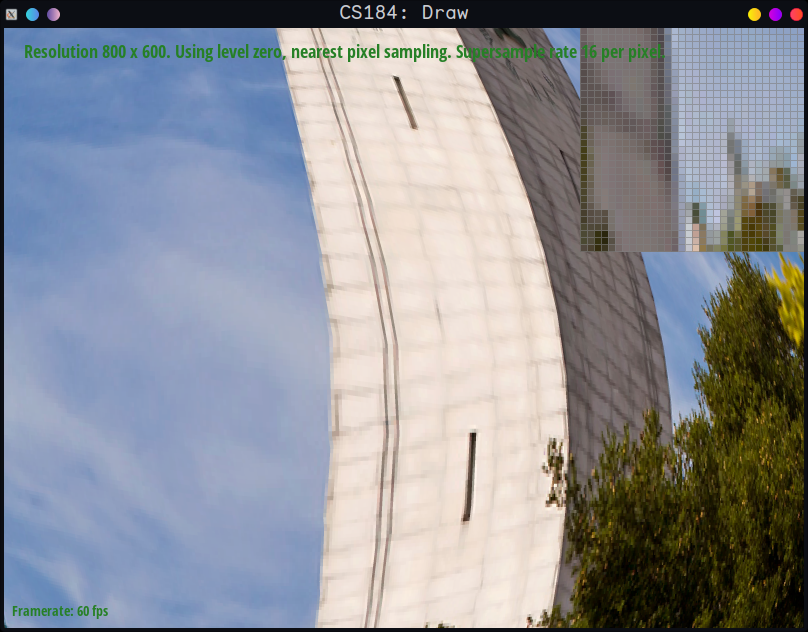 Nearest, sample_rate = 16
|
 Bilinear, sample_rate = 1
|
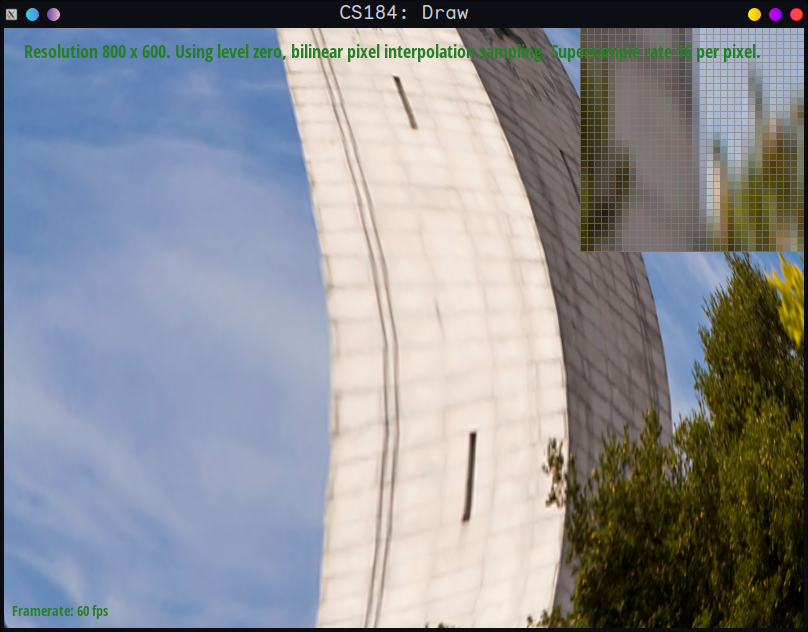 Bilinear, sample_rate = 16
|
In the sample_rate = 1 images, clearly nearest produces jaggies (especially noticeable if we zoom in). The bilinear, although perfect, looks as if we supersampled it (which we expect since
as described above bilinear is similar to supersampling with rate 4. This is the most obvious example of when there'll be a striking difference between the two - nearest is kind of like
supersampling with rate 1 in the texture space, and doesn't blend at all, whereas the bilinear algorithm blends between colors by definition.
However, with sample_rate = 16, we don't really see improvement in visual quality, and in fact we could argue that the bilinear looks worse there, since we could argue it has "overblur." This
is expected, since we are not only blending using bilinear, but also blurring it more with supersampling. It's always a tradeoff between getting rid of jagginess and having too much smoothness/blurriness
when deciding between the two.
Part 6: "Level sampling" with mipmaps for texture mapping
Level sampling is the method of choosing a mipmap level (eg: should you use 512x512, 256x256, 128x128, etc.) The higher the level,
the smaller the mipmap that's used; this is because when the distance between uvs relative to xy coordinates on the image is larger,
it's better to use lower resolution textures to reduce Moire and jaggies (it's also better performance wise since you sample from
a smaller texture). This is kind of similar to the supersampling idea, where the lower resolution sort of averages out details of higher
resolutions, resulting in smoother transitions, and thus less Moire and jaggies.
If we use lsm == L_ZERO, it's essentially just part 5, using the largest mipmap for everything, so we just pass in the appropriate uvs
and other parameters to an instance of SampleParams so that sample can appropriately use bilinear or nearest pixel sampling with the correct
uv.
Otherwise, we calculate the appropriate level using the change in distance in the uv space, with respect to the change in x and y
(from the image space) as described in the spec (these derivatives are calculated in rasterize_textured_triangle and get_level).
To calculate the appropriate level, we take the max of these two derivatives, and we also log it to get the effect of having a logarithmic
(increase in level gets smaller as our distance grows) instead of linear relationship (implemented in get_level). Lastly, we round it if we we're using nearest level,
or use the special method below:
For linear, since we can only use integer levels, we employ a trick for linearly interpolating between levels in case we want a smoother transition
between levels. We floor and ceiling the level and linearly interpolate between the resulting colors we get from sampling at the respective
floor and ceiling of the level. This way, we can "fake" a continuous level using only integer levels (since we can't have a continuous number
of mipmap levels).
Let D be our computed level. The way we linearly interpolate is we know b*floor(D) + a*ceil(D) = D for some b and a such that a + b = 1.
Solving this system of equations gives us b = (ceil(D) - D) / (ceil(D) - floor(D)) and then we just find a = 1 - b. These a and b are the
values we use to interpolate between our sampled colors at level ceil(D) and level floor(D) (these are implemented in Texture::sample)
For all of these techniques, we need to make sure the levels are between 0 and mipmap.size() - 1 because that's the only mipmaps we have stored.
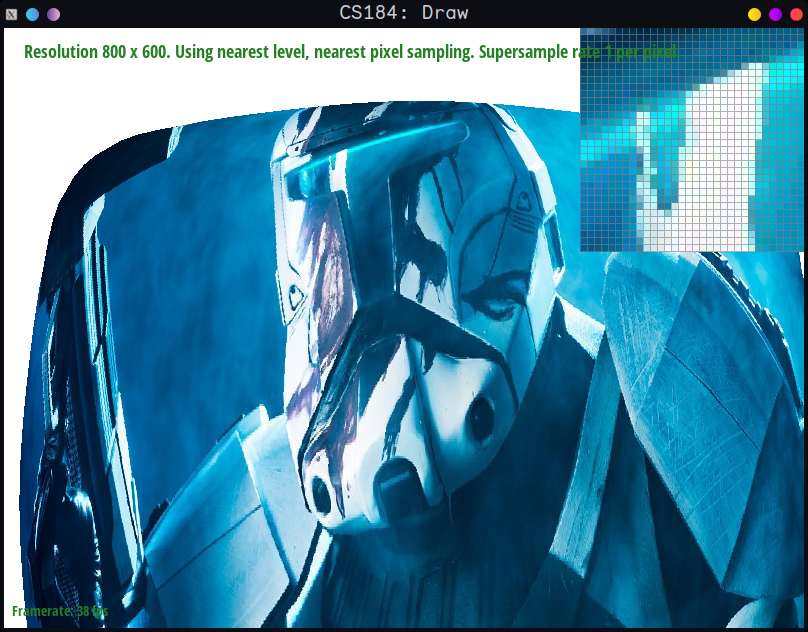
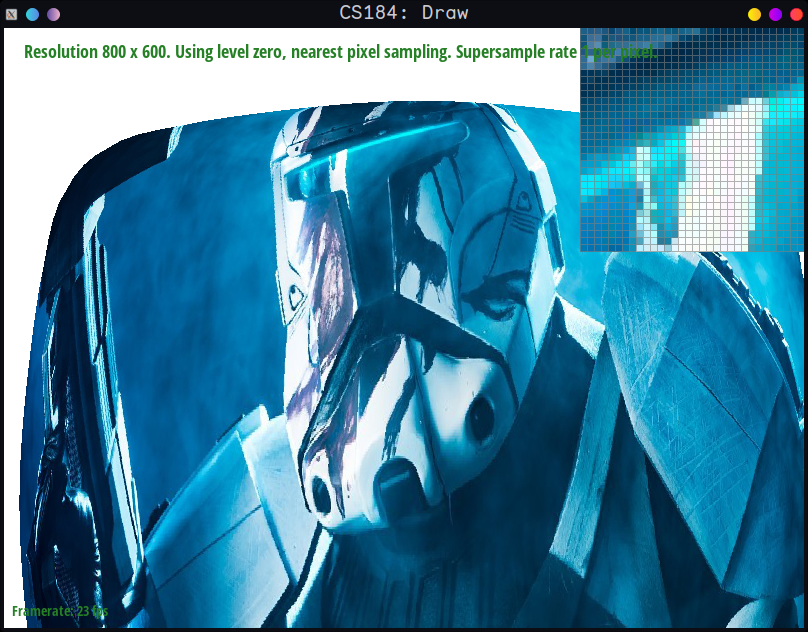 L_ZERO and P_NEAREST
|
 L_ZERO and P_LINEAR
|
 L_NEAREST and P_NEAREST
|
 L_NEAREST and P_LINEAR
|
Sidenote: this image is from the game Star Wars: Republic Commando :3
Mipmaps use at most an extra 33% of memory, assuming we halve the resolution at each subsequent mipmap level (sum of a geometric series), so
if you really needed the memory, you could avoid mipmaps, only using L_ZERO. Changing pixel sampling will not affect memory usage outside of
having to index more, so in terms of space used, the only change happens if we use L_NEAREST or L_LINEAR.
However, mipmaps in general are known to get better performance since in general sampling from smaller textures means the cache is less
flooded (and thus less prone to running into cache misses from frequent unloading and loading of large textures).
In terms of speed, ranked from slowest to fastest is L_ZERO, L_NEAREST, and L_LINEAR for level sampling, and P_NEAREST, P_LINEAR for pixel
sampling. Finding the level for L_ZERO runs in constant time, since you just return 0 for the level then do your sampling, but again if you're
using a lot of textures that use up a lot of memory you could run into cache misses and other memory related performance issues.
L_NEAREST is a nice middle ground between L_ZERO and L_LINEAR in that it does require the same calculation as L_LINEAR to find the level, which is
two square roots, raising to power, etc. but won't need to do two samples to interpolate between. L_LINEAR takes the most time since
we're doing double the sampling, with a few extra calculations for interpolating and finding the floor and ceiling, though most of the extra
work is from doing two samples rather than one.
As for P_LINEAR vs P_NEAREST, P_NEAREST is obviously faster because you just have to retrieve one texel rather than four (P_LINEAR may have
more cache misses, and it's doing 4 lookups vs 1 for P_NEAREST) as well as the fact that it only rounds two values rather than doing 8 floors/ceilings
and 3 lerps.
Combining P_LINEAR and L_LINEAR is the most expensive, as it requires two calls to sample_bilinear which means 6 lerps from those calls,
then another lerp for lerping between the two sampled colors (7 total). It also requires 8 texel reads (4 each from each sample_bilinear)
in comparison to L_NEAREST and P_LINEAR (1 sample_bilinear -> 3 lerps, 4 texel reads), which is half the amount roughly
or L_LINEAR and P_NEAREST (2 sample_nearest, 1 lerp, 2 texel reads), which is a quarter roughly. If you really need the extra aliasing,
I guess go for it, but otherwise maybe it'd be better to steer away from trilinear filtering (as a gamer, I know I did).
For antialiasing, as I've said earlier, L_NEAREST and P_NEAREST are kind of like supersampling with rate 1, so they don't really antialias very well
(evident in L_ZERO and P_NEAREST and L_NEAREST and P_NEAREST). L_ZERO by itself is also not going to antialias, but bringing in P_LINEAR is, as discussed in part 5, going to
help antialias since it's similar to supersampling from the texture with rate 4. We see there's not much difference between (L_ZERO and P_LINEAR)
and (L_NEAREST and P_LINEAR) because again, L_NEAREST doesn't really antialias.
In general, P_LINEAR and L_LINEAR are going to see the most antialiasing, since they both involve blurring/blending pixels/texels.
Section III: Art Competition
If you are not participating in the optional art competition, don't worry about this section!
Part 7: Draw something interesting!