To rasterize my triangles I looped through all points of the screen and checked if it was within the triangle. To do this, I treated the edges as lines and checked if the point was “inside” of each of the lines. The algorithm works well because it looks good (?).
Instead of calculating l0, l1, and l2 for every point it is calculated at the beginning. Then, they are added and subtracted at each point which is much more efficient. This ends up being roughly twice as fast as my unoptimized version.
My super sampling algorithm changes sample_buffer to instead be width * height * sample_rate large. It also changes dxi and dyi by dividing by sqrt(sample_rate). When I then read the sample buffer to the frame buffer I look at the box of pixels of size sqrt(sample_rate)xsqrt(sample_rate). Supersampling is useful because it removes jaggies and moire, making our renders look crisper and less compressed. Supersampling antialiased my triangles because it isn’t binary. So if a pixel is 75% covered by the triangle it’ll be 75% colored instead of 100% or 0%.
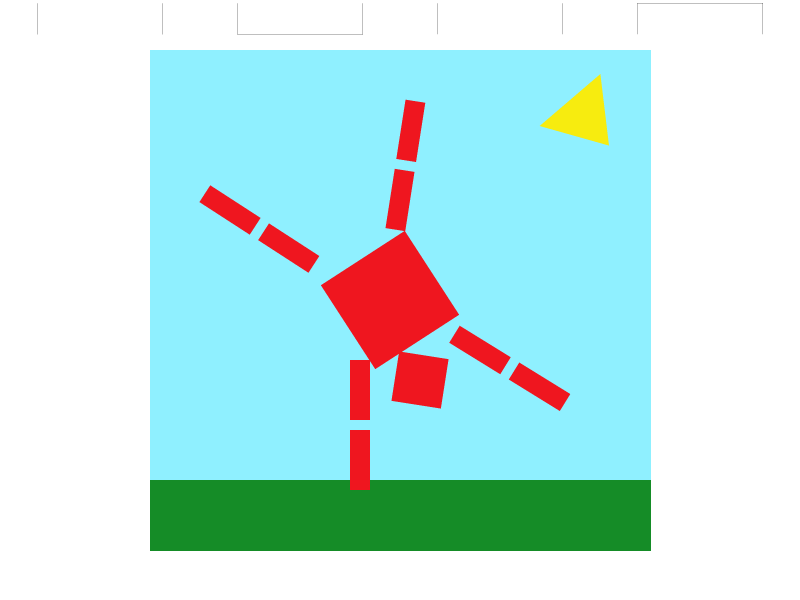
I wanted to make the cube man do a one-handed handstand. He’s on a very well maintained green lawn, in front of a beautiful cloudless sky.
Barycentric coordinates are essentially the normalized distance to each vertex of the triangle. The sums will always equal 1, and the closer you are to a vertex, the larger its influence is. That means we get a continuous color at every point inside the triangle, relative to each vertex.

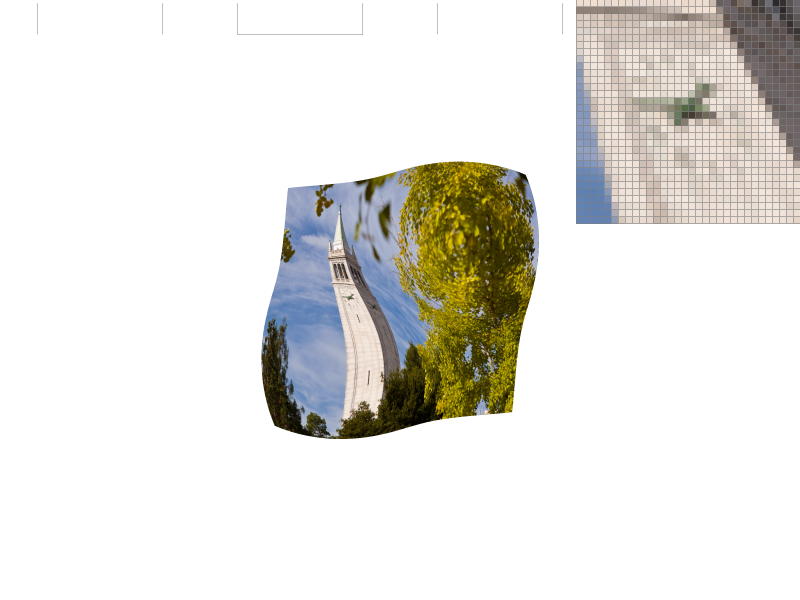
Pixel sampling is a way of rendering image textures onto the canvas. I implemented it two different ways. For nearest, I would get the closest texel to the coordinates normalized based on the triangle’s new coordinates. For bilinear, I would take the closest 4 pixels to the transformed pixel and normalize them based on distance.
The bilinear ones are slightly smoother. The biggest difference still comes from supersampling though. The difference between bilinear and nearest will be most prevalent when given a very small texture image.
Level sampling is the act of sampling different resolution images to help with antialiasing and blurring in 3D. I implemented it by using the derivatives of the transform and through that deciding which mipmap level to sample from. Then I used pixel sampling to get the pixel color. I also added trilinear interpolation which helps with blending between level transitions by interpolating between them.
Pixel sampling doesn’t use any added memory, but it can slow down speed if using bilinear interpolation as it needs to get 4 different values from the texture. Its antialiasing power is clearly visible, and pretty good, though it’s not perfect. Level sampling uses a lot more memory, as you need to store all the different levels in memory. Its speed isn’t terrible, though to interpolate between two different levels it takes twice as long. It helps quite a bit with antialiasing in 3D, as different distances will be able to act more independently and you don’t need to fit it to just one size. Supersampling does wonders for antialiasing. However it takes exponentially more memory and speed to calculate.


