In this task, we have to implement pixel sampling using two methods:
nearest neighbor or bilinear interpolation.
Pixel sampling is when you apply a texture into screen space. You
take a pixel and its corresponding color from the texture and map it
to the pixel in screen space. This requires the color information,
ie where it is located in texture space, from the texture to
determine the final color of a pixel. To do this, I had to find the
barycentric coordinates (alpha, beta, and gamma) of the sample
point. After this, I have to convert to the sample point to texture
space by using these alpha, beta, and gamma values. Once the sample
point is converted to texture space which is represented by (u, v)
coordinates, we then apply texture sampling using either nearest
neighbor or billinear interpolation method.
In nearest neighbor sampling, we simply take the closest (u, v)
coordinate and sample the texture at that point. On the other hand,
in bilinear interpolation, we get the four closest (u, v)
coordinates and then do a weighted average (through linear
interpolation) and then sample.
The following functions were implemented for pixel sampling:
-
`rasterize_textured_triangle`
This function is very similar to the other rasterize triangle
functions except it converts to (u, v) coordinates. These
coordinates are passed onto the `sample` function.
-
`sample`
This function returns the color for the pixel from the texture
based on the pixel sampling method.
-
`sample_nearest`
This function takes the nearest texture coordinates and returns
the color. This is done by taking the (u, v) coordinates to
match the width and height of the mipmap level, which is always
0, for pixel sampling.
-
`sample_bilinear`
This function takes the nearest four texture coordinates and
returns the interpolated color. We also have to scale the (u, v)
coordinates to match the width and height of the mipmap level.
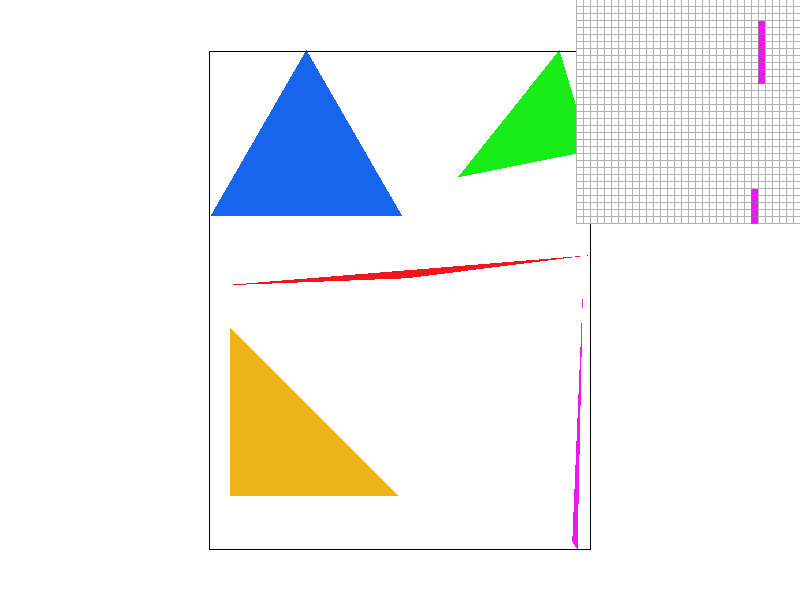
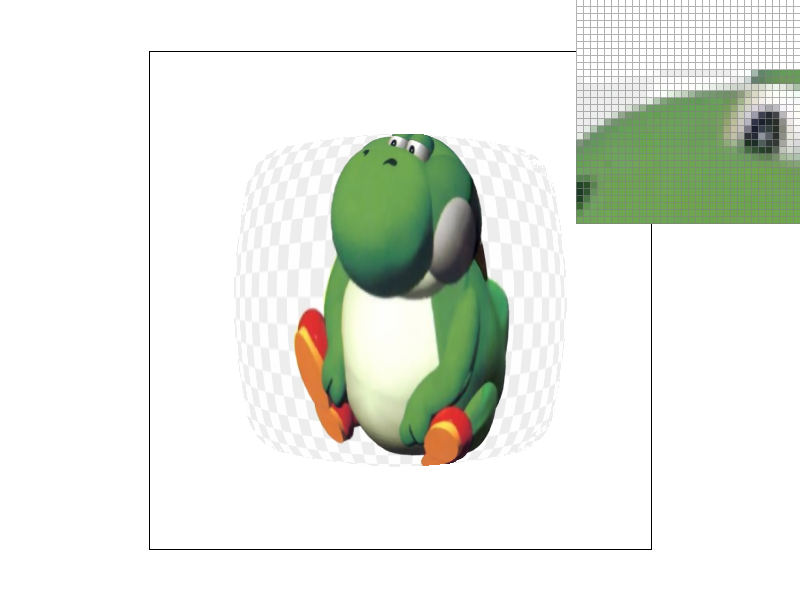
 Nearest sampling at supersample rate = 1
|
 Nearest sampling at supersample rate = 16
|
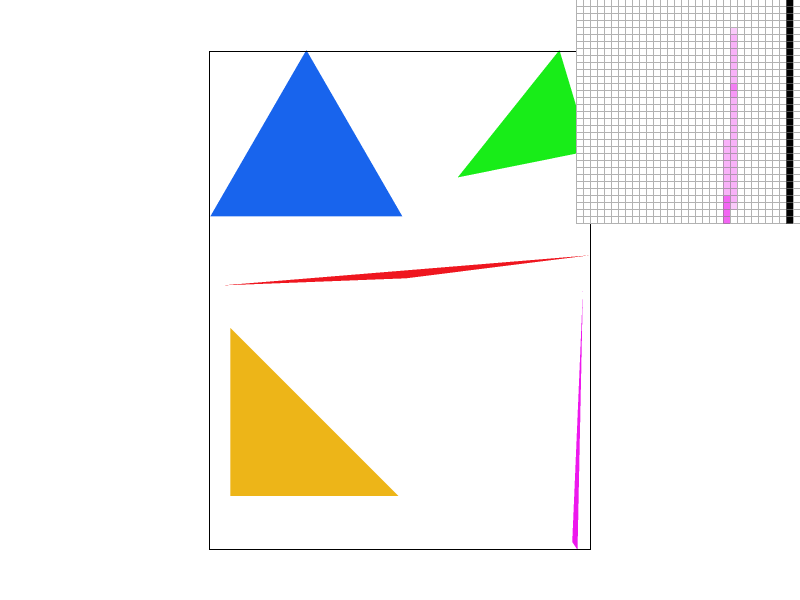
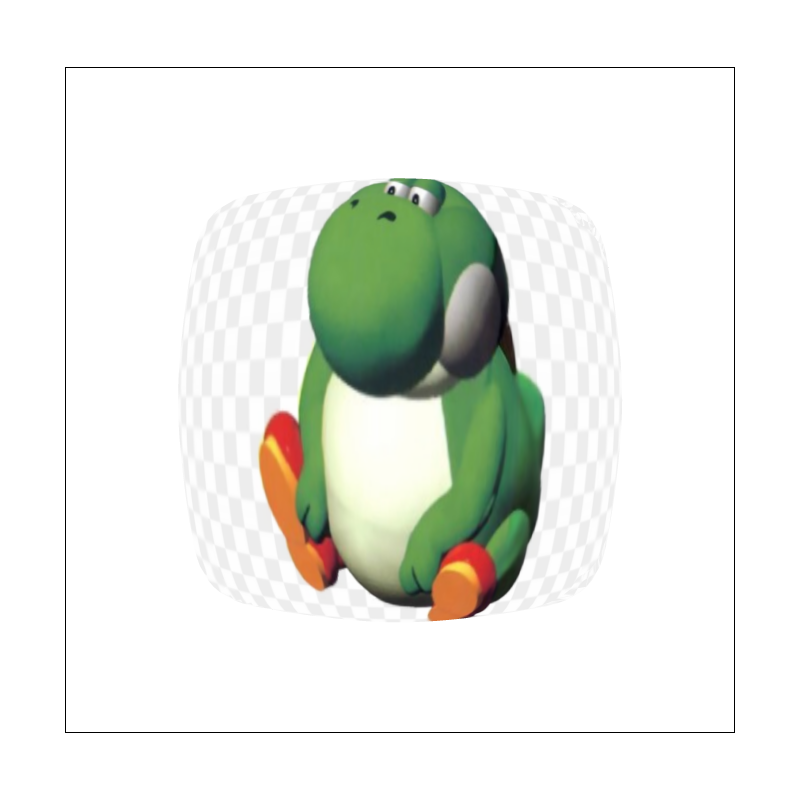
 Bilinear interpolation at sample rate = 1
|
 Bilinear interpolation at sample rate = 16
|
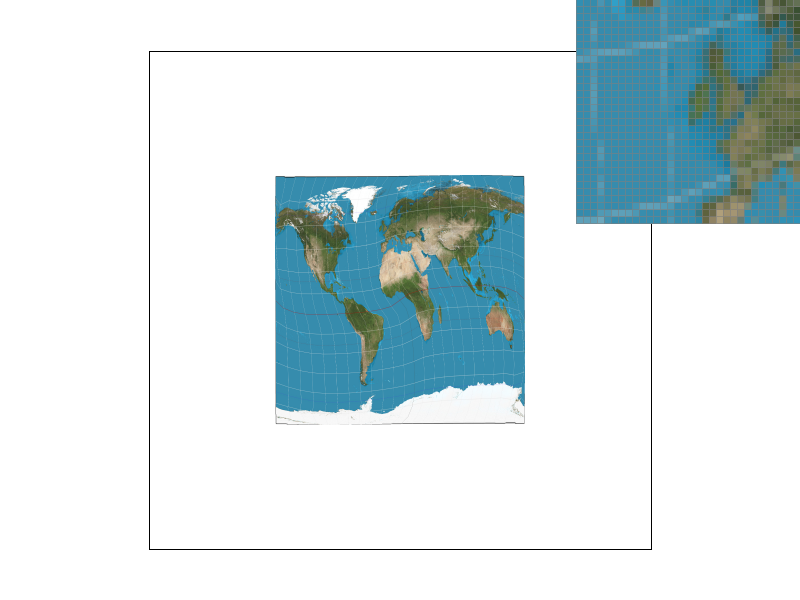
Between nearest sampling at supersample rate 1 and bilinear
interpolation at supersample rate 1, we see that the latitude lines
(horizontal white lines) are a bit more blurry or better antialiased
for bilinear interpolation.
Then, for the methods with supersampling rate 16, the differences
are much harder to tell because supersampling already antialiases;
however, bilinear interpolation is still better. For example, if you
look at some of the longitude lines closely, it is a bit more
blurry.
With these observations, there will be large differences when the
supersample rate is at 1, or when there is no supersampling. Nearest
sampling tends to produce blocky, pixelated, and sometimes jagged
edges since it only takes the nearest texel and not consider other
adjacent texels like bilinear interpolation does. This is especially
noticeable when we zoom in with the pixel inspector at pixels where
we move from high frequencies to low frequencies.
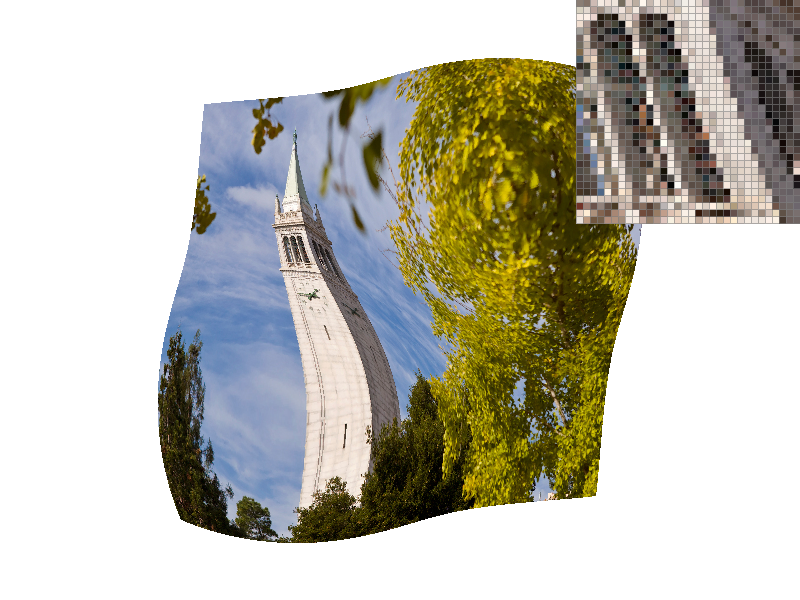 Nearest sampling at supersample rate = 1 of Campanile
|
 Bilinear interpolation at supersample rate = 1 of Campanile
|
Looking at the pixel inspectors, we can see how bilinear
interpolation is much better when going from high frequencies to
low frequencies. In this case, from the black pixels to the
brownish/lighter pixels.